Buseoksa Temple – 부석사 (Yeongju, Gyeongsangbuk-do)
Temple History
Buseoksa Temple, which means “Floating Rock Temple” in English, is located in Yeongju, Gyeongsangbuk-do. It’s also one of Korea’s most famous temples. Buseoksa Temple is home to five National Treasures and five additional Korean Treasures. As for the temple itself, Buseoksa Temple was first established by the famed monk, Uisang-daesa (625-702 A.D.), under the royal decree of King Munmu of Silla (r. 661-681 A.D.), in 676 A.D. There were a few reasons for the Silla Kingdom’s royal support in establishing Buseoksa Temple. The first is that it would help promote the ideas behind Hwaeom (Huayan) Buddhism throughout the Korean peninsula, and Buseoksa Temple would also act as the base to help spread the message of Hwaeom Buddhism.
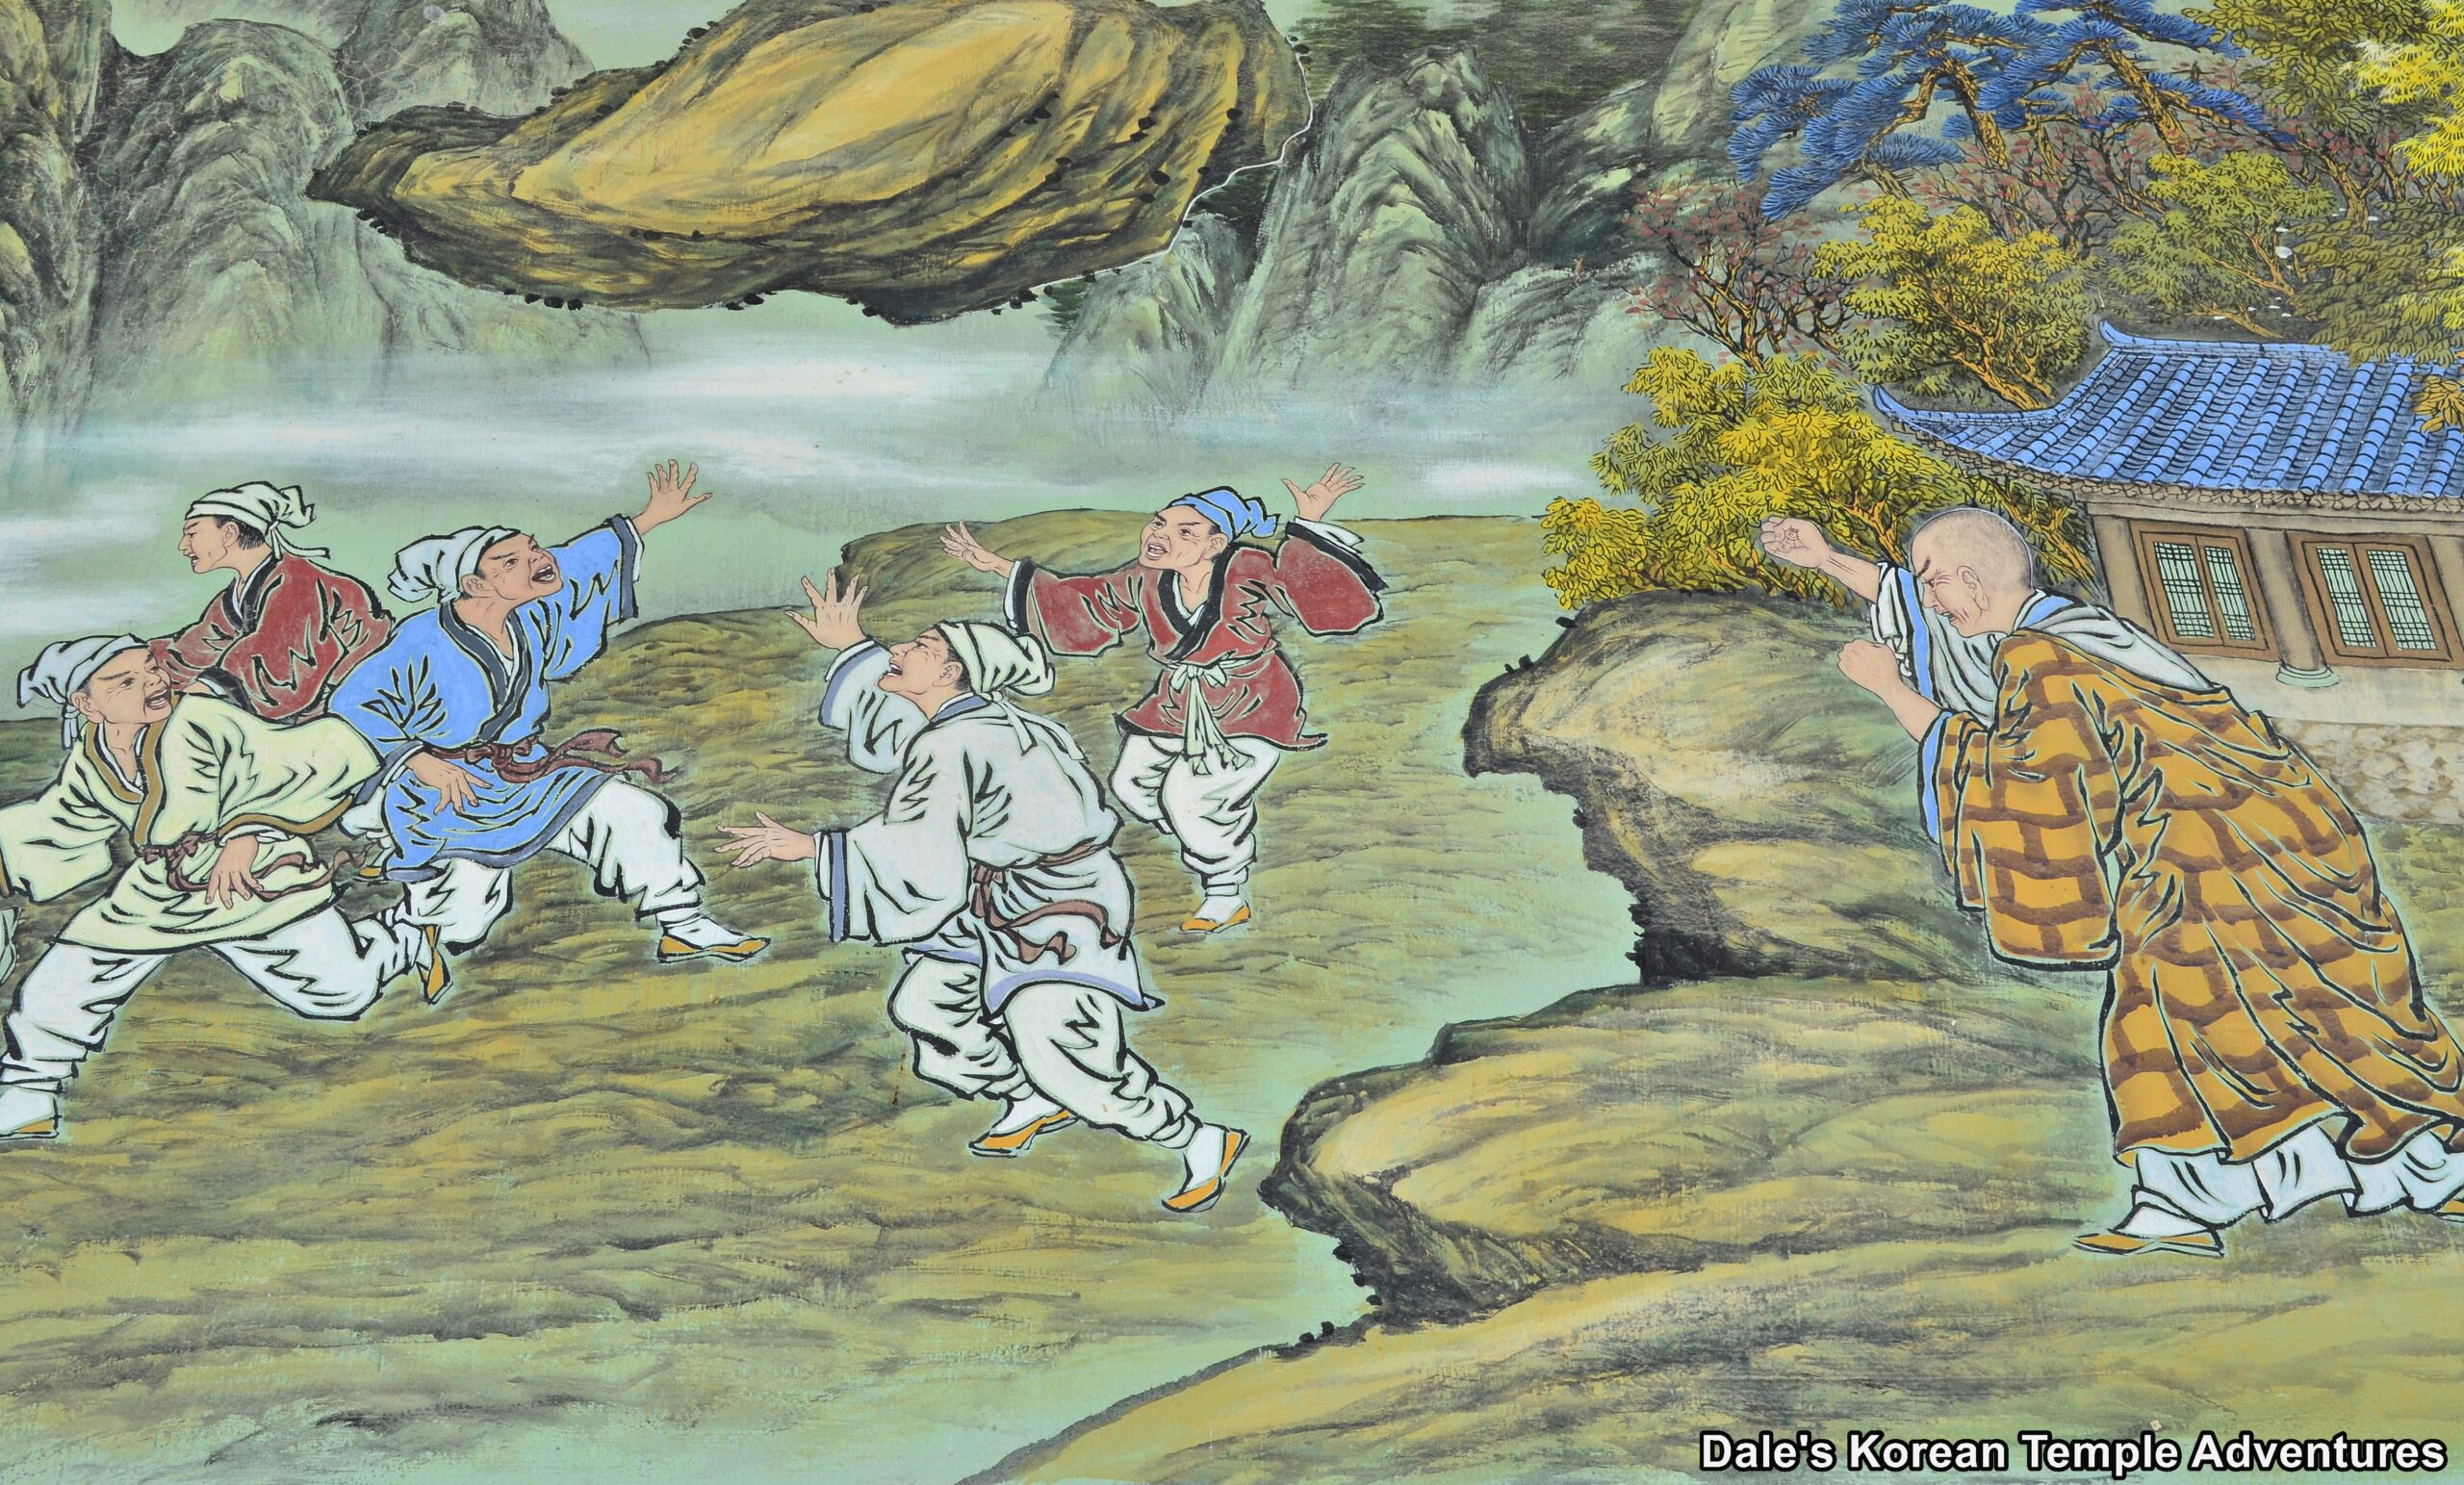
Interestingly, after Uisang-daesa found the site to build Buseoksa Temple, about five hundred non-believers attempted to prevent the famed monk from building the new temple. During the establishment of Buseoksa Temple, the political climate was extremely unstable and tenuous after the unification of the Korean peninsula by the Silla Kingdom after defeating the Baekje (18 B.C. – 660 A.D.) and Goguryeo (37 B.C. – 668 A.D.) Kingdoms. In fact, Buseoksa Temple was built near a strategic pass, which was the boundary between the Goguryeo and Silla Kingdoms. So with the building of Buseoksa Temple, The Silla Kingdom (57 B.C. – 935 A.D.) possessed a significant position on the peninsula that would allow for greater administration and management. And with Hwaeom Buddhism’s focus on the principles of unity and harmony, it was hoped that Buseoksa Temple, in part, would help quell some of the social unrest at this time in Korean history.
When Buseoksa Temple was first built, Uisang-daesa held assemblies at the temple for forty days and gave talks on the Flower Garland Sutra, or the “Hwaeom Gyeong – 화엄경” in Korean. Uisang-daesa preached and taught Hwaeom Buddhism from thatched houses and grottos around the Taebaek and Sobaek mountain ranges. This allowed him to spread Hwaeom Buddhism throughout the region. In total, Uisang-daesa would have three thousand disciples who were taught directly from Buseoksa Temple.
The current configuration of the temple, which includes the huge stone stairs, was most likely completed after Uisang-daesa’s lifetime. The most reliable evidence points to the time of King Gyeongmun of Silla’s reign from 861 – 875 A.D. And once again, it was completed with significant Silla state support.
During the Goryeo Dynasty (918-1392), Buseoksa Temple was known as either Seondalsa Temple (a variation of Buseoksa) or Heunggyosa Temple (a reference to the revival of the Hwaeom Sect). Then, under the supervision of the monk Wonyung (964-1053), Buseoksa Temple reached it artistic and architectural zenith. An imprinting of the Tripitaka Koreana printing blocks took place at this time. And the partial remains of these imprinting blocks remain to this day. Also, Buseoksa Temple at this time underwent significant expansion.
In fact, records state that the Muryangsu-jeon Hall and the Josa-dang Hall were reconstructed around 1377. Furthermore, while it’s probable that the Josa-dang Hall was repaired in 1377, it’s unlikely that the Muryangsu-jeon Hall was based on its architectural style. Instead, it’s more likely that the Muryangsu-jeon Hall was rebuilt about one hundred and fifty years earlier, which makes it an early 13th century building rather than a late 14th century structure. It would seem that the records confused reconstruction with repair.
The repair and reconstruction of Buseoksa Temple continued during the Joseon Dynasty (1392-1910). This included the large rebuilding and reconstruction conducted by Samyeong-daesa (1544-1610) in 1580. As well as the restoration of several shrine halls in 1748 after a destructive fire in 1746.
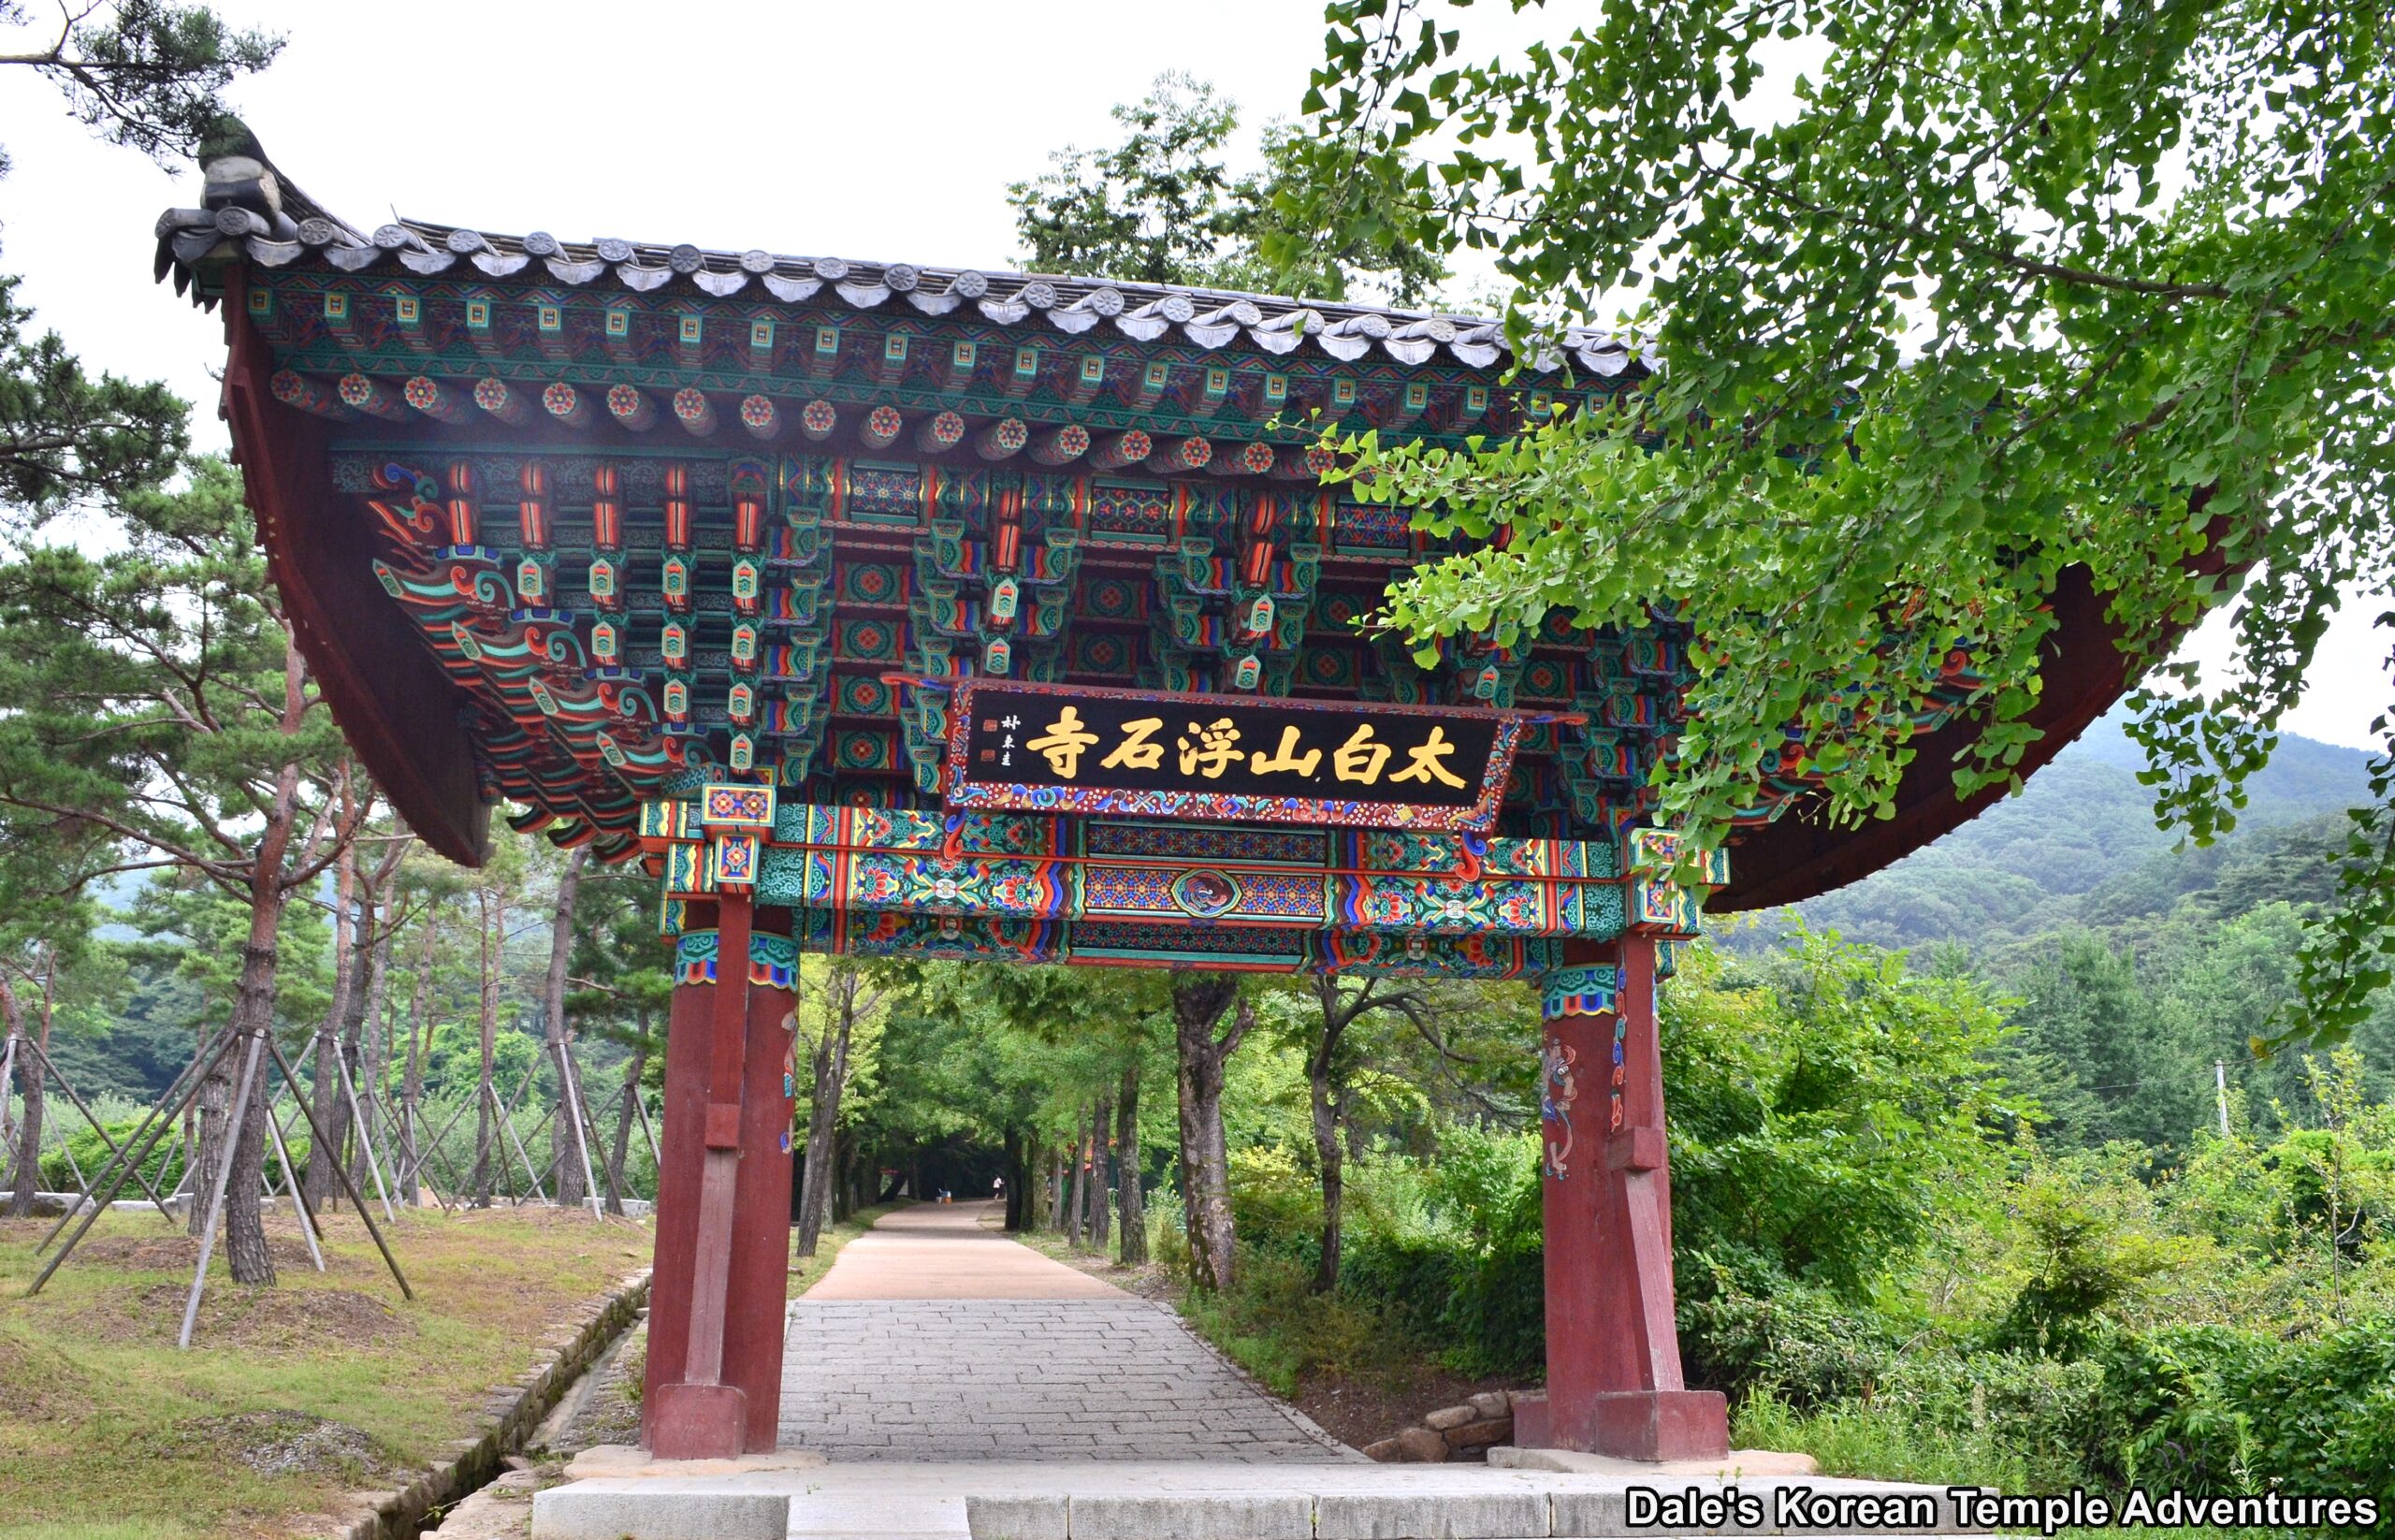
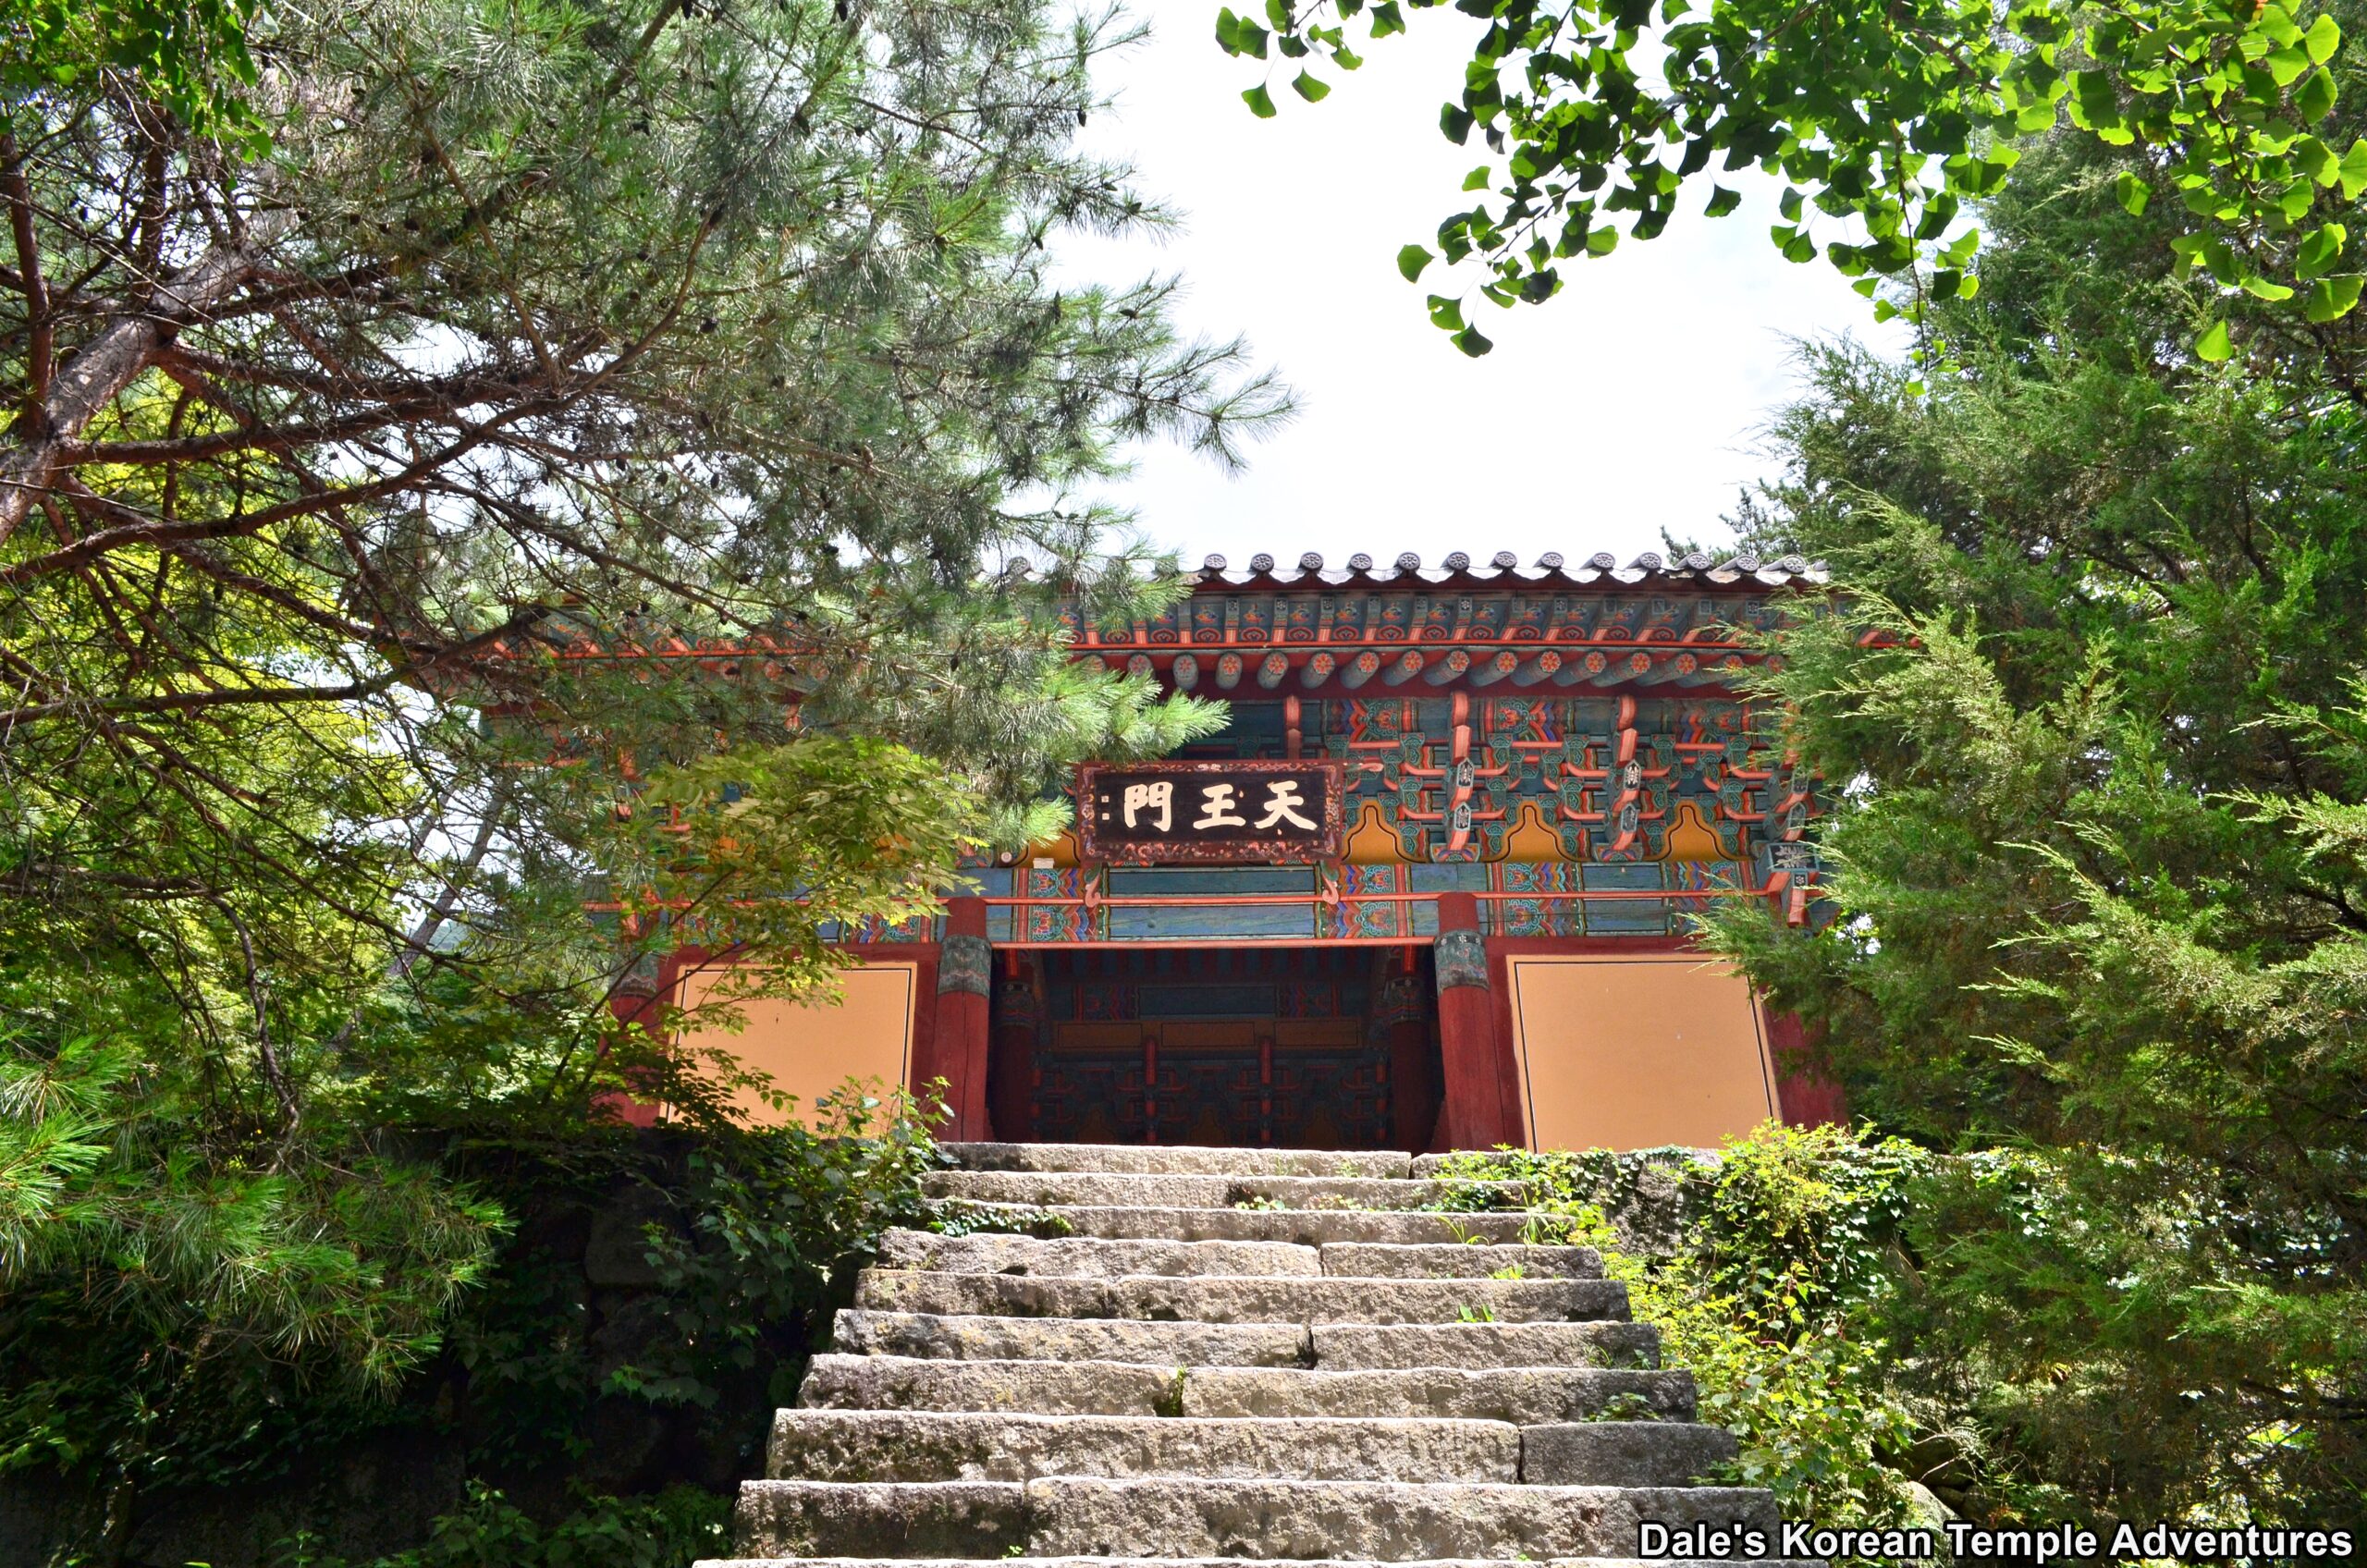
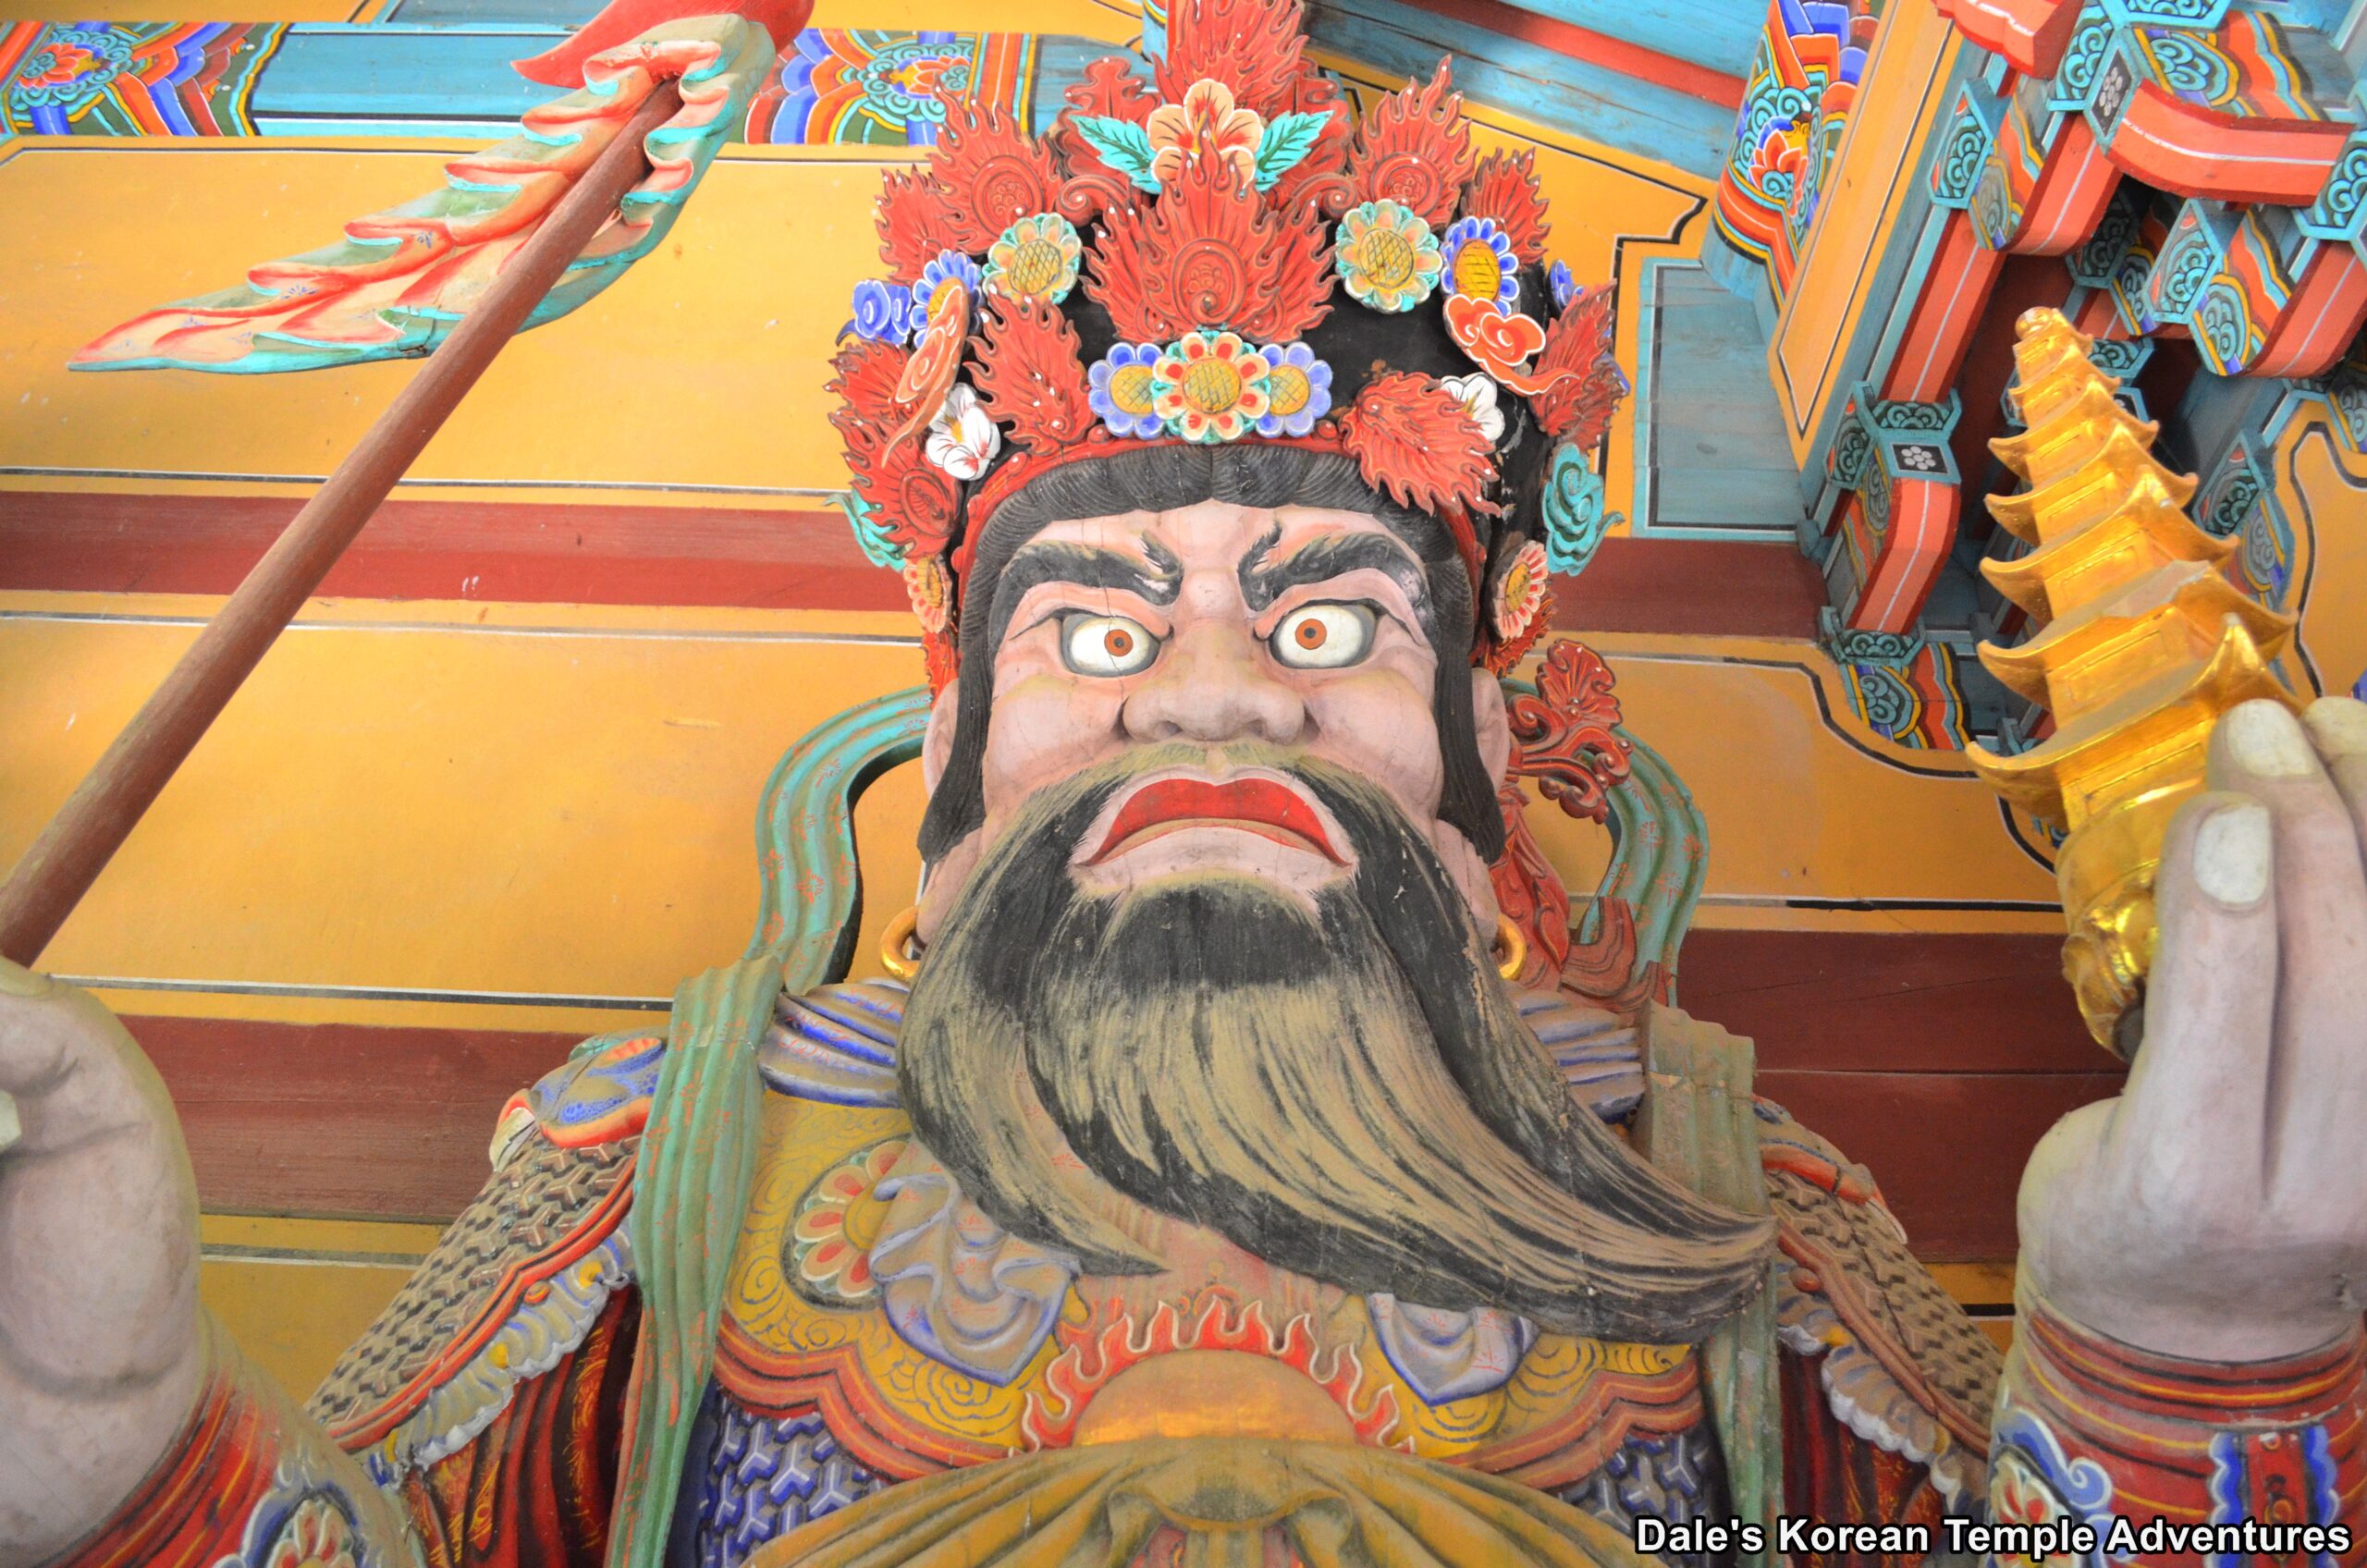
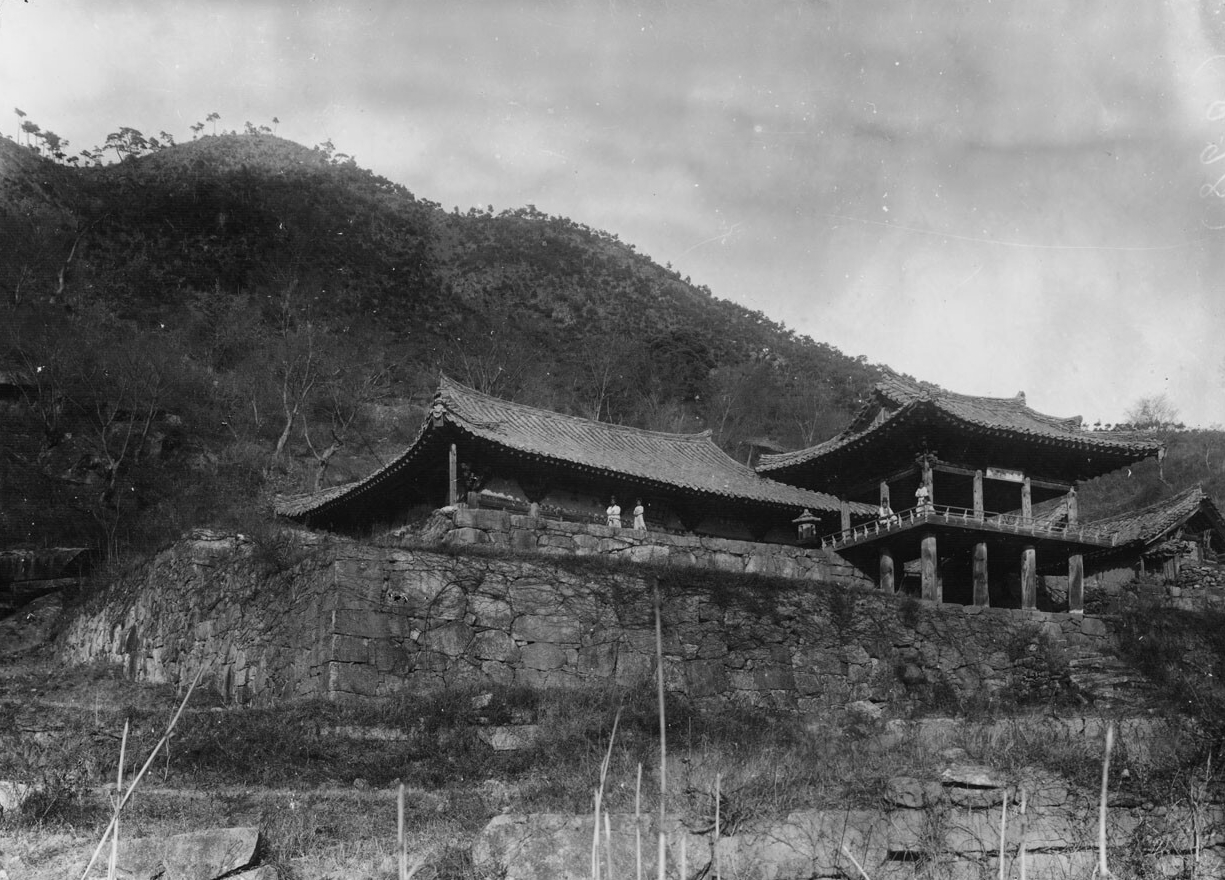
During the Japanese Colonization of Korea from 1910-1945, both the Muryangsu-jeon Hall and the Josa-dang Hall were disassembled and reassembled in 1916. And after Korean independence, these two structures underwent further repair in 1967. And remnants of twin pagodas at the old temple site were used to build a pair of pagodas to the left and right of the Beomjong-gak Pavilion. Also, the Jain-dang Hall was built at this time up near the Josa-dang Hall; and both the Iljumun Gate and the Cheonwangmun Gate started to be built in 1977 and completed in 1980.
Temple Myth
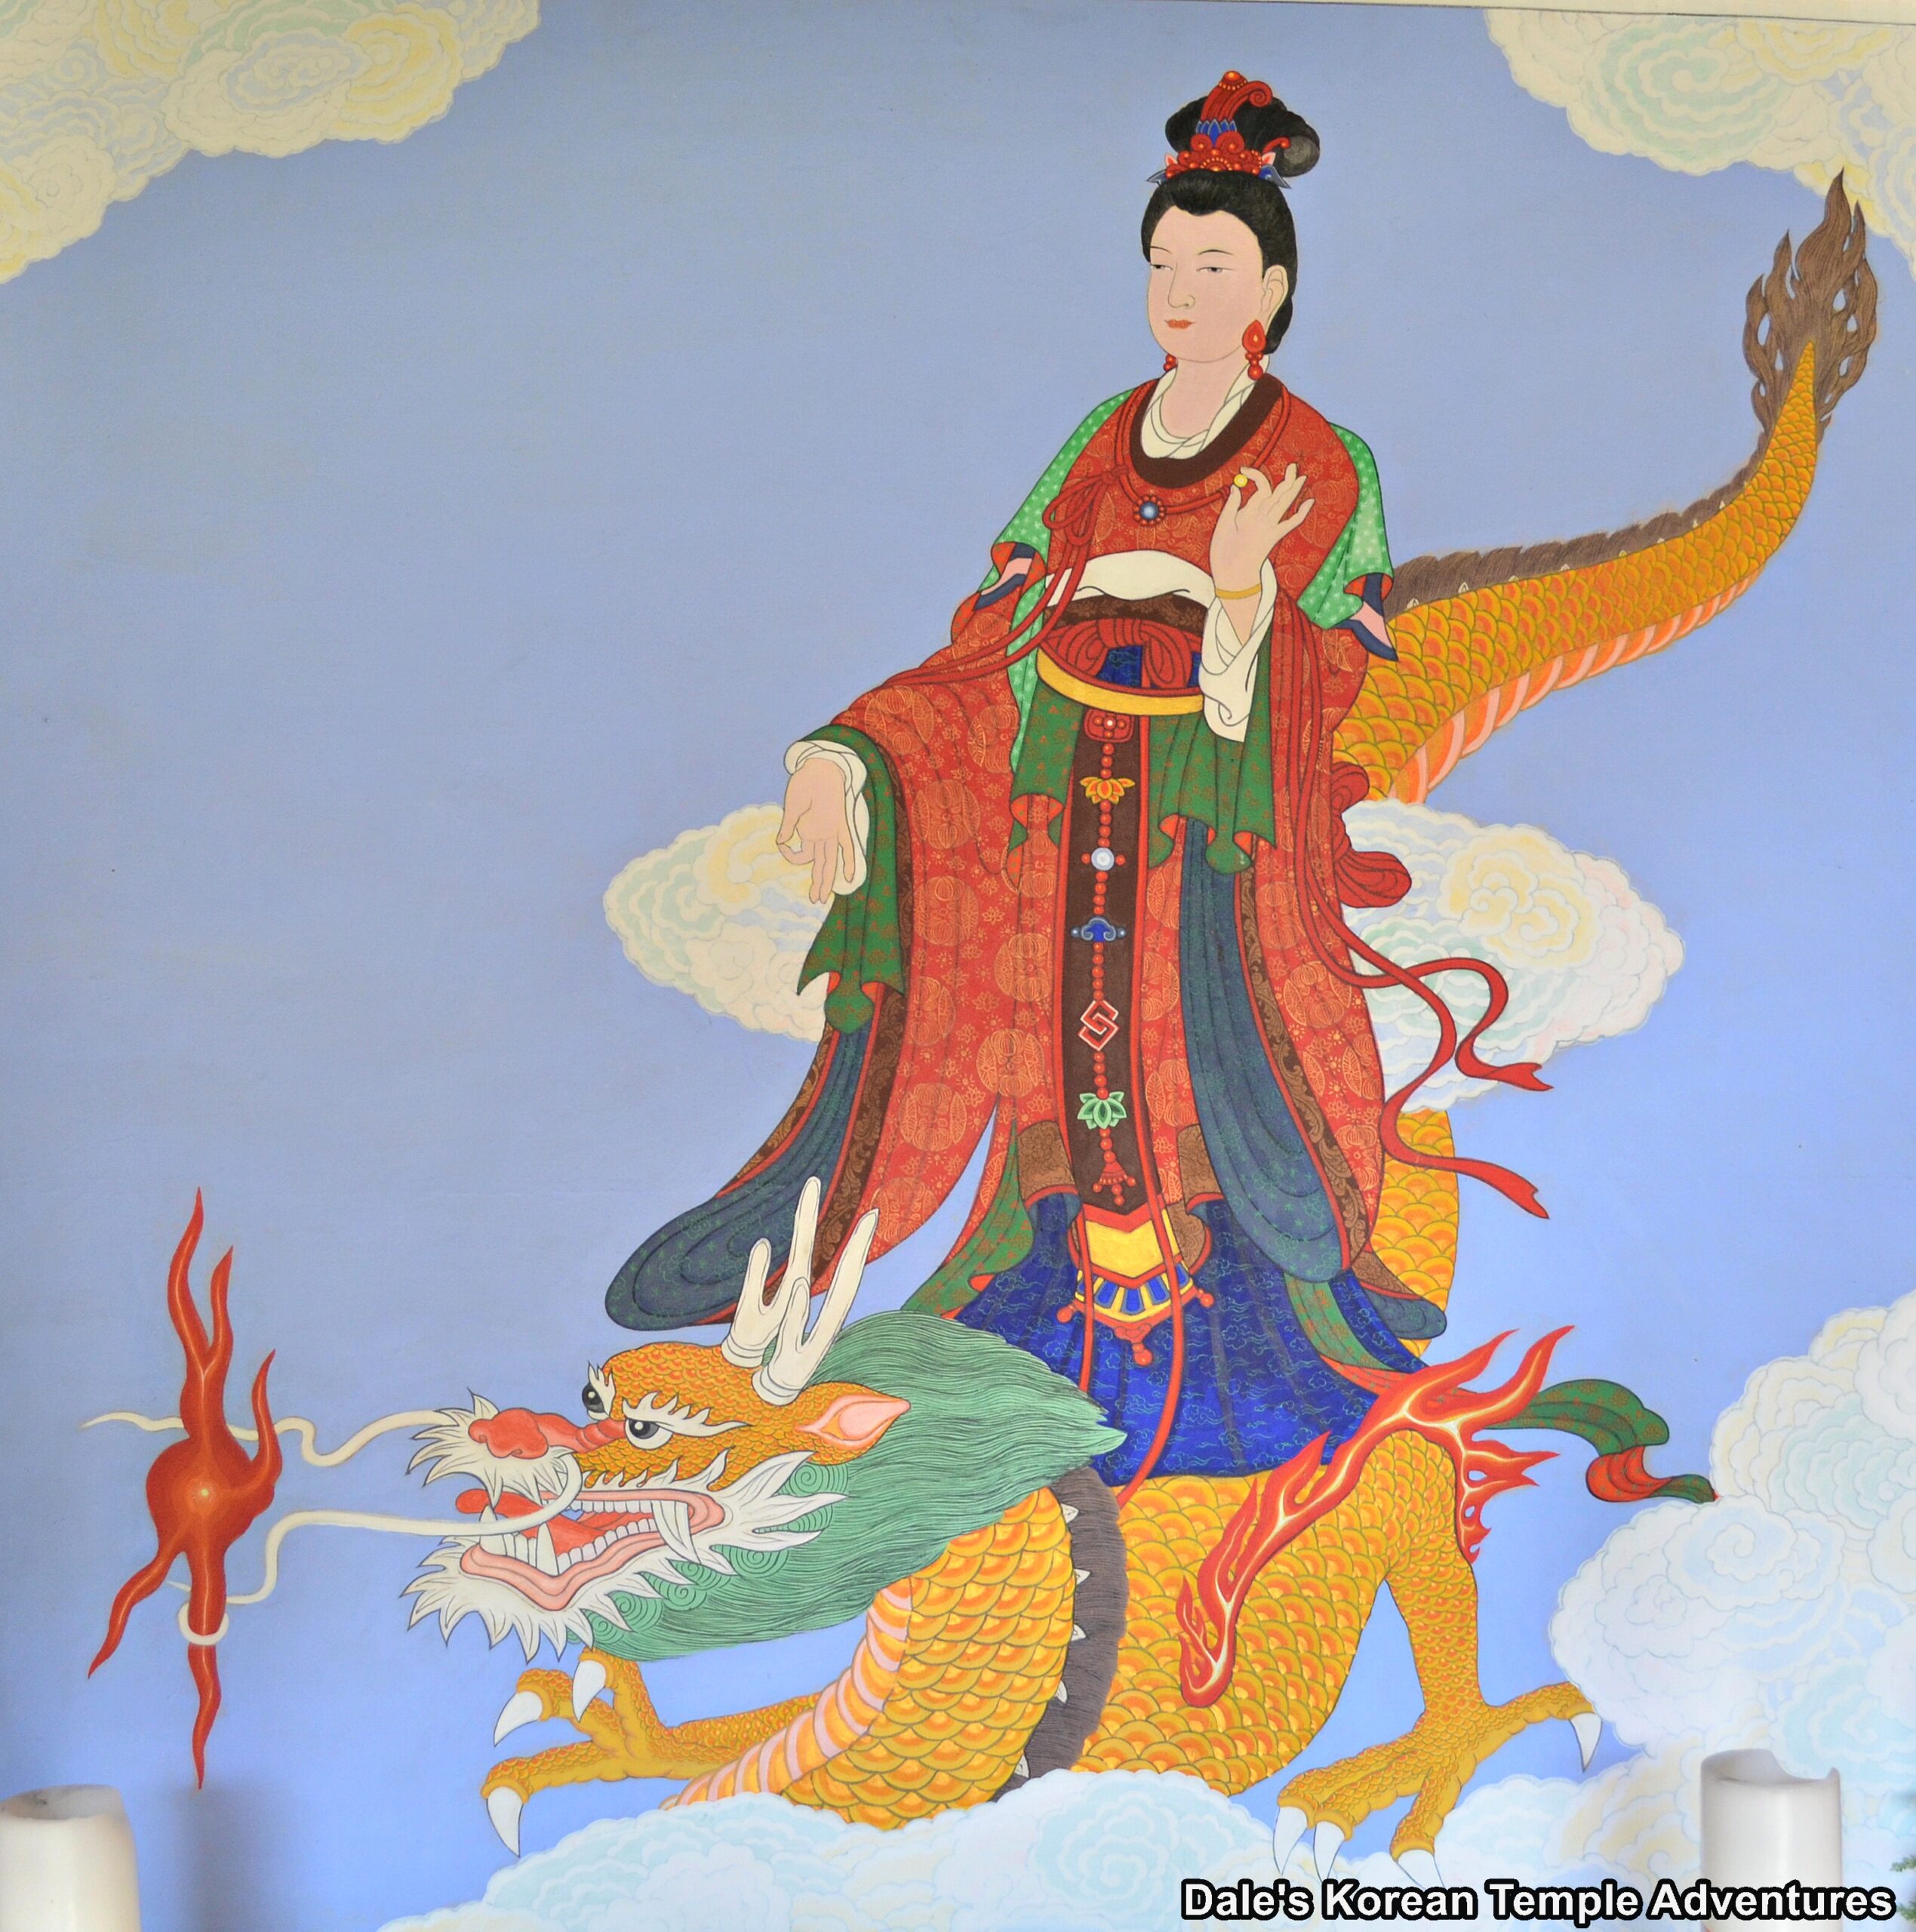
There’s a famous story about Uisang-daesa’s return to Tang China (618-907 A.D.) that was written in the Samguk Yusa (Memorabilia of the Three Kingdoms). In this story, Uisang-daesa met a Chinese woman named Lady Seonmyo. Uisang-daesa met her while he was in China studying. Uisang-daesa told Lady Seonmyo that he was going to return to the Korean peninsula. Uisang-daesa left Tang China unexpectedly because he had overheard that the Tang Chinese were going to attack the Silla Kingdom (his home). Upon his return, Uisang-daesa immediately told the king. Realizing that his boat had already left, and without saying good-bye, Lady Seonmyo became distraught and jumped into the sea and drowned herself. After her death, Lady Seonmyo became a dragon.
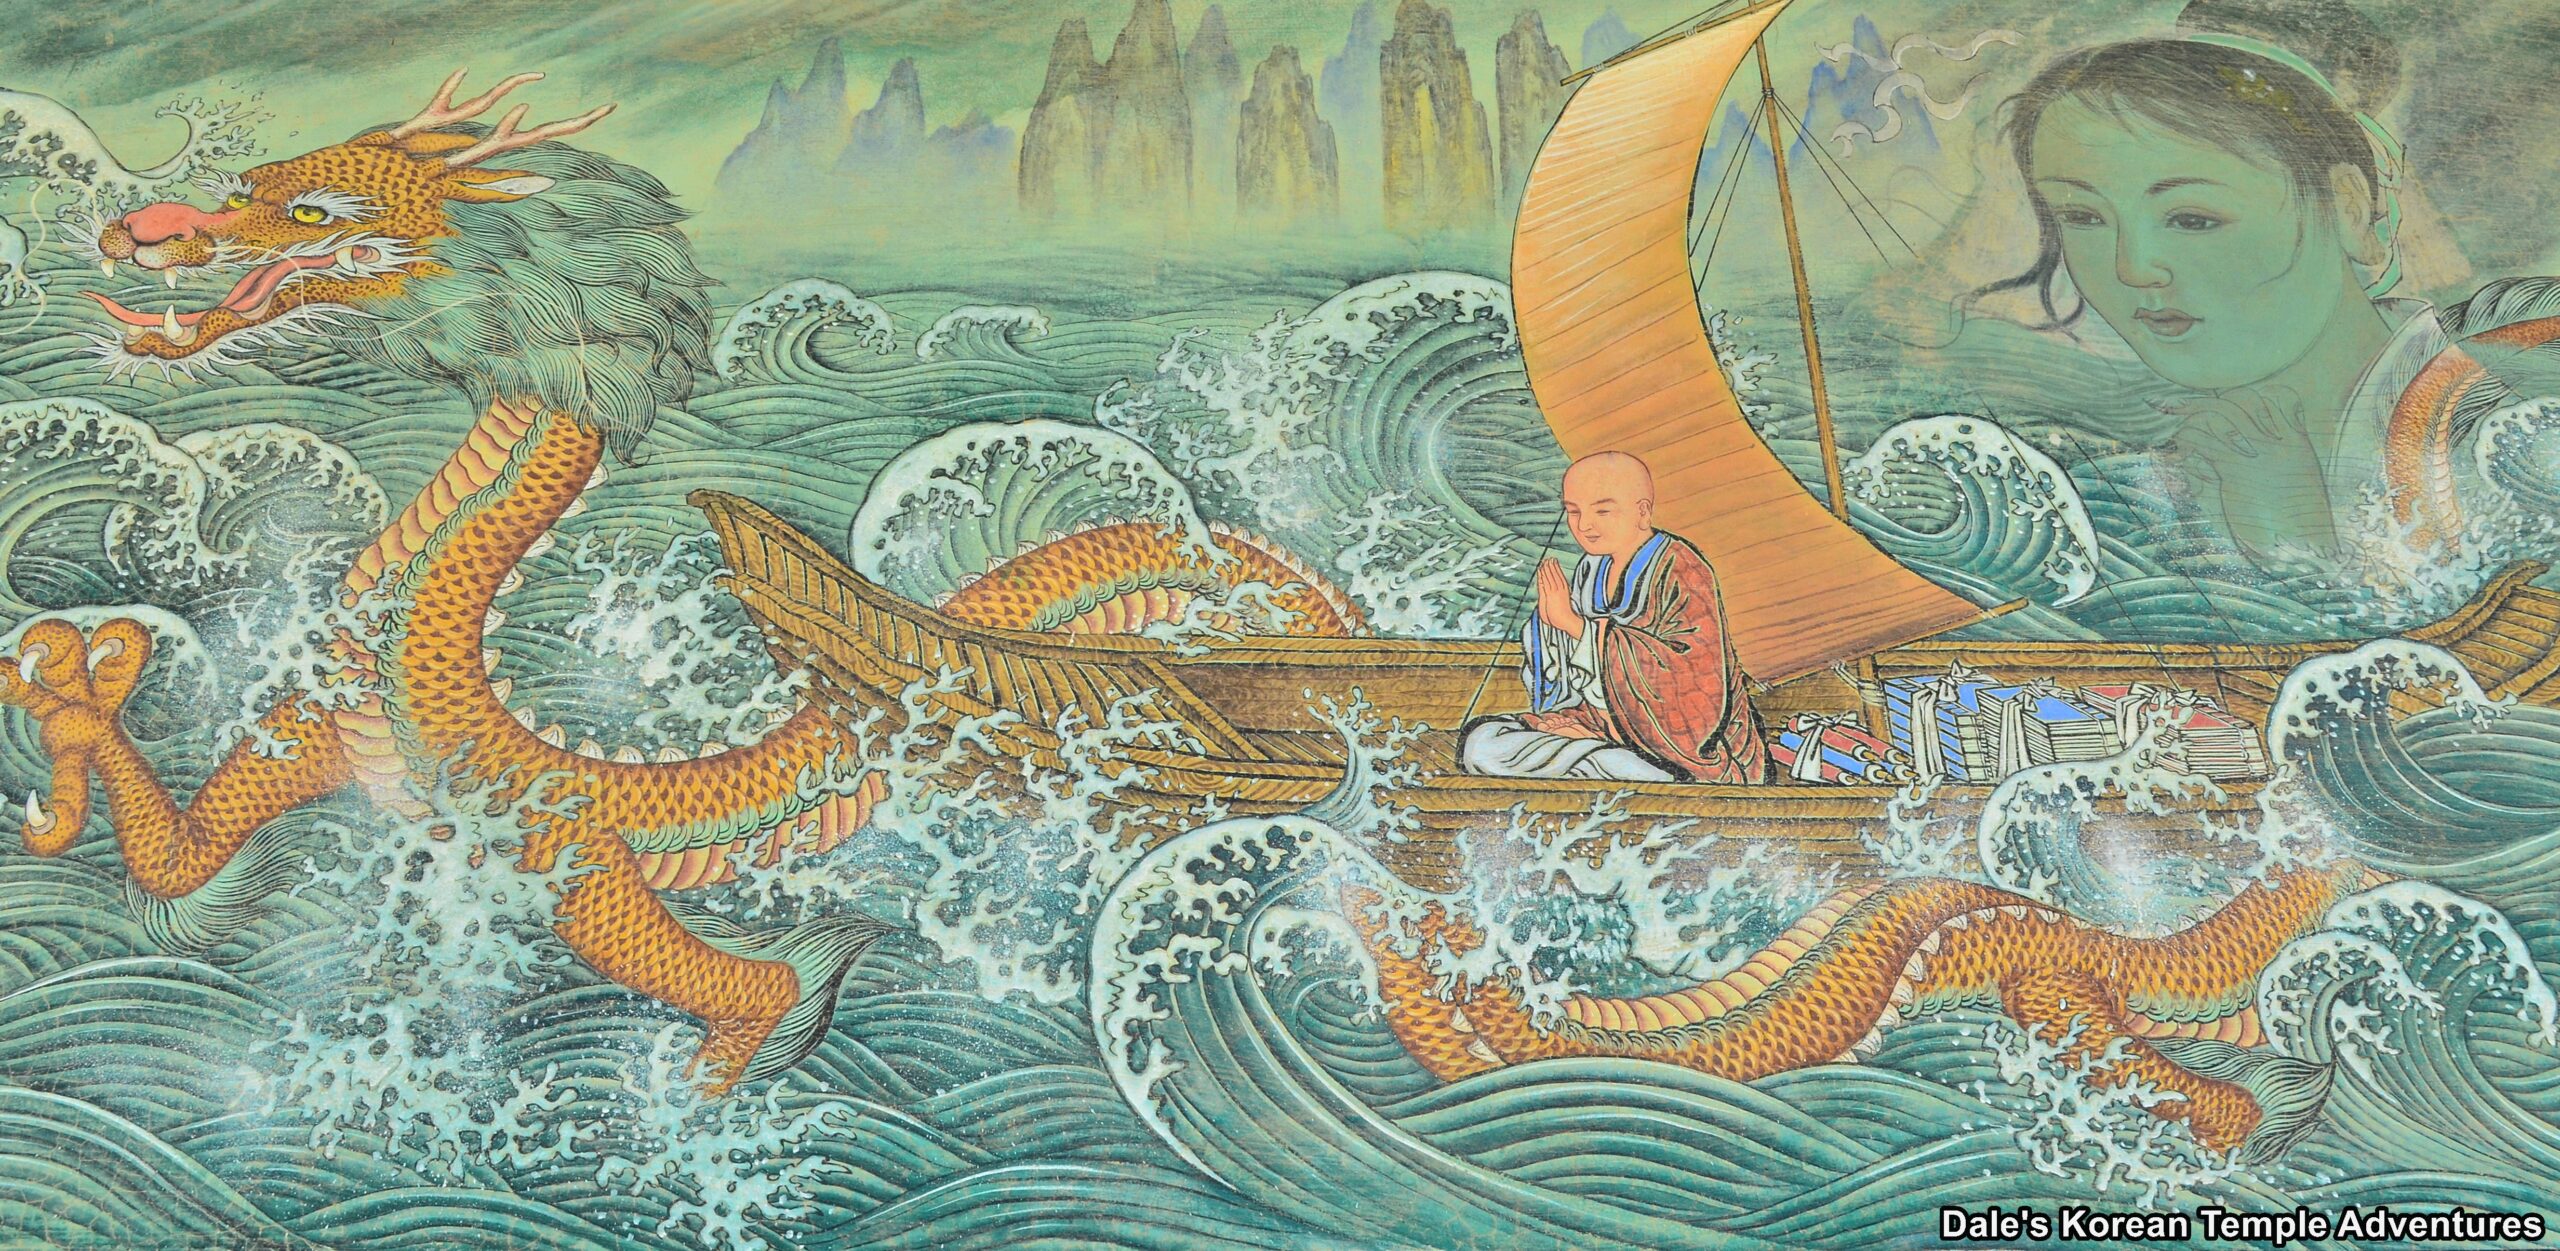
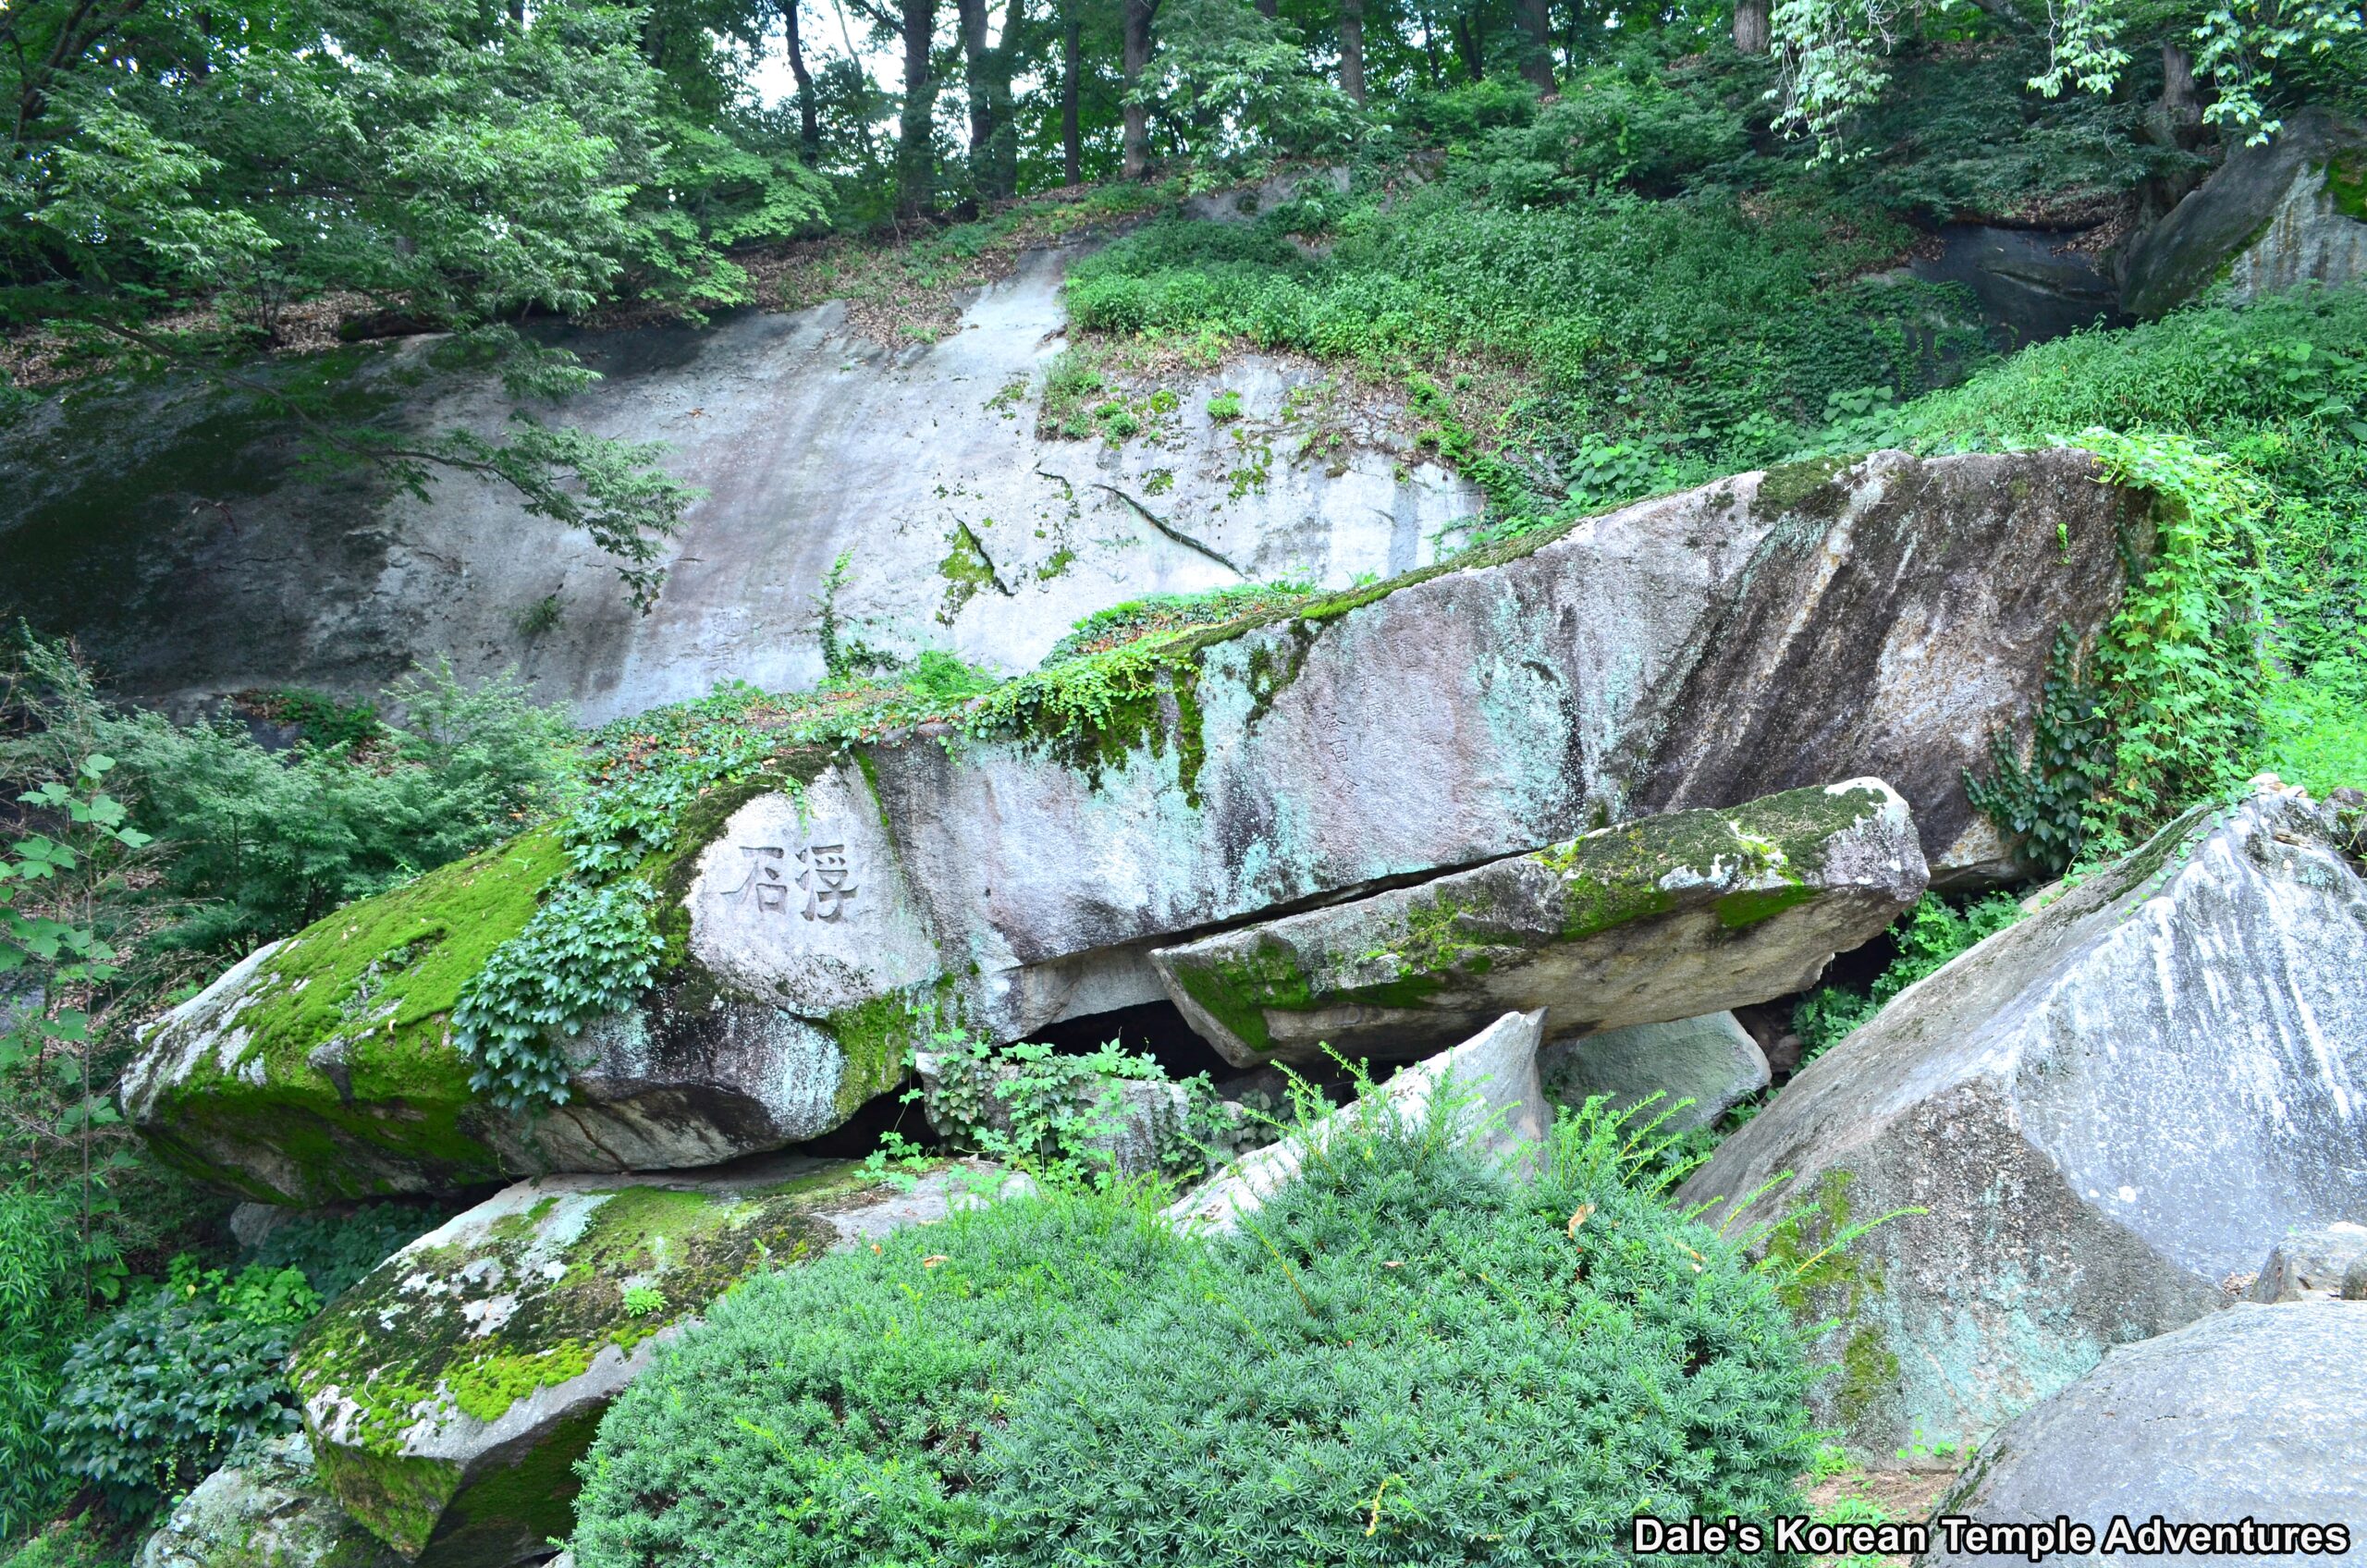
As a dragon, Seonmyo followed Uisang-daesa back to the Silla Kingdom to help protect him. And when Uisang-daesa ran into difficulty building Buseoksa Temple, probably from locals that were followers of traditional Korean shamanic beliefs, Lady Seonmyo, now appearing as a dragon, lifted a stone by magic to defeat the locals. This stone, purportedly, now rests to the left of the main hall, the Muryangsu-jeon Hall. And another legend states how later on Lady Seonmyo transformed into a stone dragon and was buried in the courtyard of the Muryangsu-jeon Hall to guard the temple. Lastly, the temple was built to pray for the protection of the nation.
Temple Layout
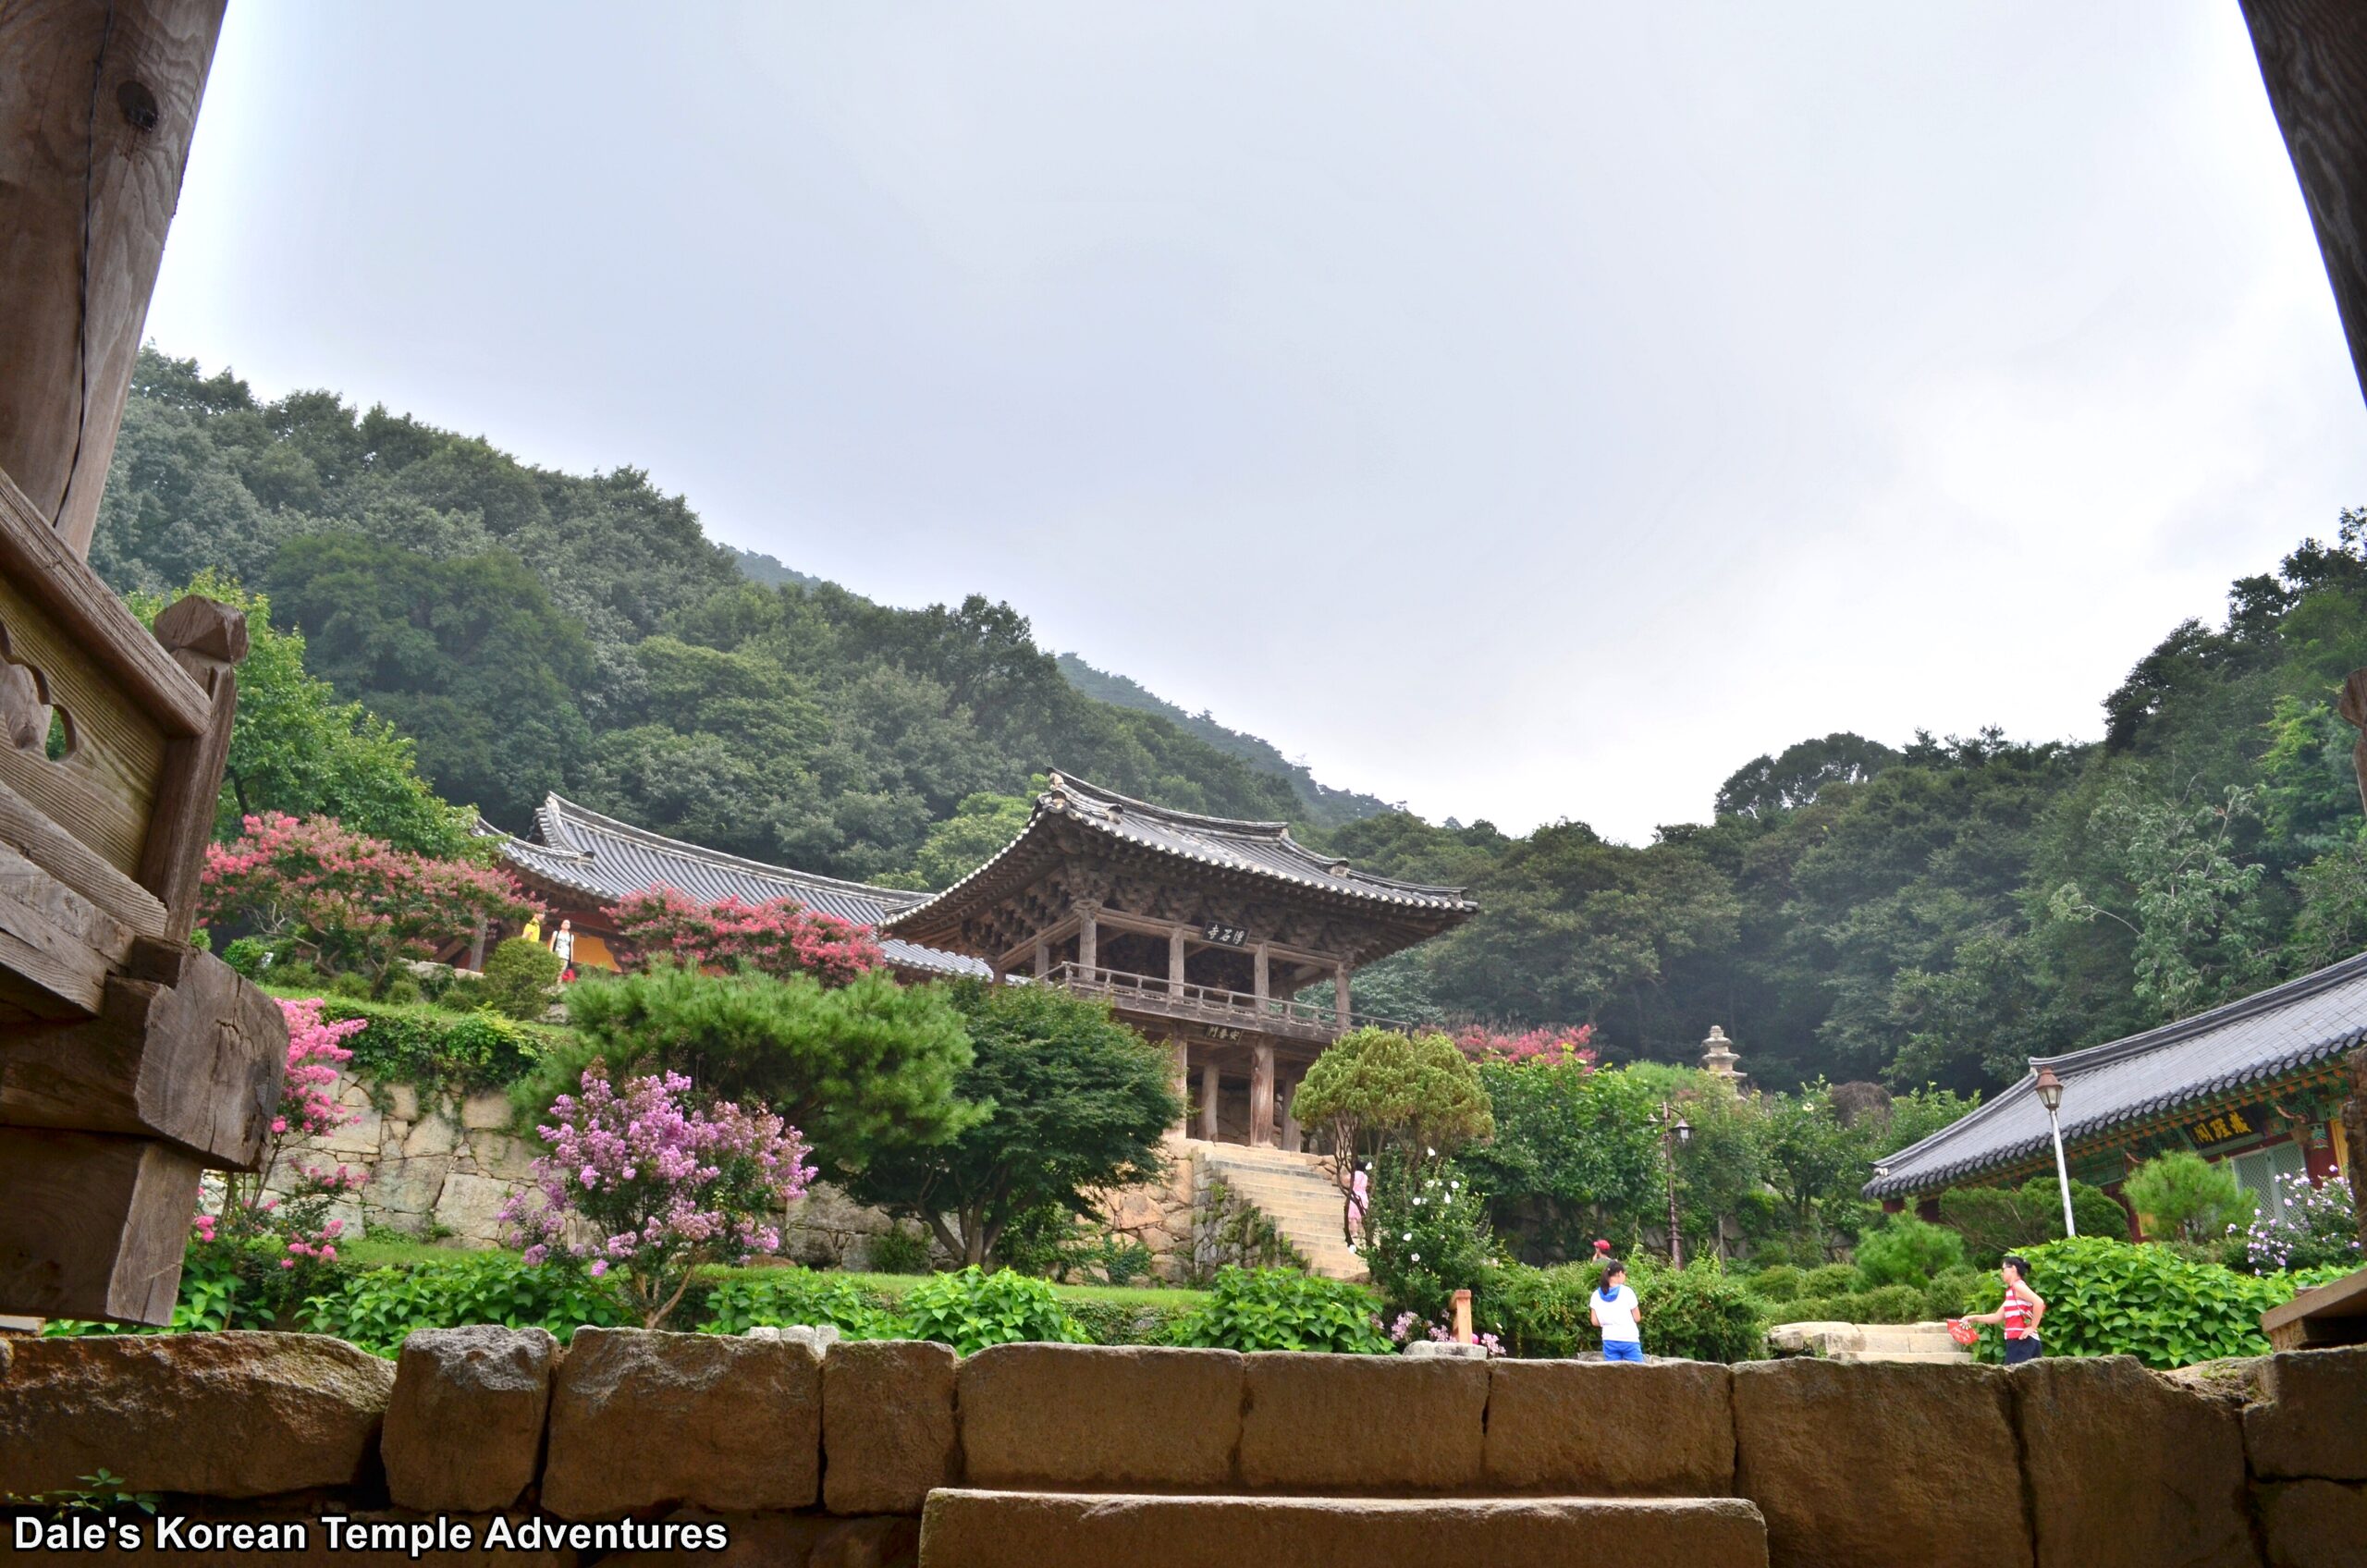
You first approach Buseoksa Temple up a long country road. The views of the valley below are gorgeous. As you near the temple grounds, you’ll first past by the newly built temple museum that houses invaluable artifacts from the historic temple. The design of the temple is unique with the main hall resting on top of the terraced hillside. On the first terrace, you’ll see twin pagodas that date back to Later Silla (668-935 A.D.). And to the far right you’ll notice the newly built, and very colourful, Jijang-jeon Hall. The exterior walls are beautifully adorned with scary Gwimyeon (Monster Masks), and the interior houses a statue of Jijang-bosal (The Bodhisattva of the Afterlife).
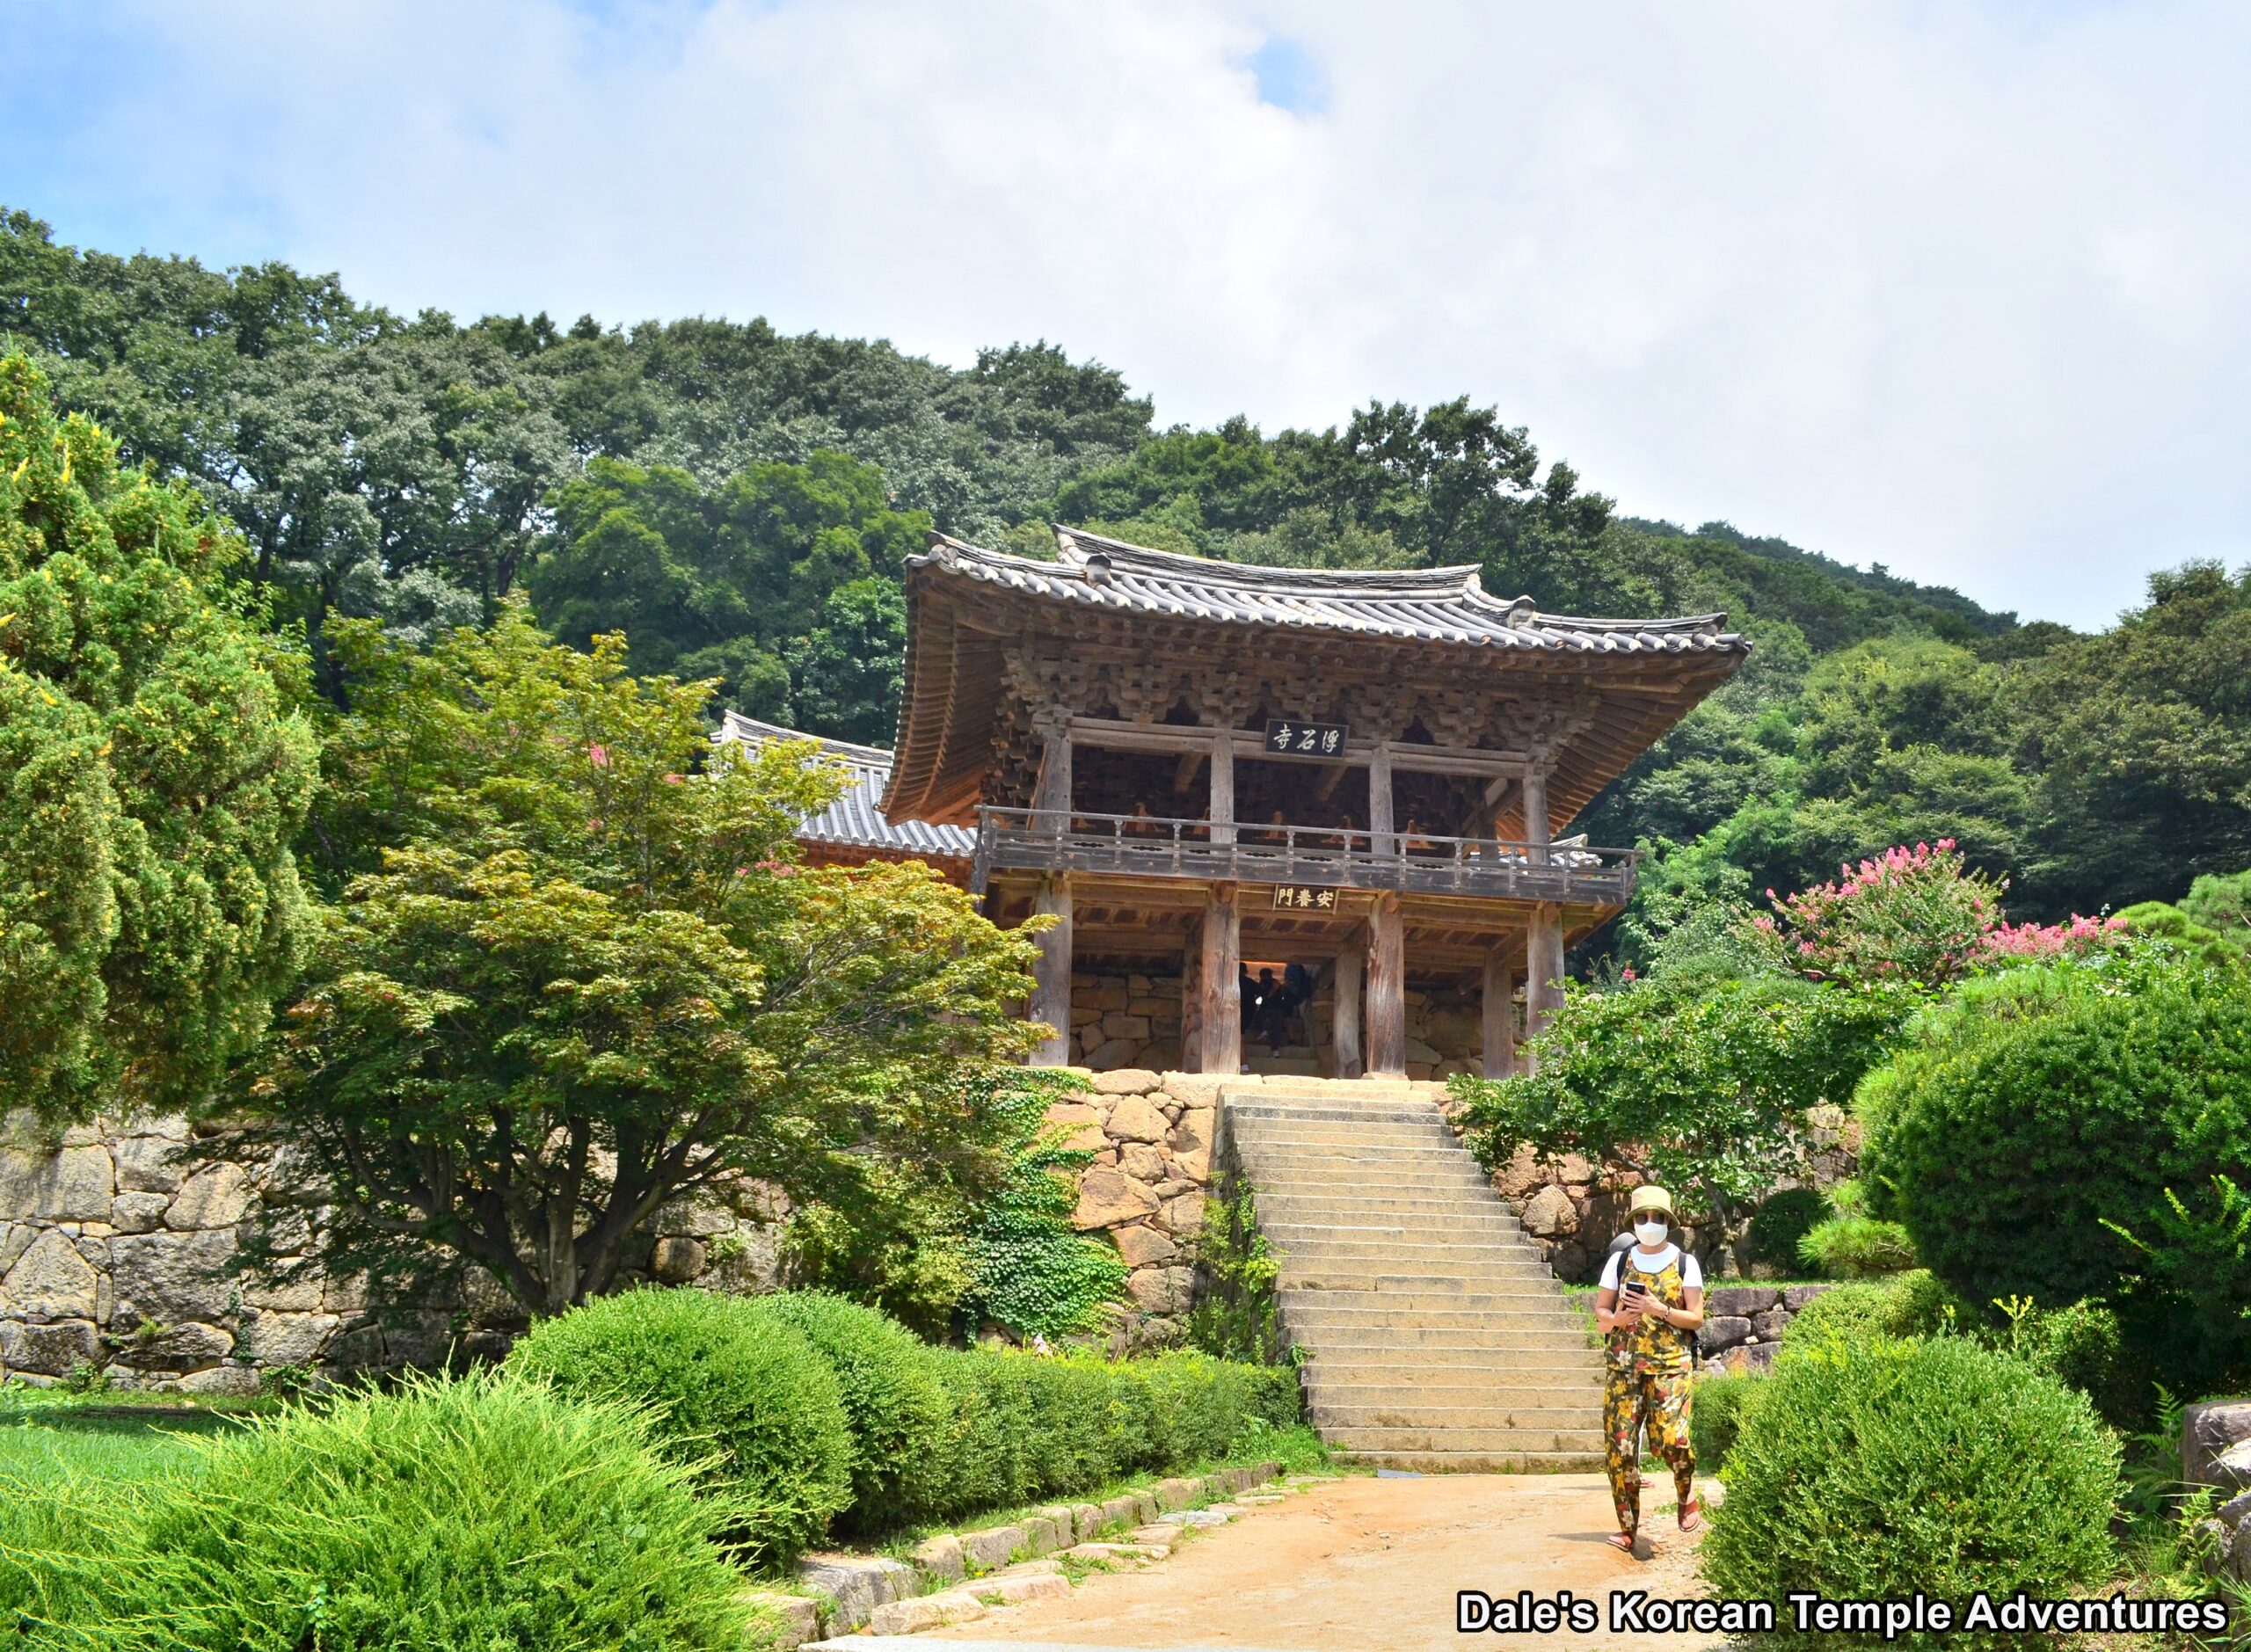
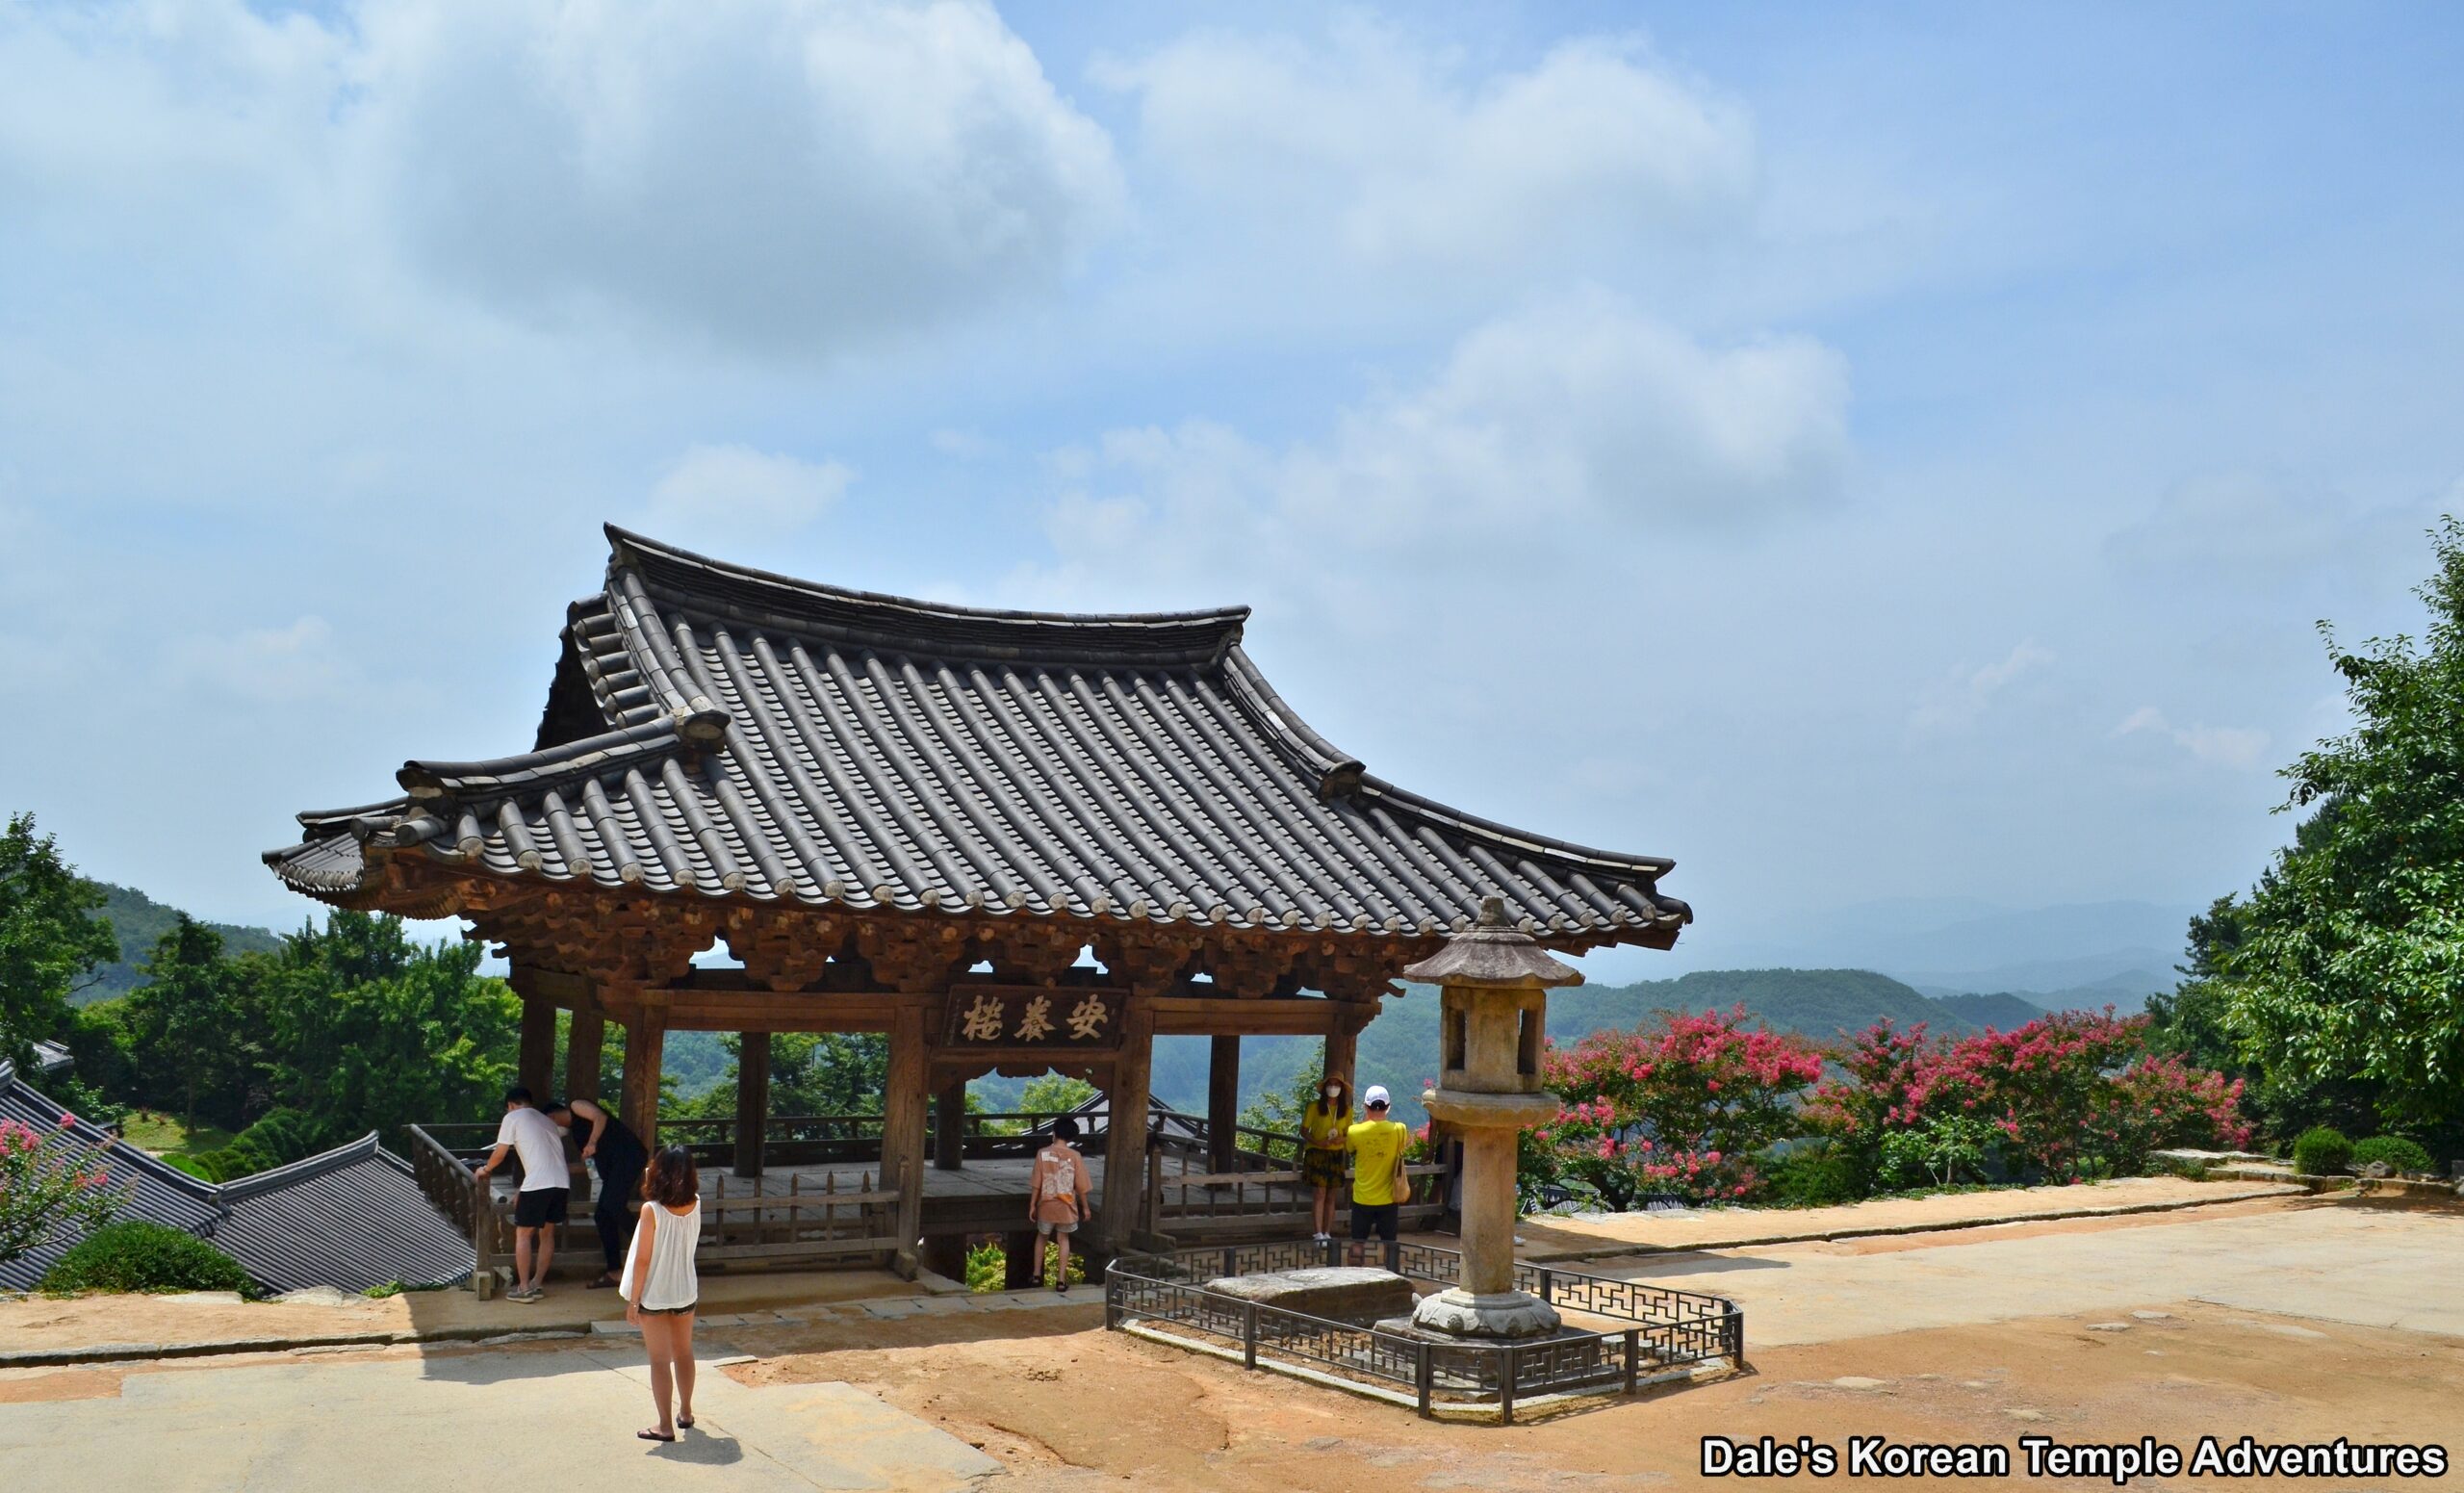
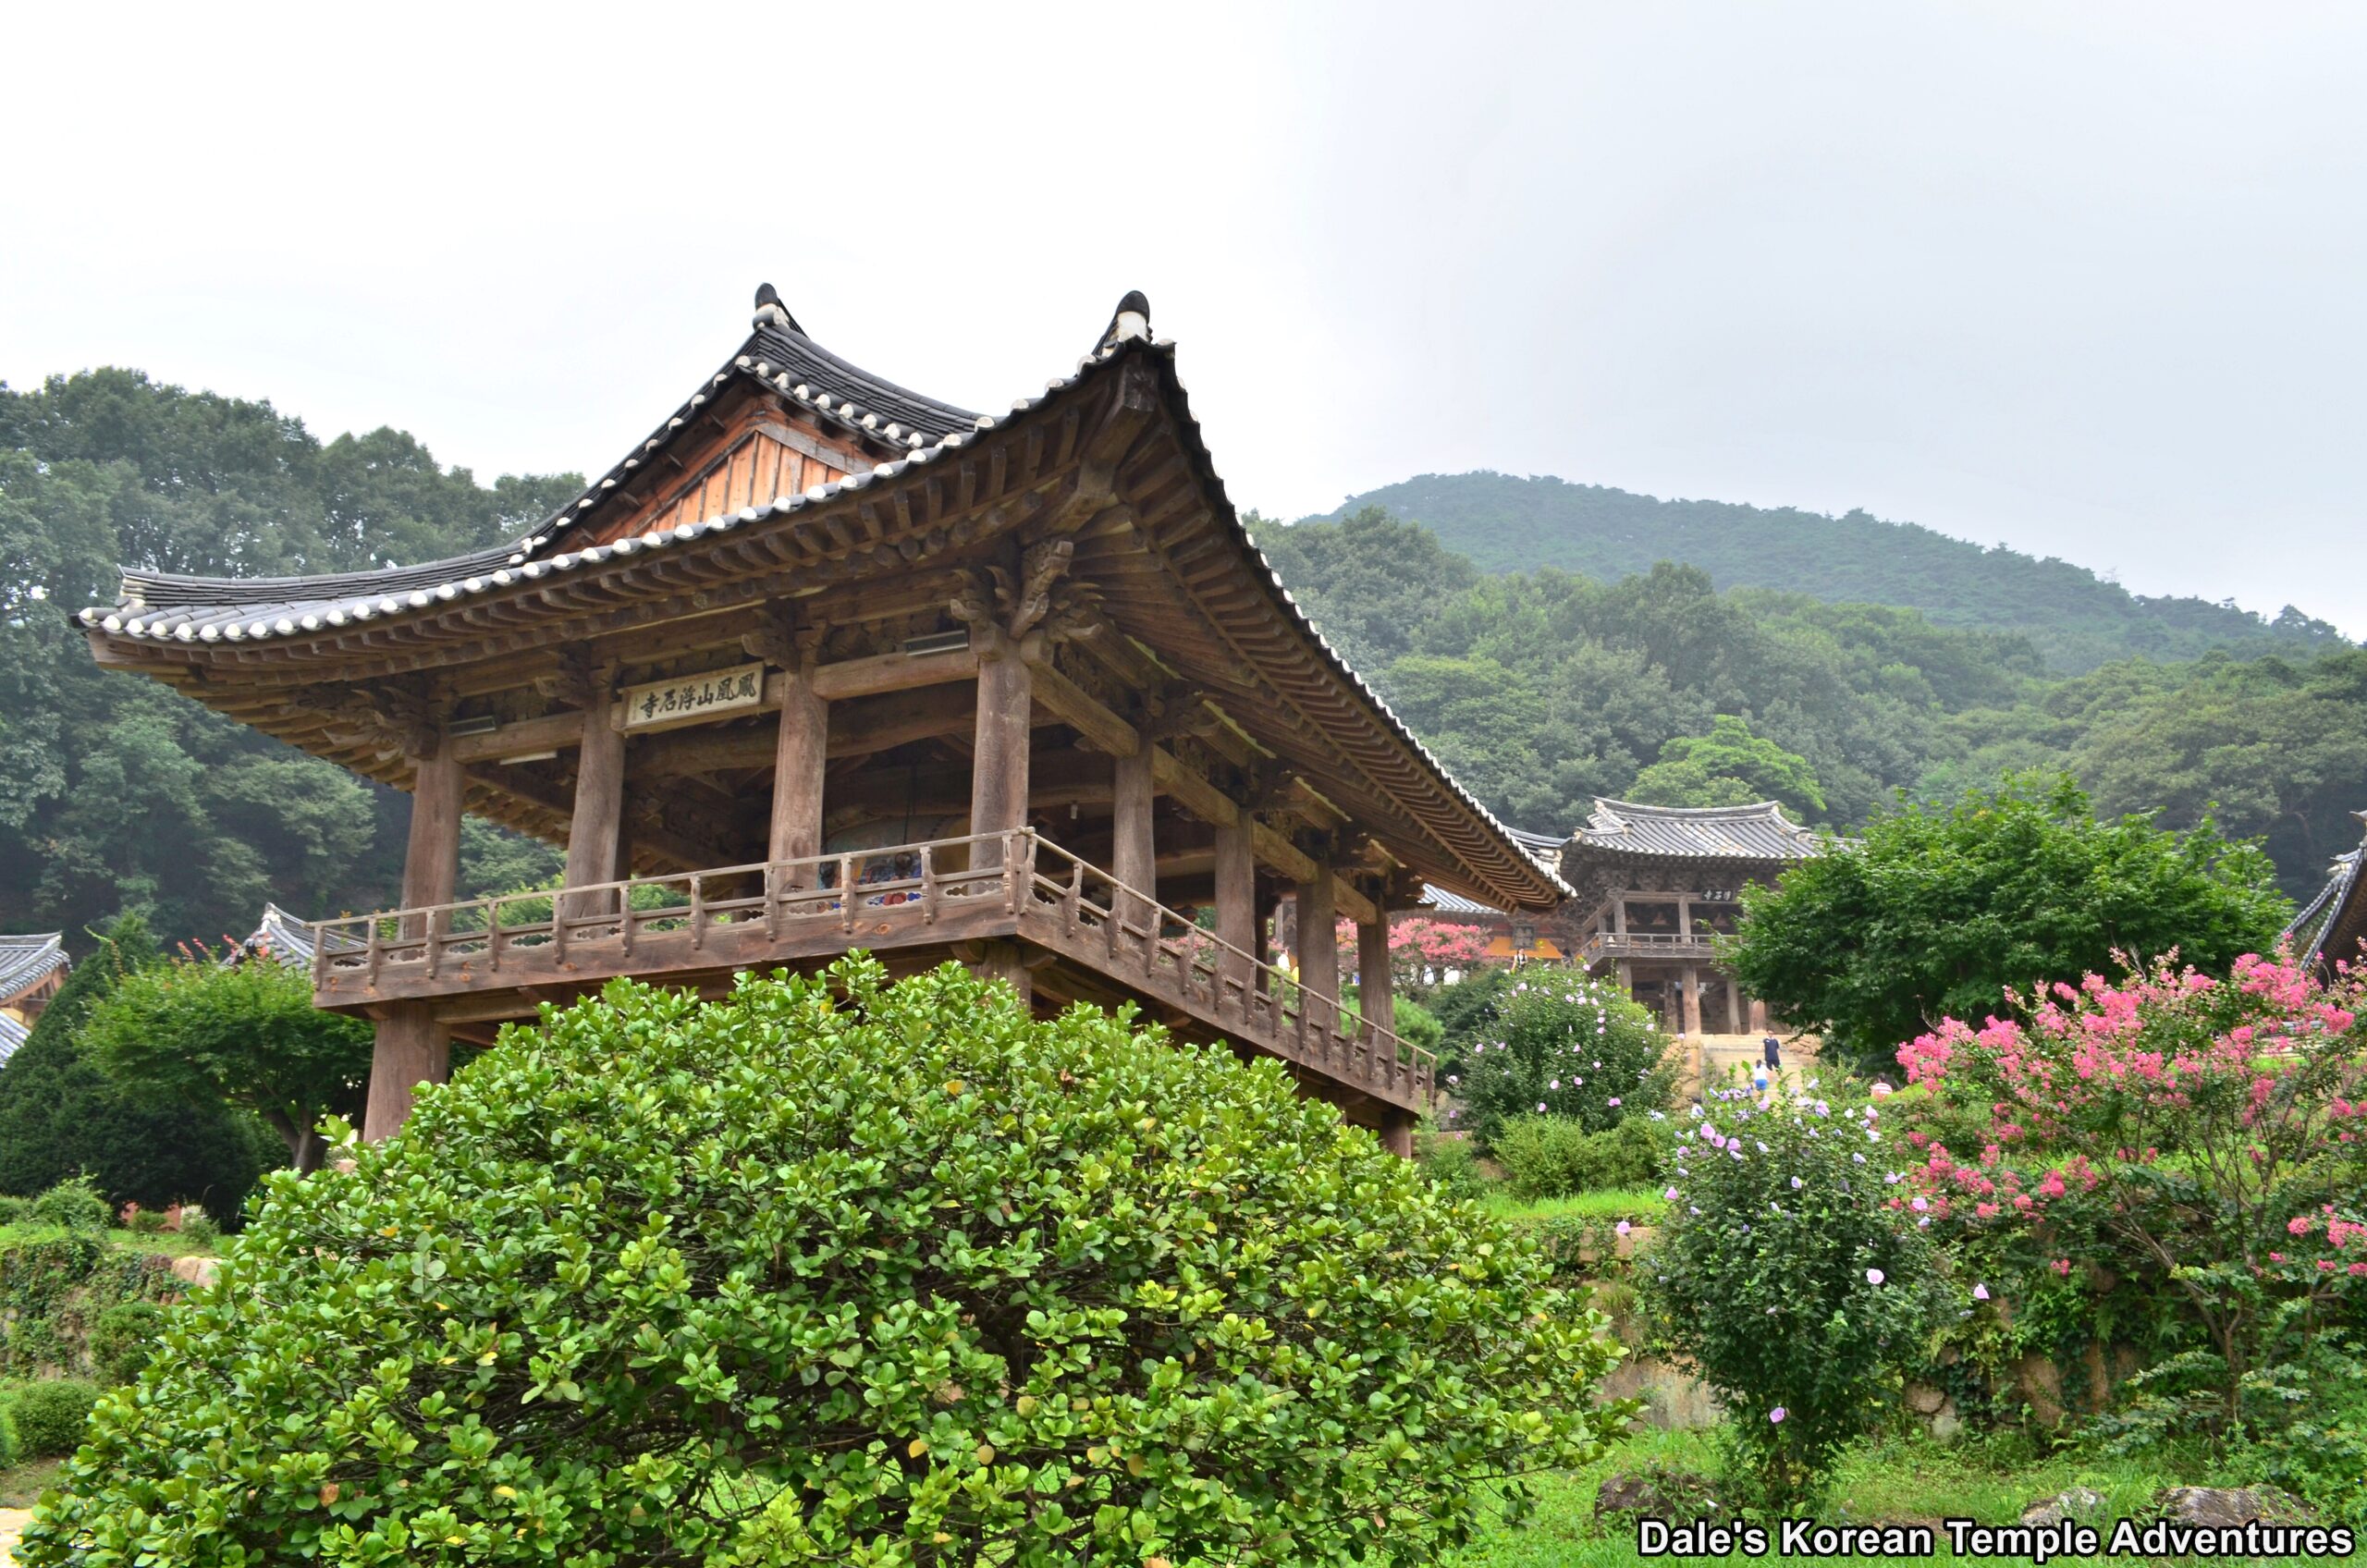
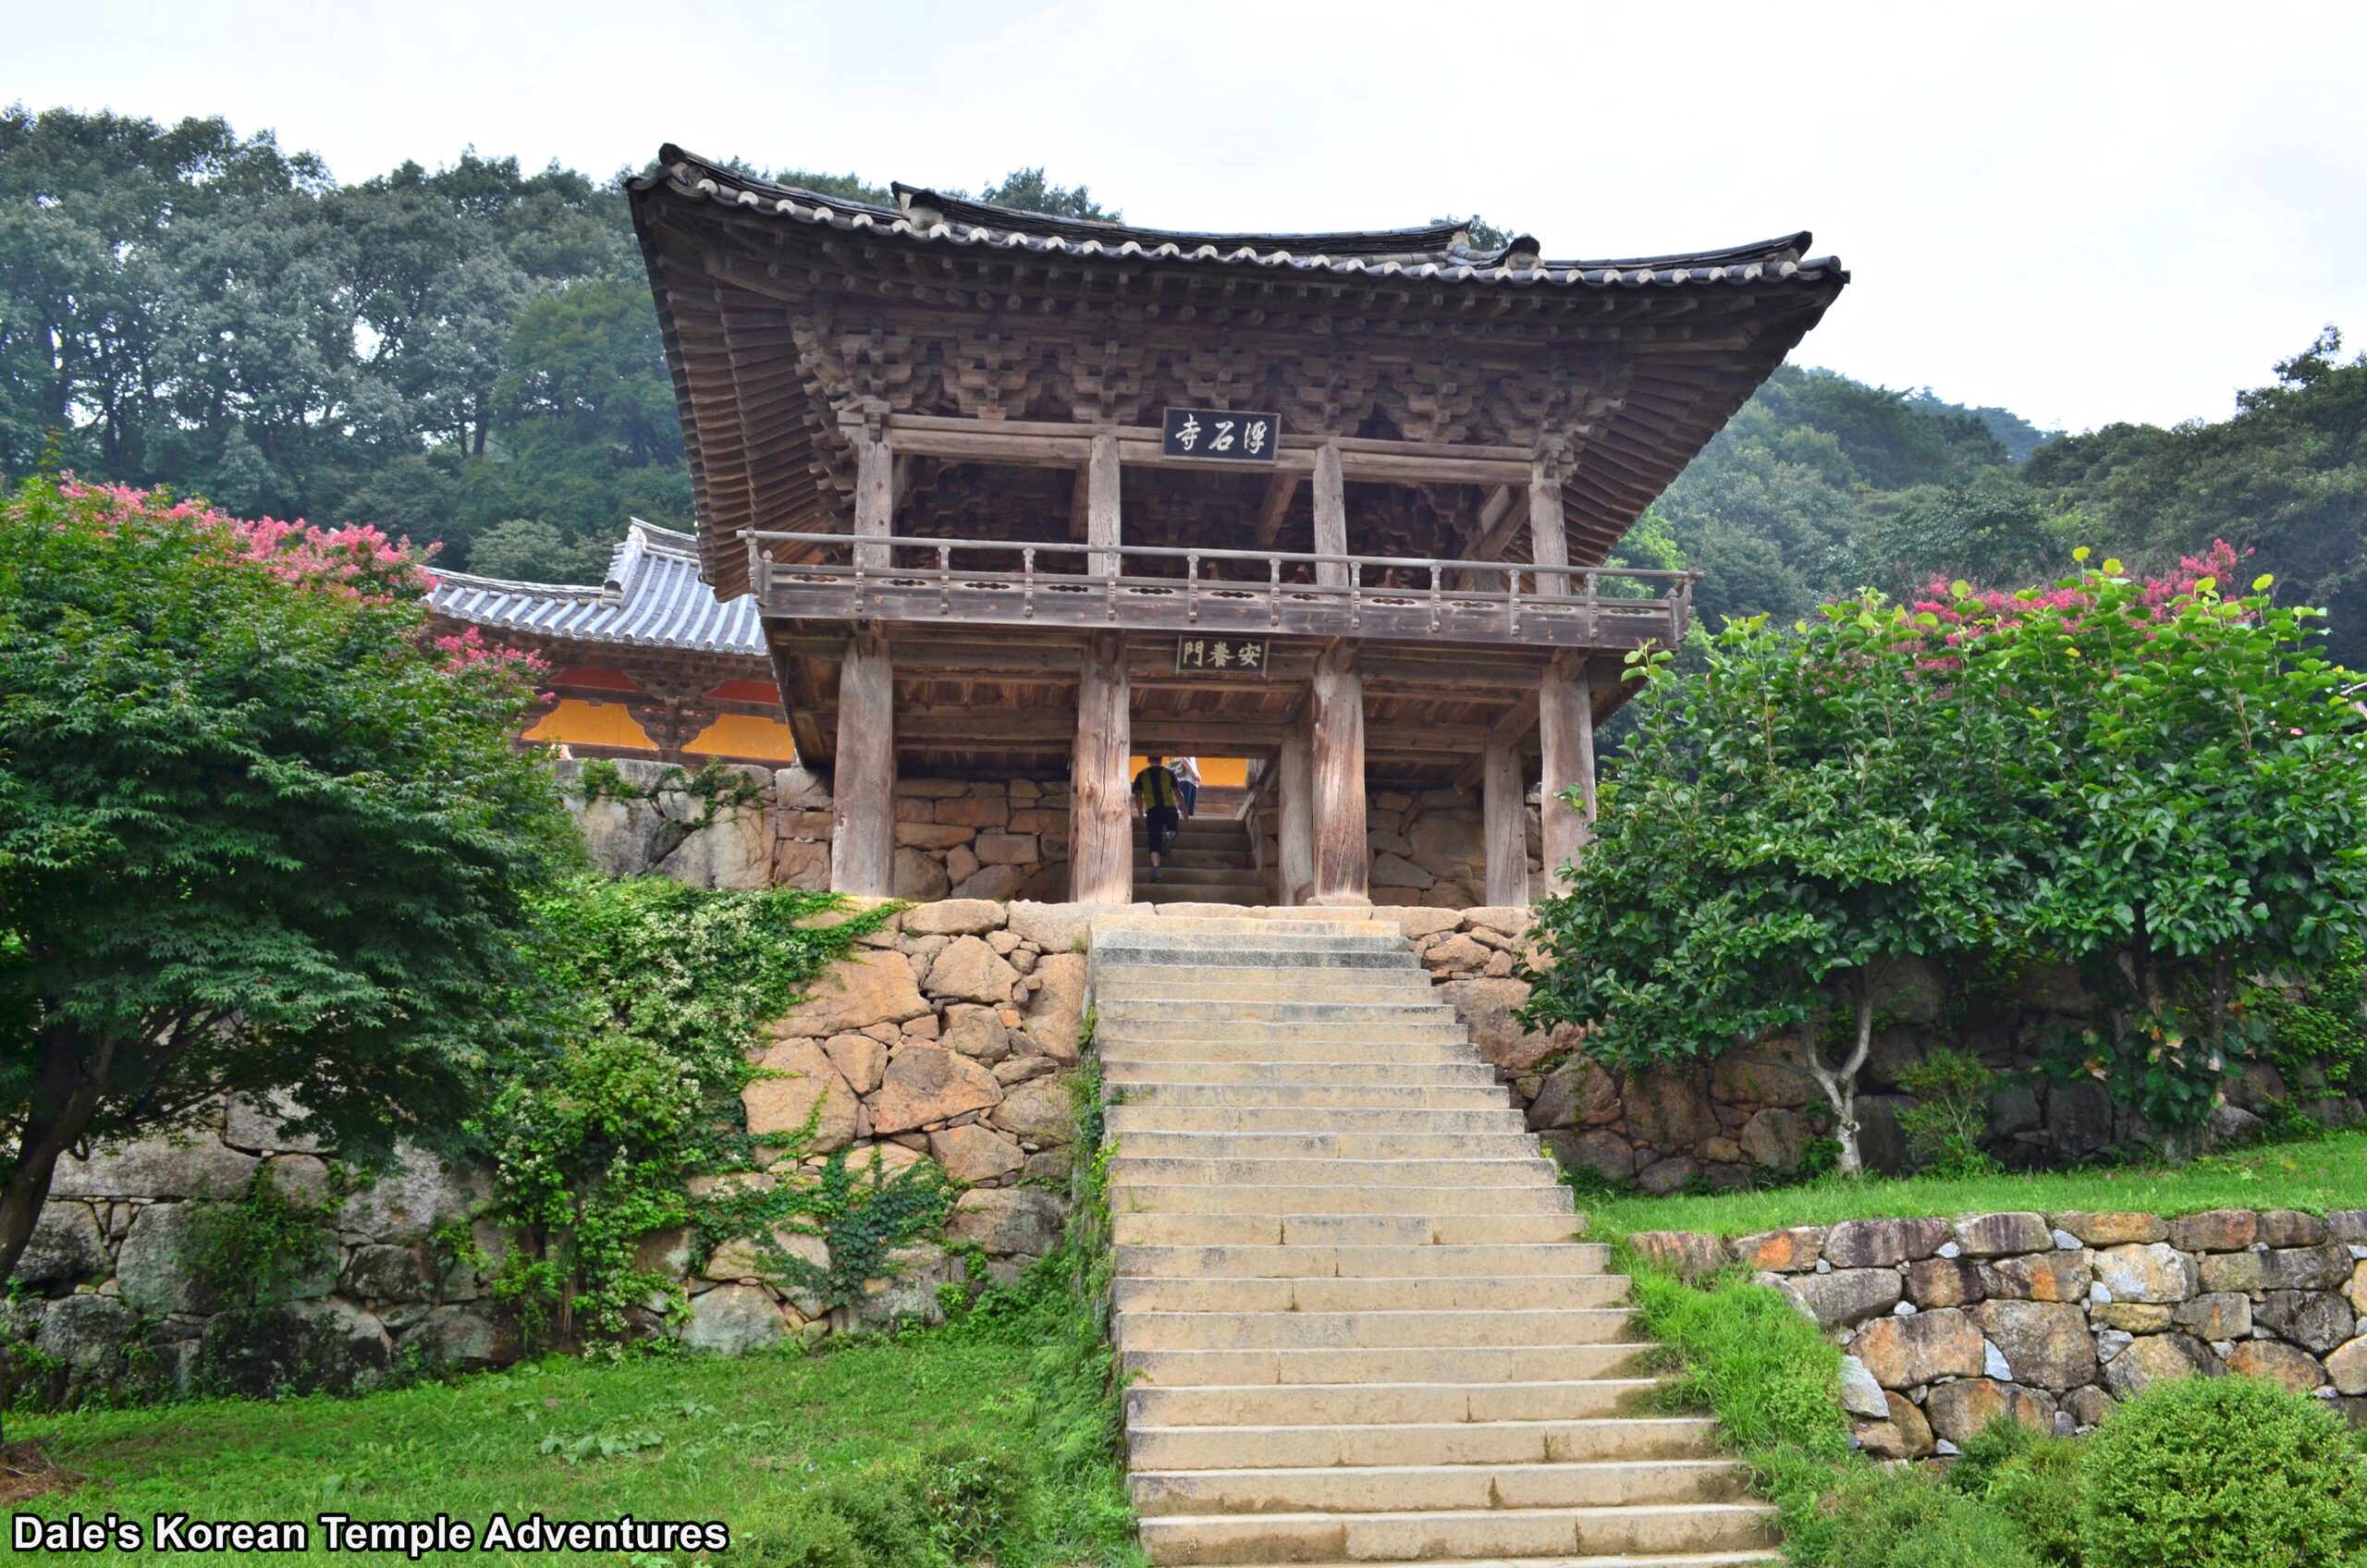
Up the main stairway that will eventually bring you to the main hall, you’ll pass under the weathered Beomjong-gak Pavilion. This open designed bell pavilion houses the fish gong and drum. Passing under this pavilion, you’ll next come to the picturesque Anyang-ru Pavilion, which means “Entrance to Heaven Pavilion” in English. This pavilion beautifully frames the main hall; but you’ll have to watch your head as you make your way up to the Muryangsu-jeon Hall, because the ceiling to the pavilion is quite low.
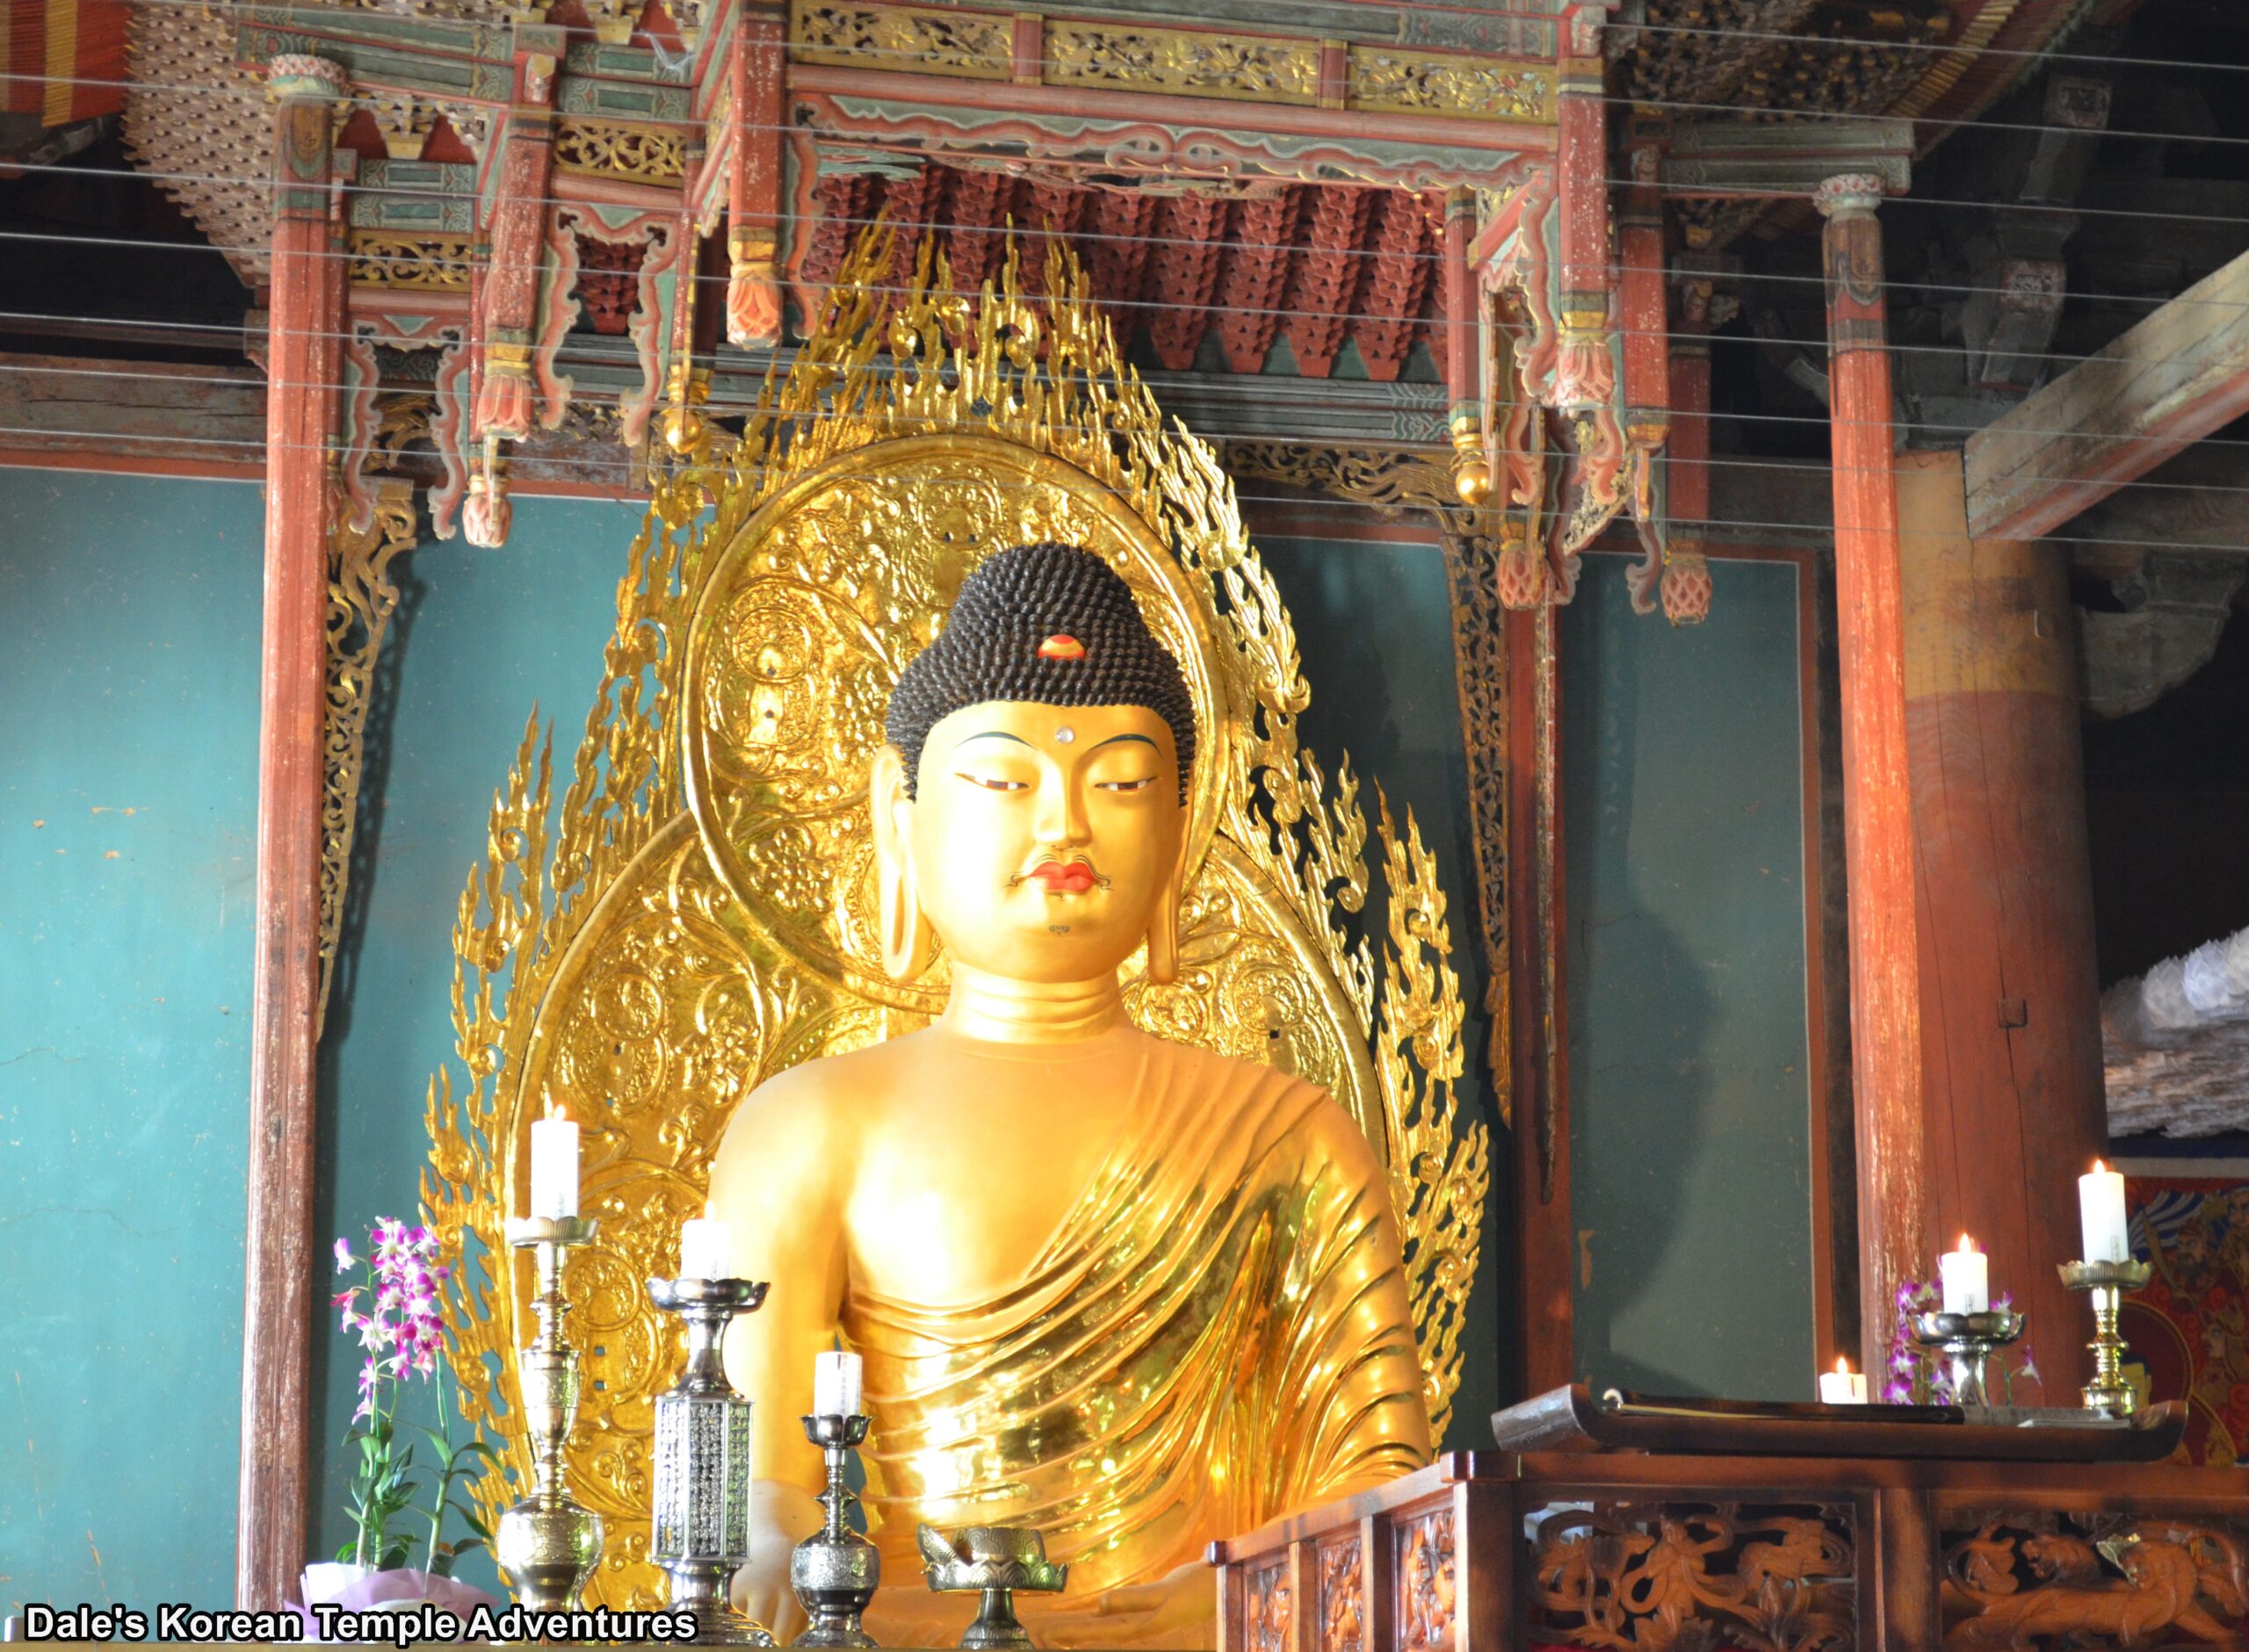
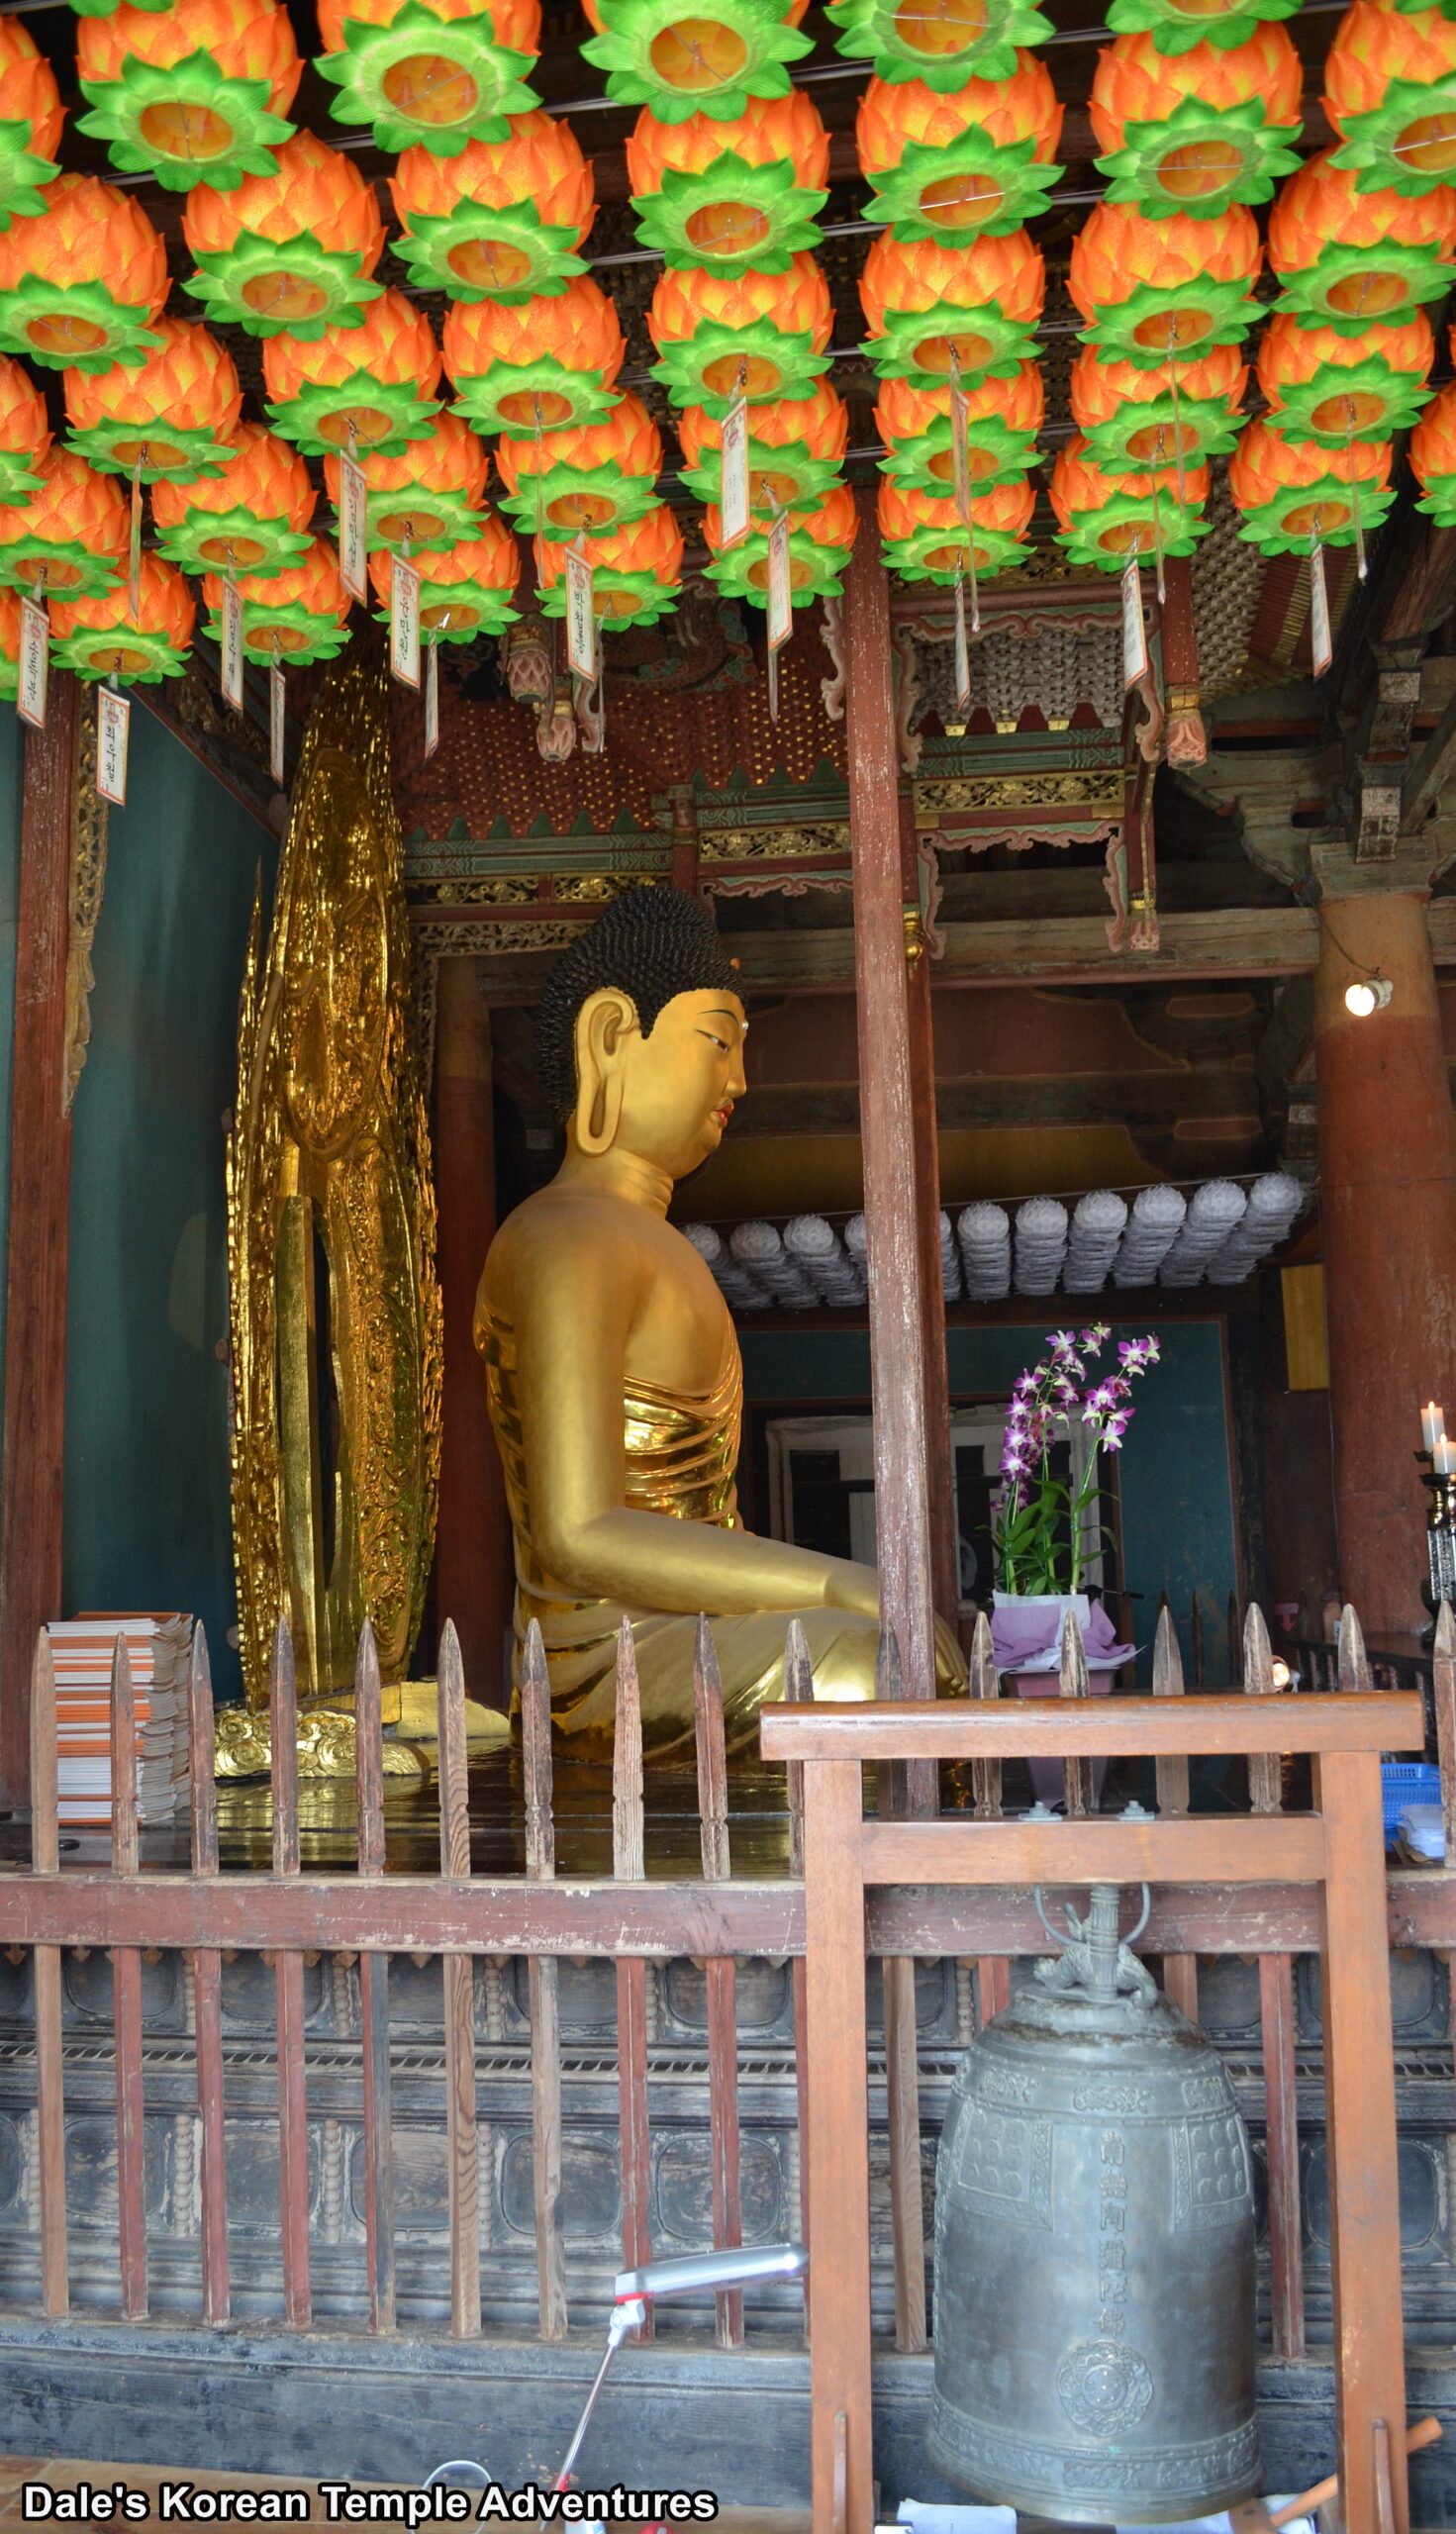
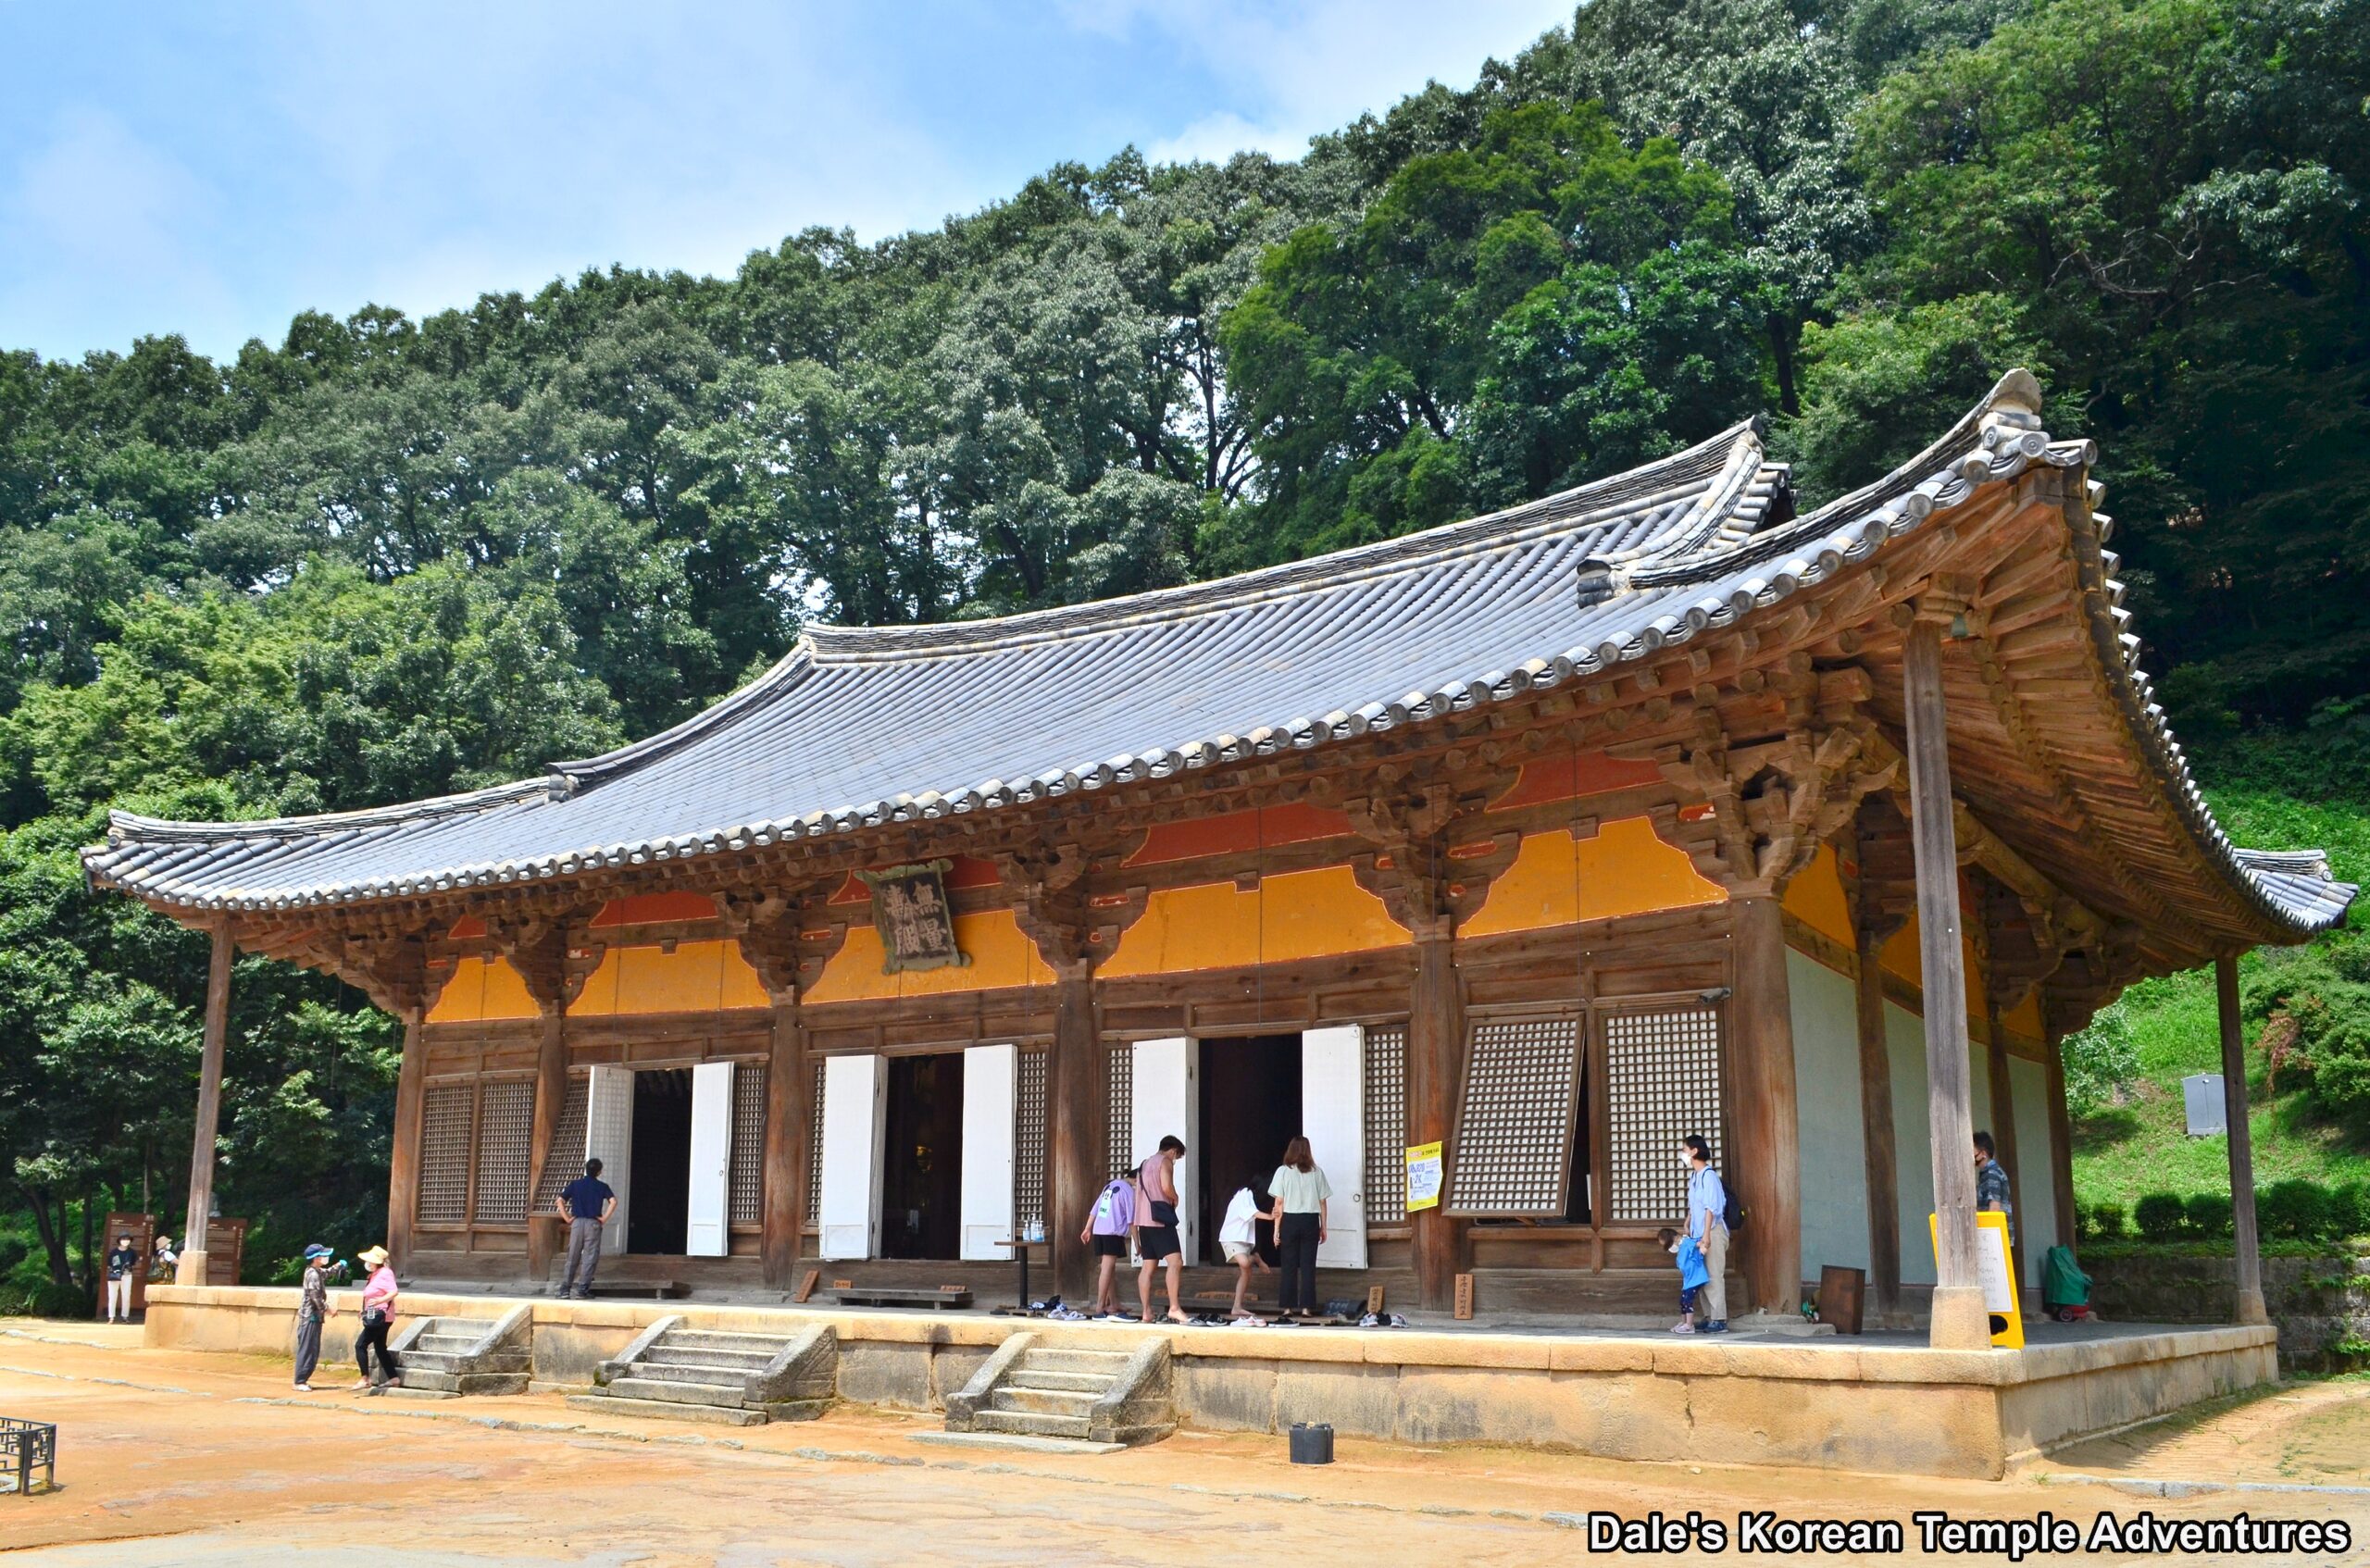
Muryangsu-jeon Hall at Buseoksa Temple is the second oldest wooden structure in all of Korea behind only Sudeoksa Temple’s Daeung-jeon Hall which dates back to 1308. The Muryangsu-jeon Hall dates back to 1358, and it’s National Treasure #18. Most wooden structures across the Korean peninsula were destroyed by the invading Japanese during the Imjin War (1592-1598). Fortunately, Buseoksa Temple’s Muryangsu-jeon Hall was one of the very few to avoid the flames. The hall is smaller in size, and it’s typical of Goryeo Dynasty architecture. The name tablet that hangs over the entrance to the hall was written by King Sukjong of Joseon (r.1674-1720). Inside the hall, there’s a beautiful statue of Amita-bul (The Buddha of the Western Paradise). This statue is National Treasure #45. The statue dates back to the early Goryeo Dynasty, and it’s made by putting clay paste on top of a wooden frame. Out in front of the Muryangsu-jeon Hall is a stone lantern that’s National Treasure #17. This lantern dates back to the Later Silla Dynasty.
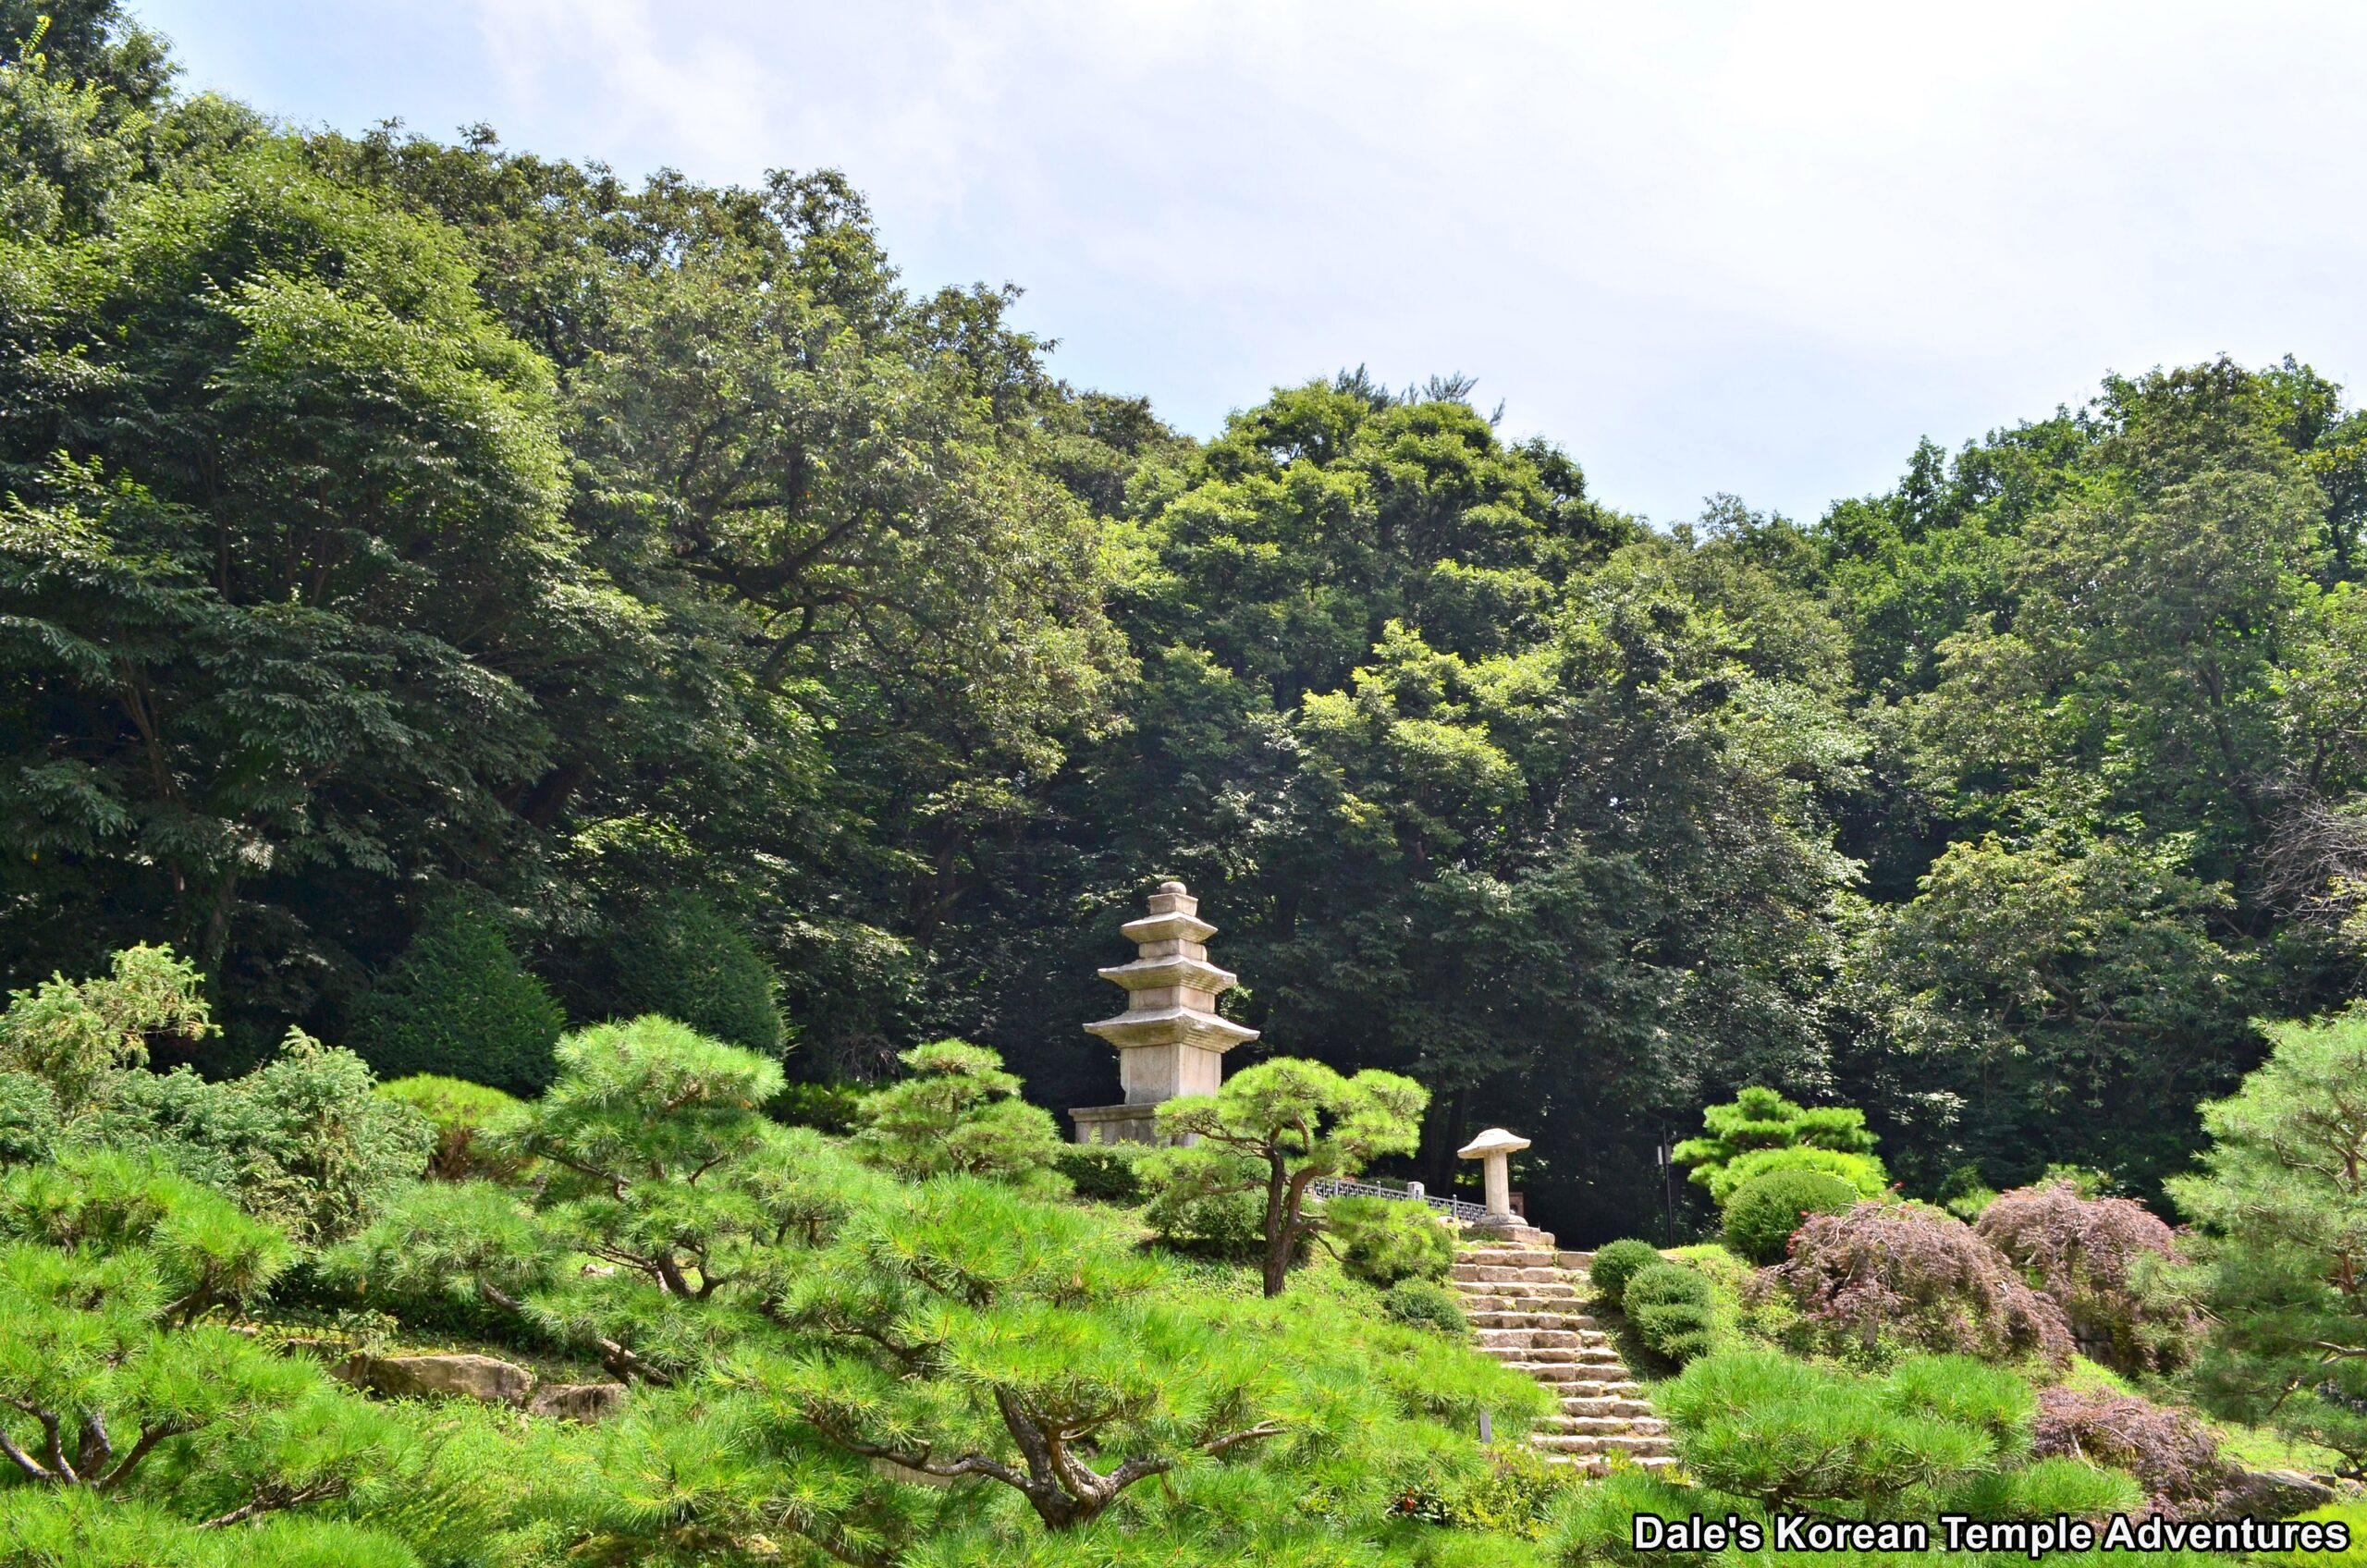
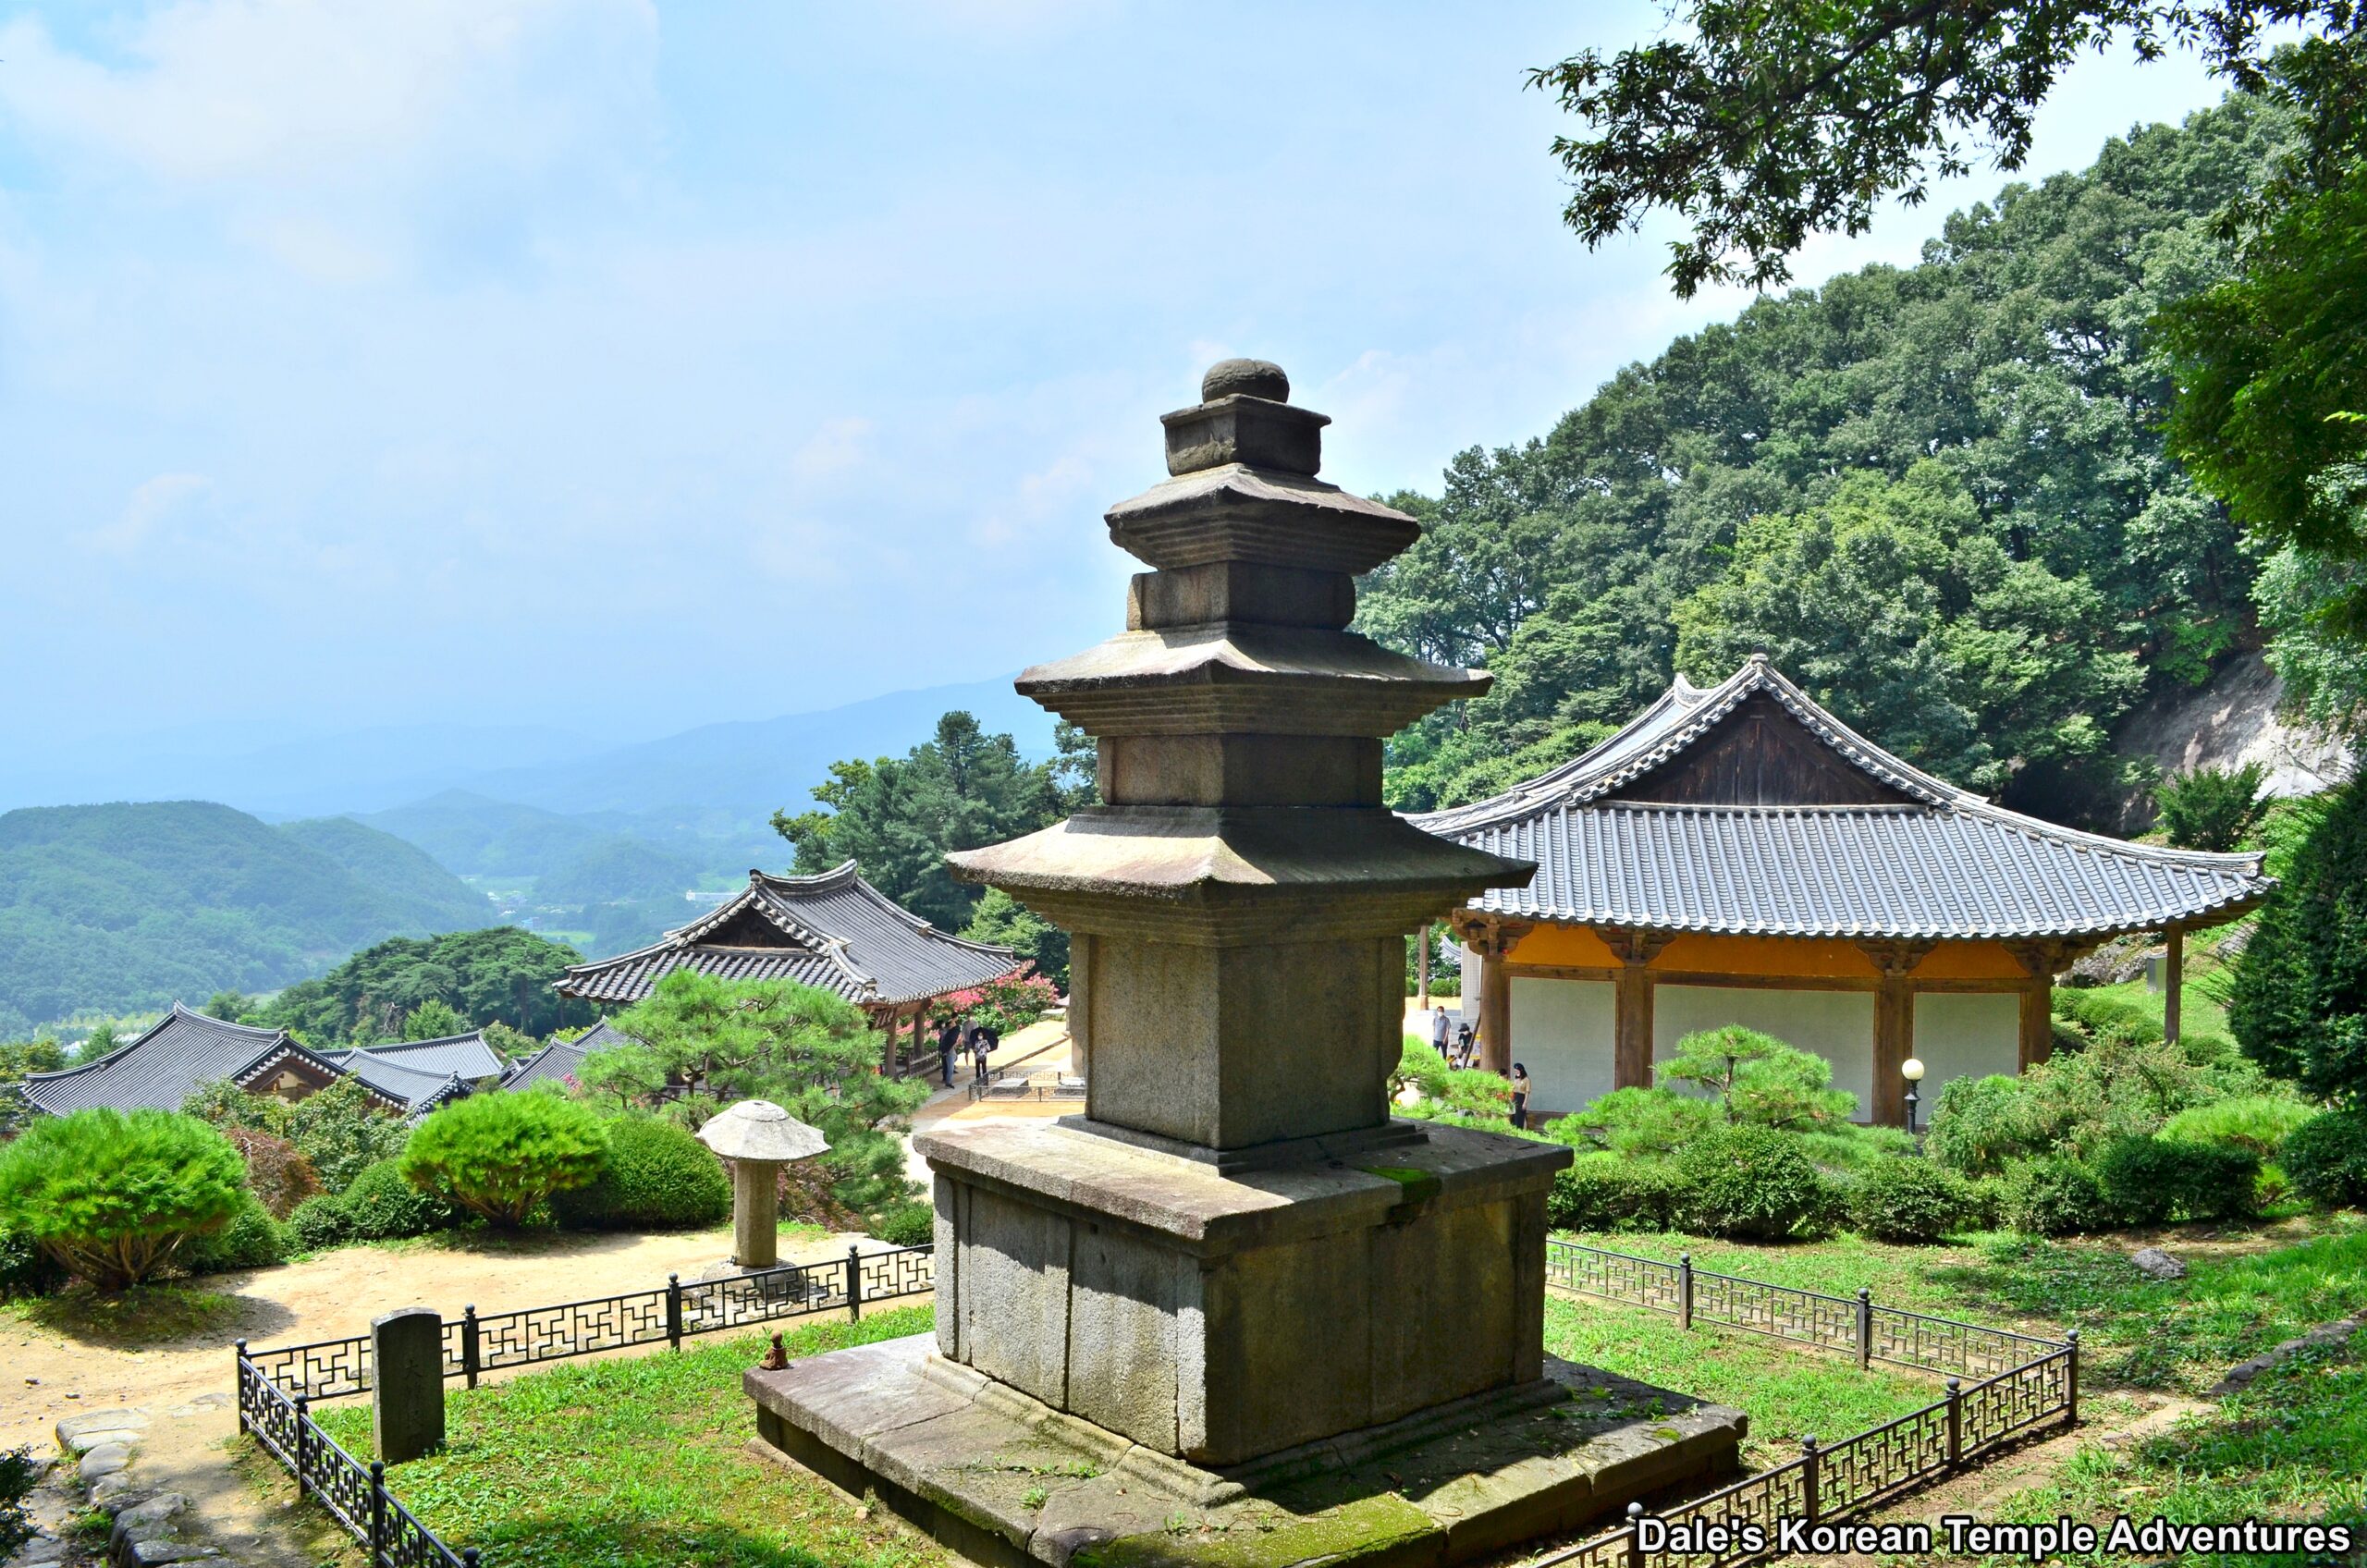
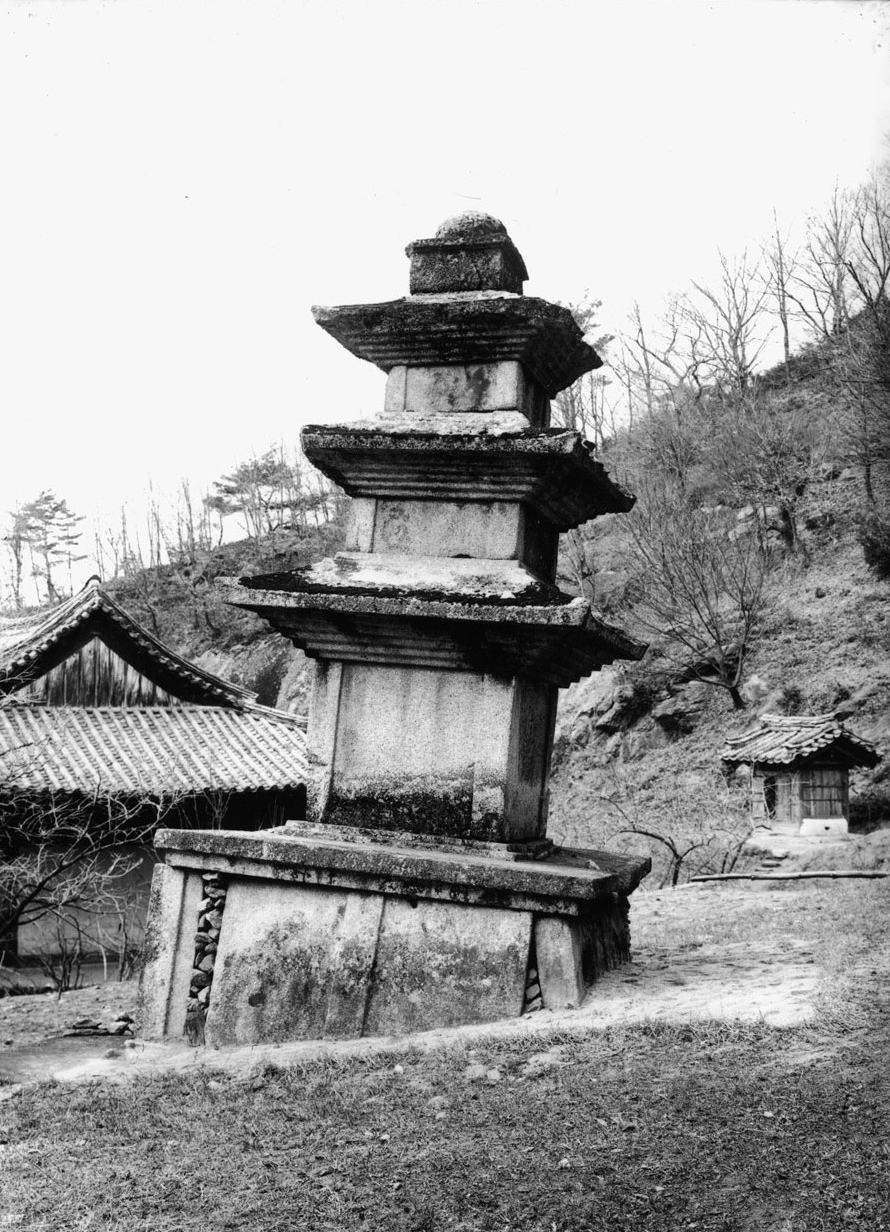
To the right of the main hall is a small shrine. Inside you’ll find a mural dedicated to Lady Seonmyo. And to the right of this little shrine hall is a large pagoda that stands five metres in height. This pagoda stands like a sentinel watchful over the temple grounds. The pagoda dates back to the Later Silla Dynasty, and it’s Korean Treasure #249.
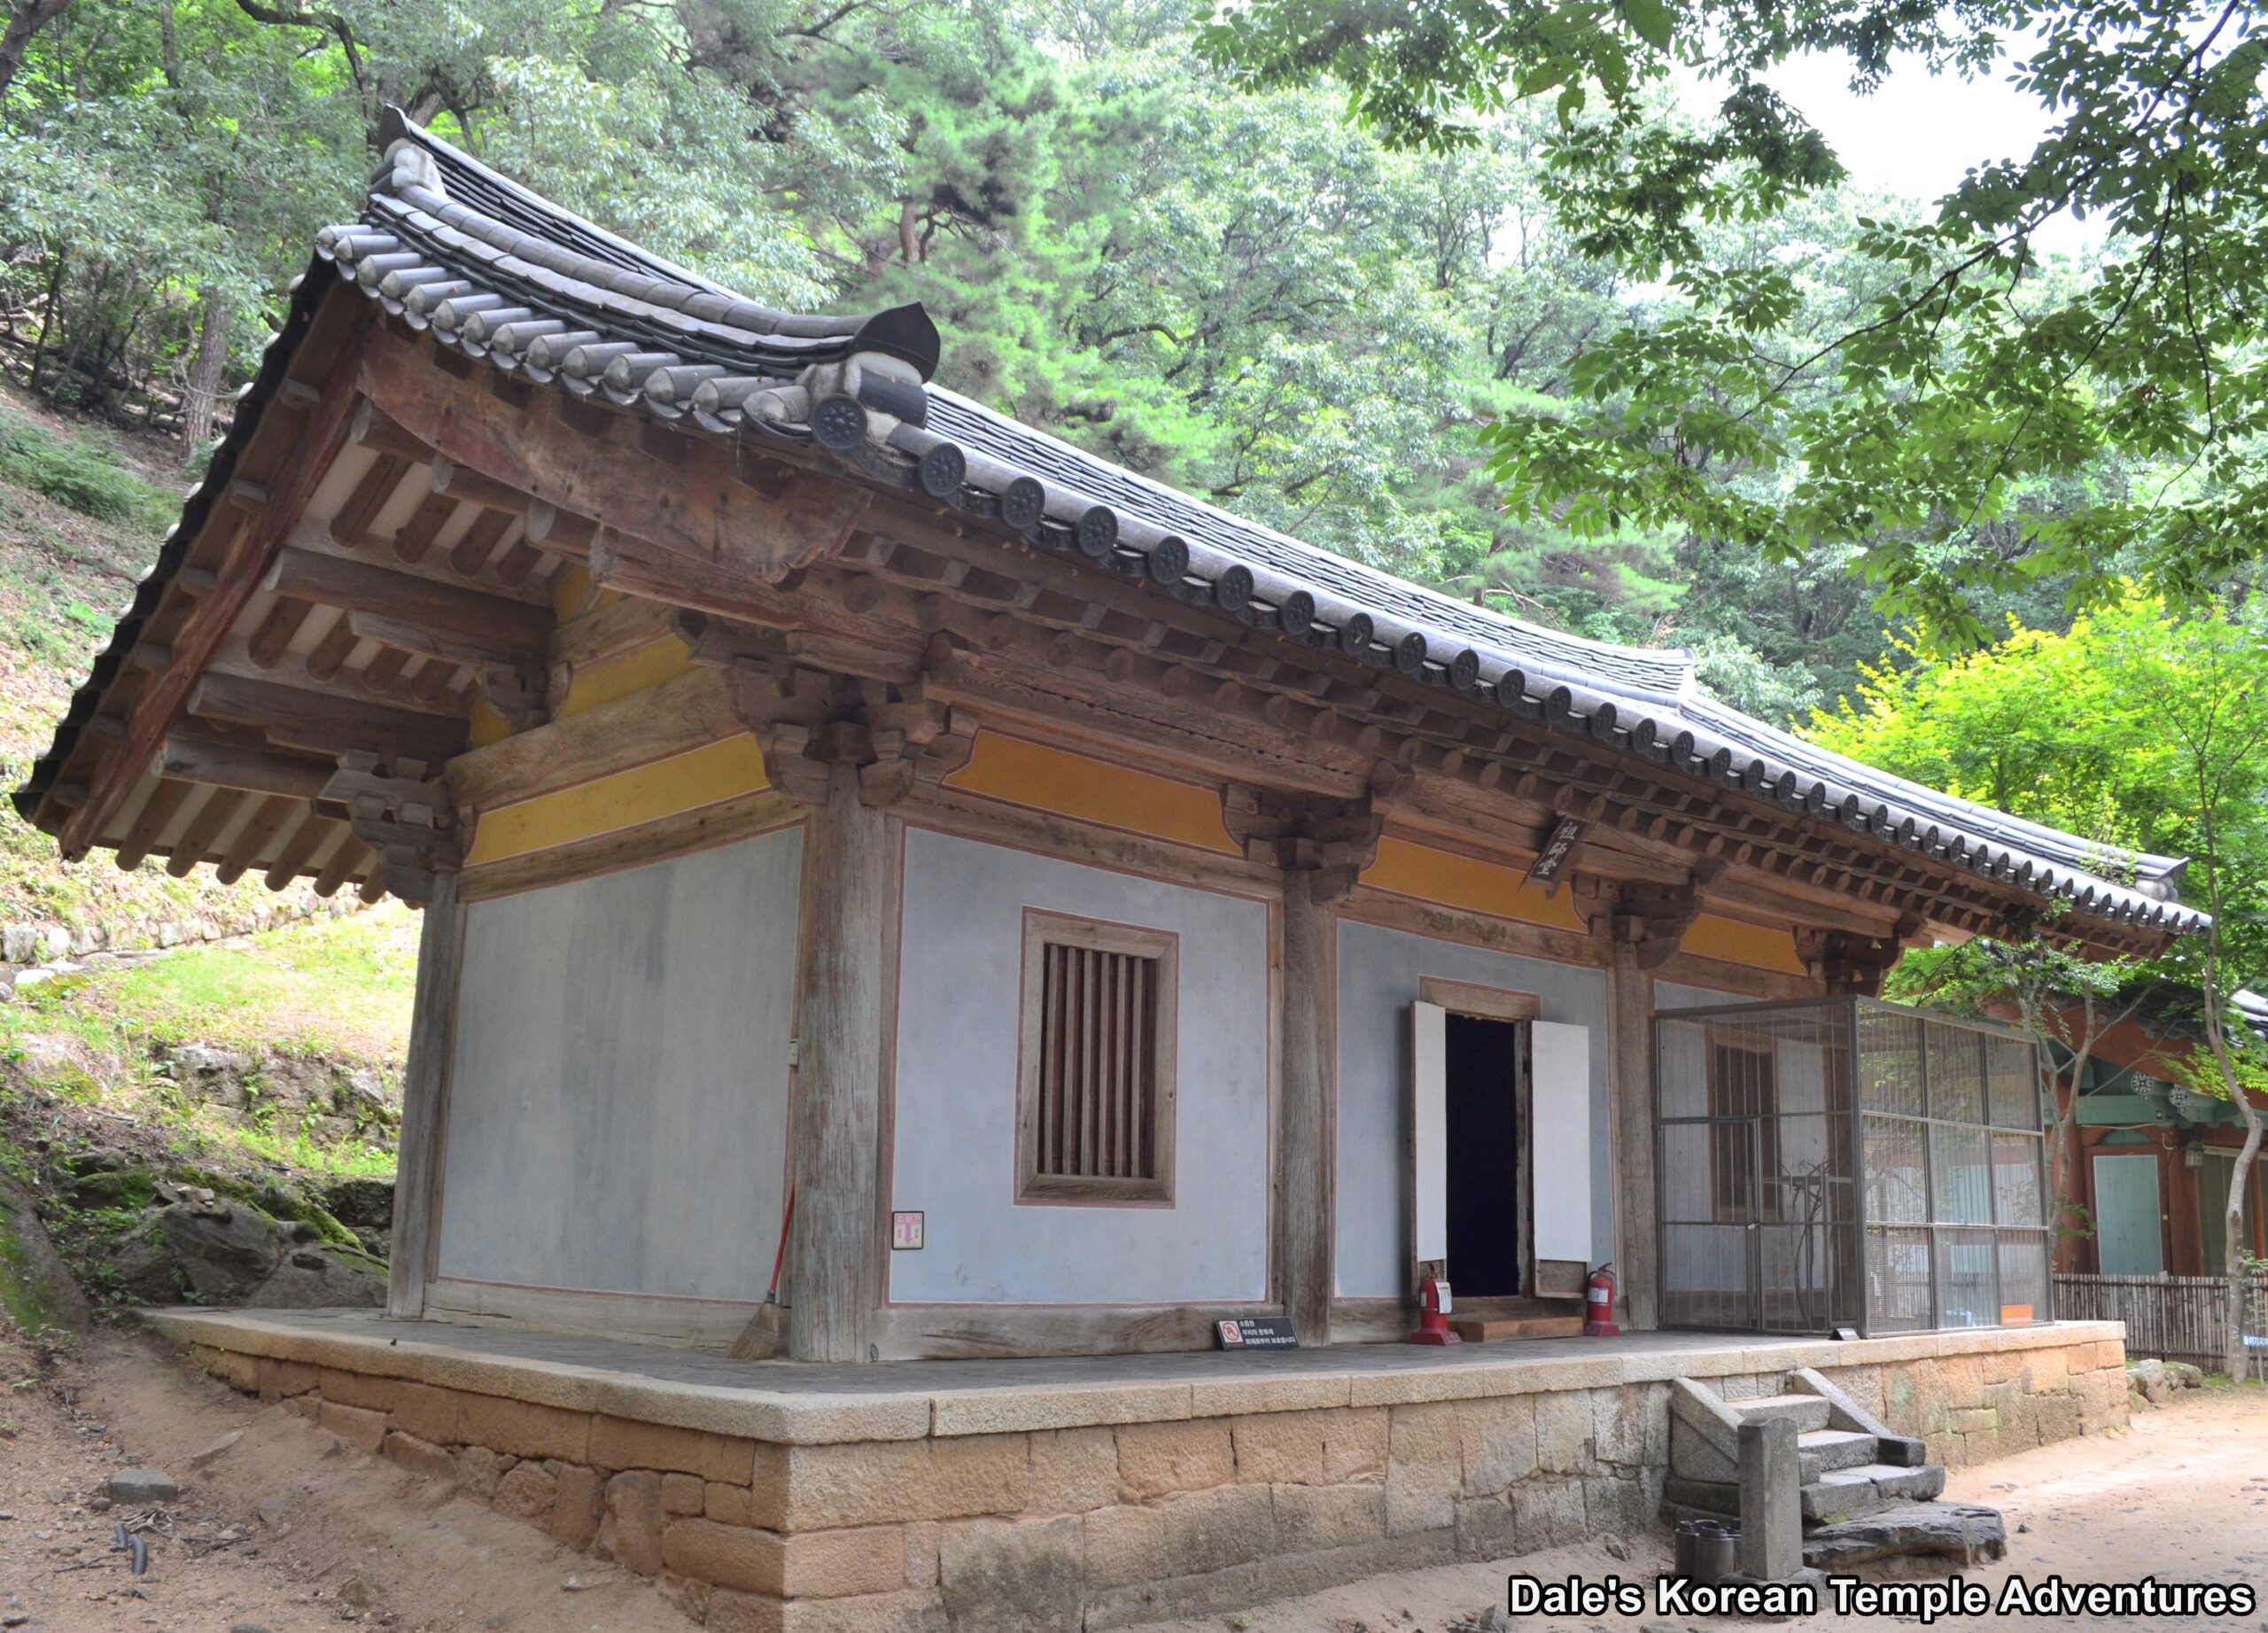
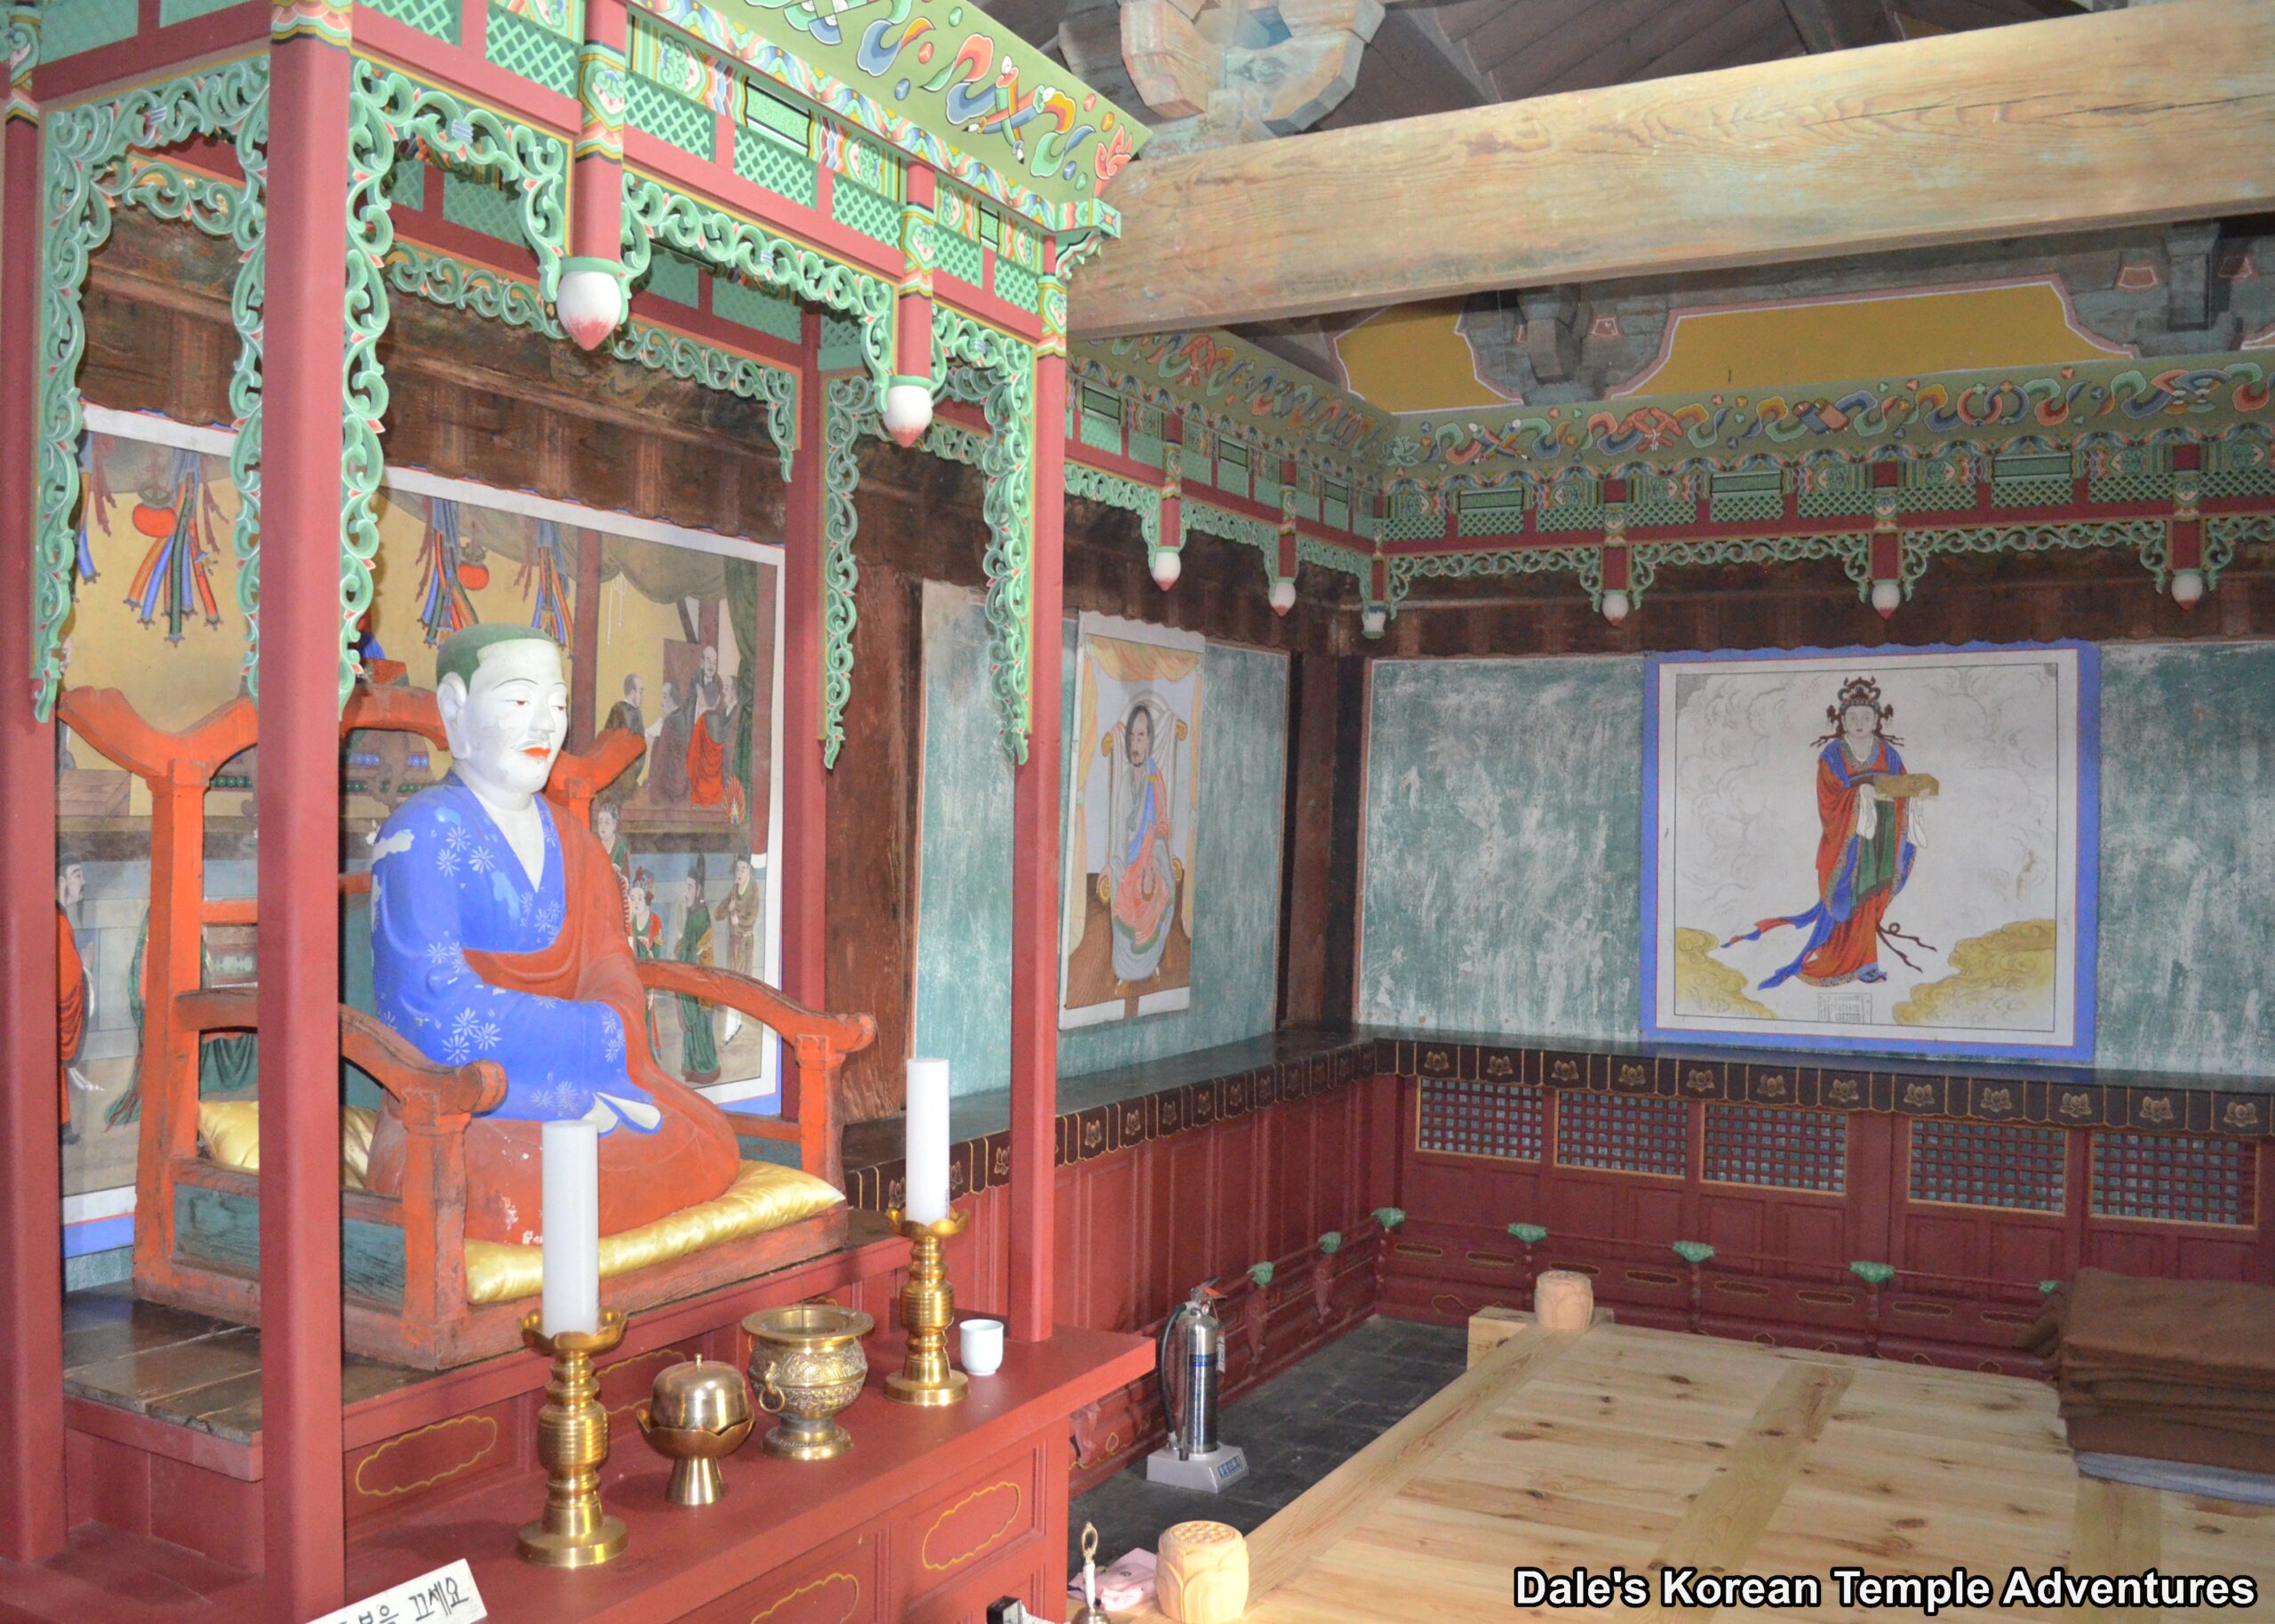
Just past the pagoda, and up the hillside a bit, you’ll find a trail that splits into two separate directions. The trail that forks to the right has a single shrine hall: the Josa-dang Hall. This is the shrine hall that dates back to 1377, and it’s also National Treasure #19. The hall is dedicated to the founding monk, Uisang-daesa. There is a statue of the monk that sits in the centre of the hall with a unique painting of the monk backing the statue. In front of the statue of Uisang to the left are right are painted murals of the Four Heavenly Kings that date back to the late Goryeo Dynasty. The murals are some of the rarest paintings in Korea because they are the oldest Buddhist paintings in Korea. They are now housed in a special protective building at the temple. The ones that now take up residence in the Josa-dang Hall are excellent copies of the originals. The originals are National Treasure #46.
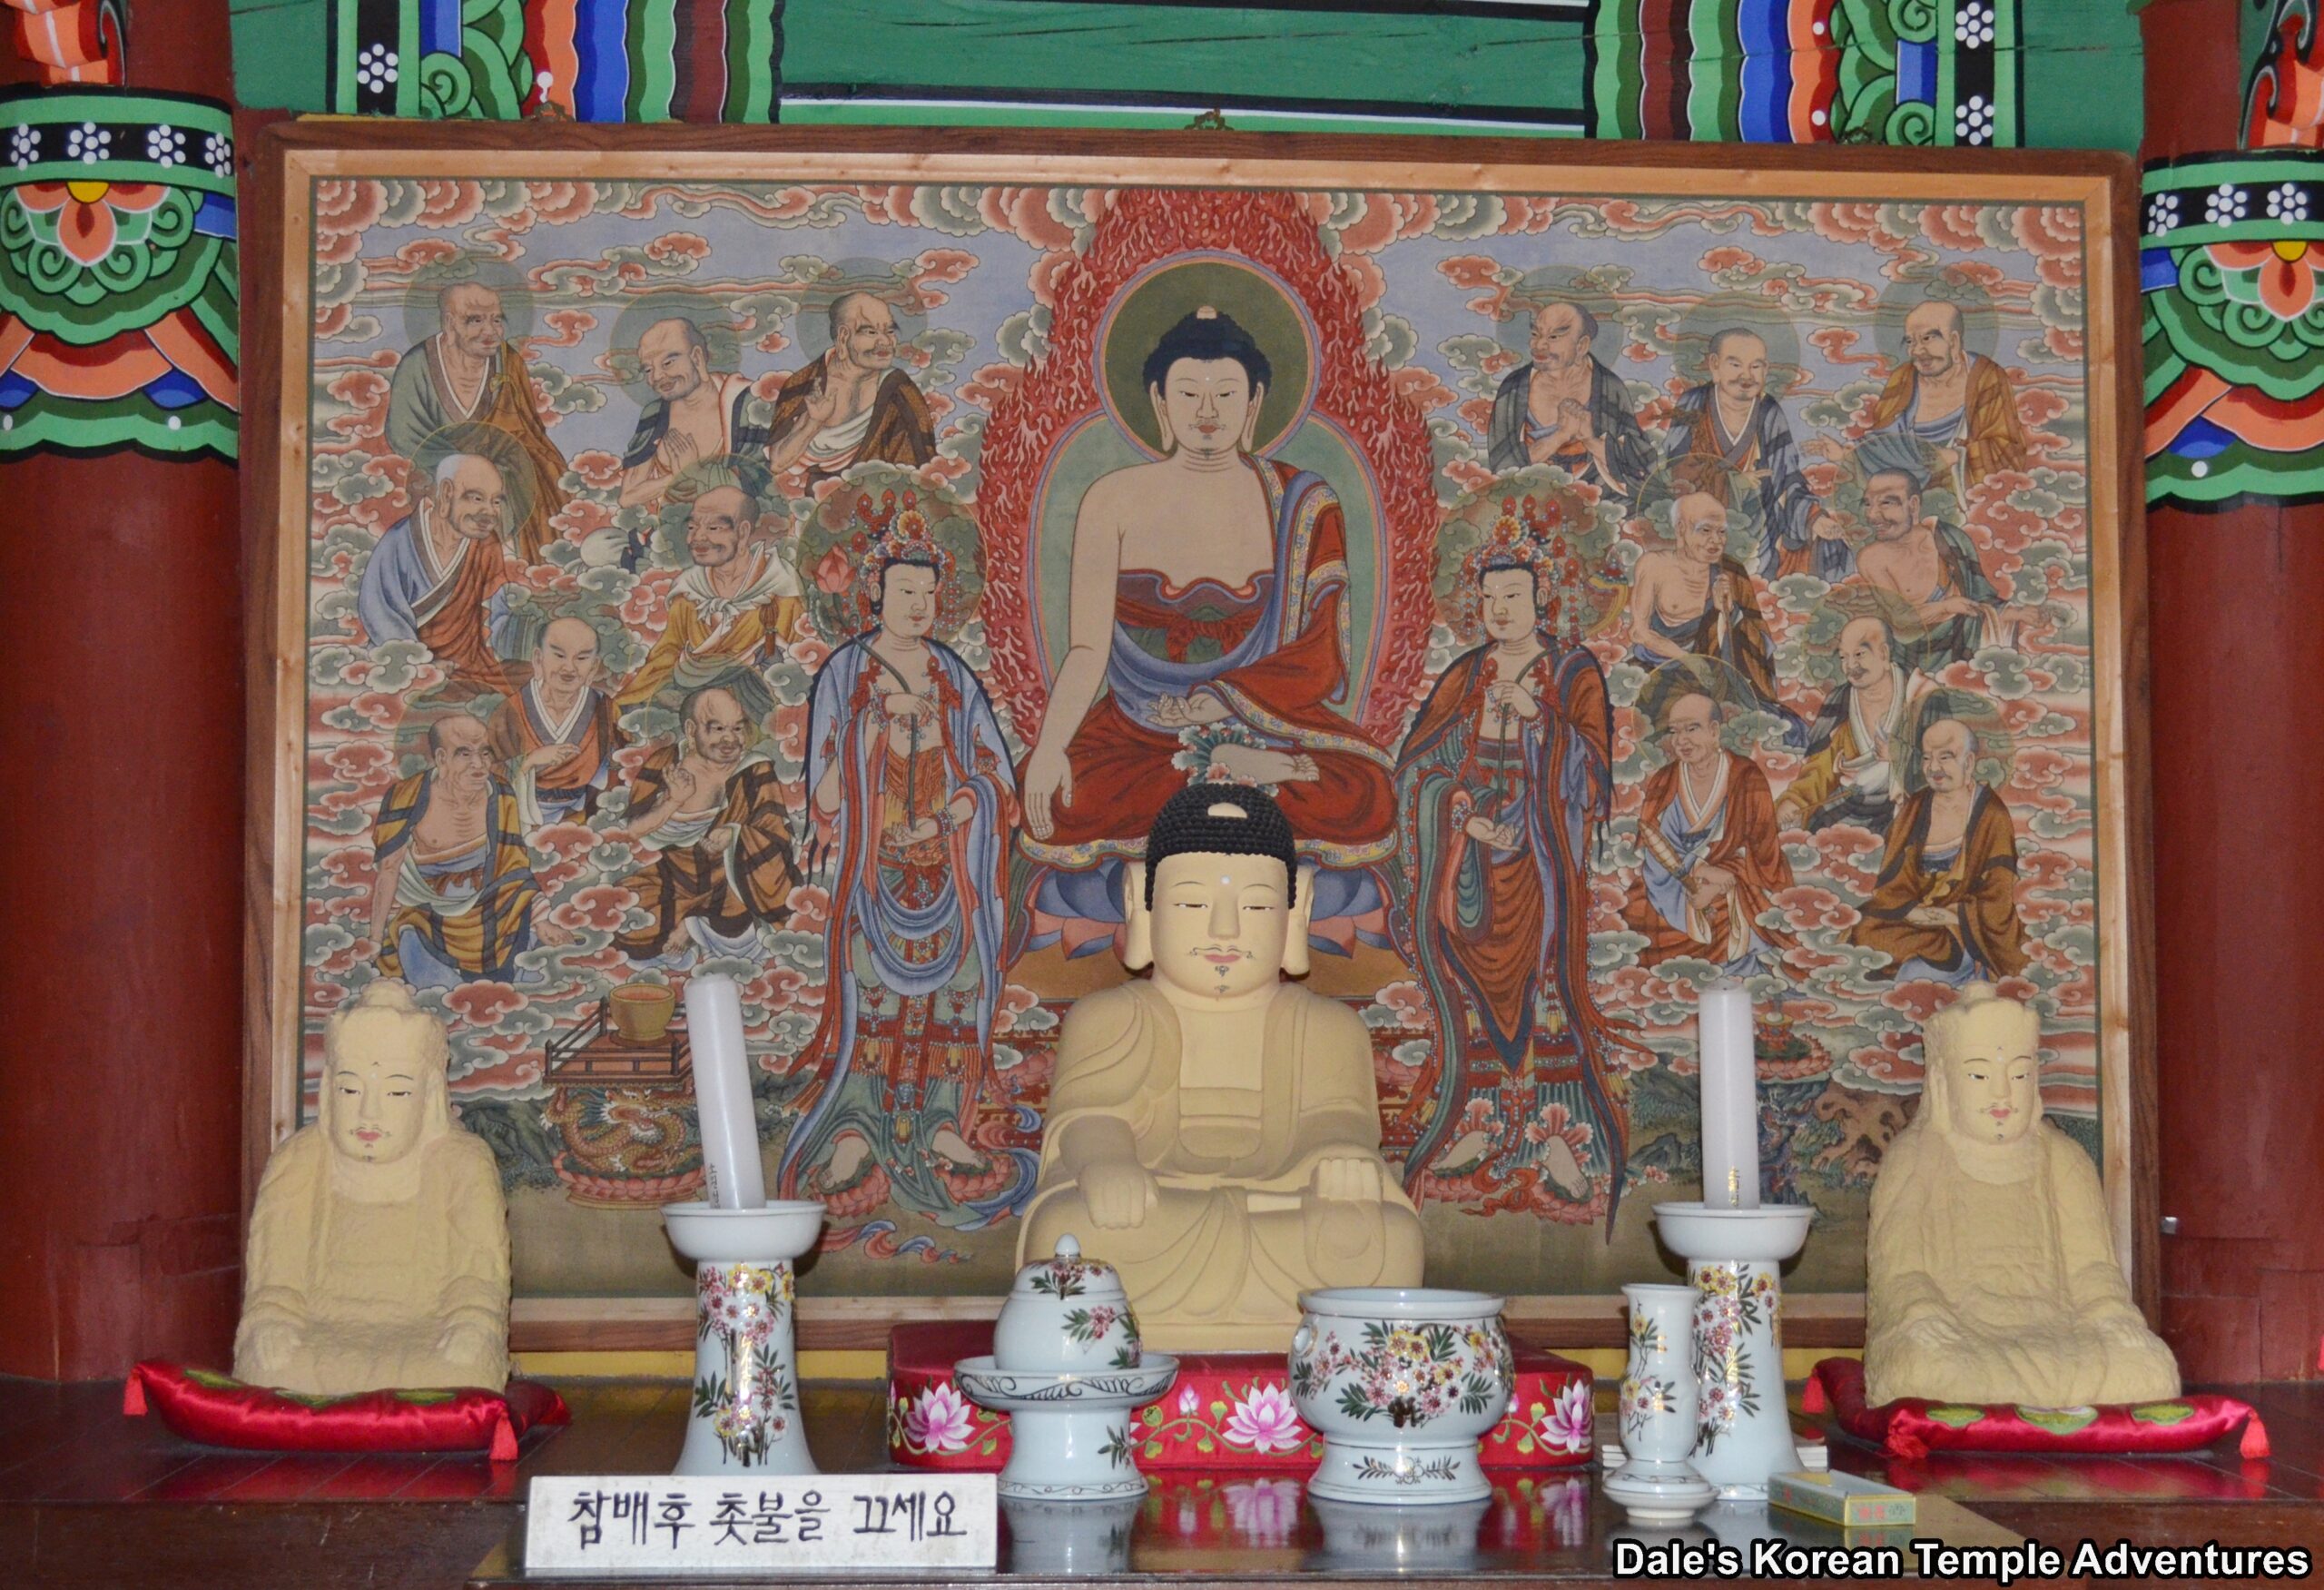
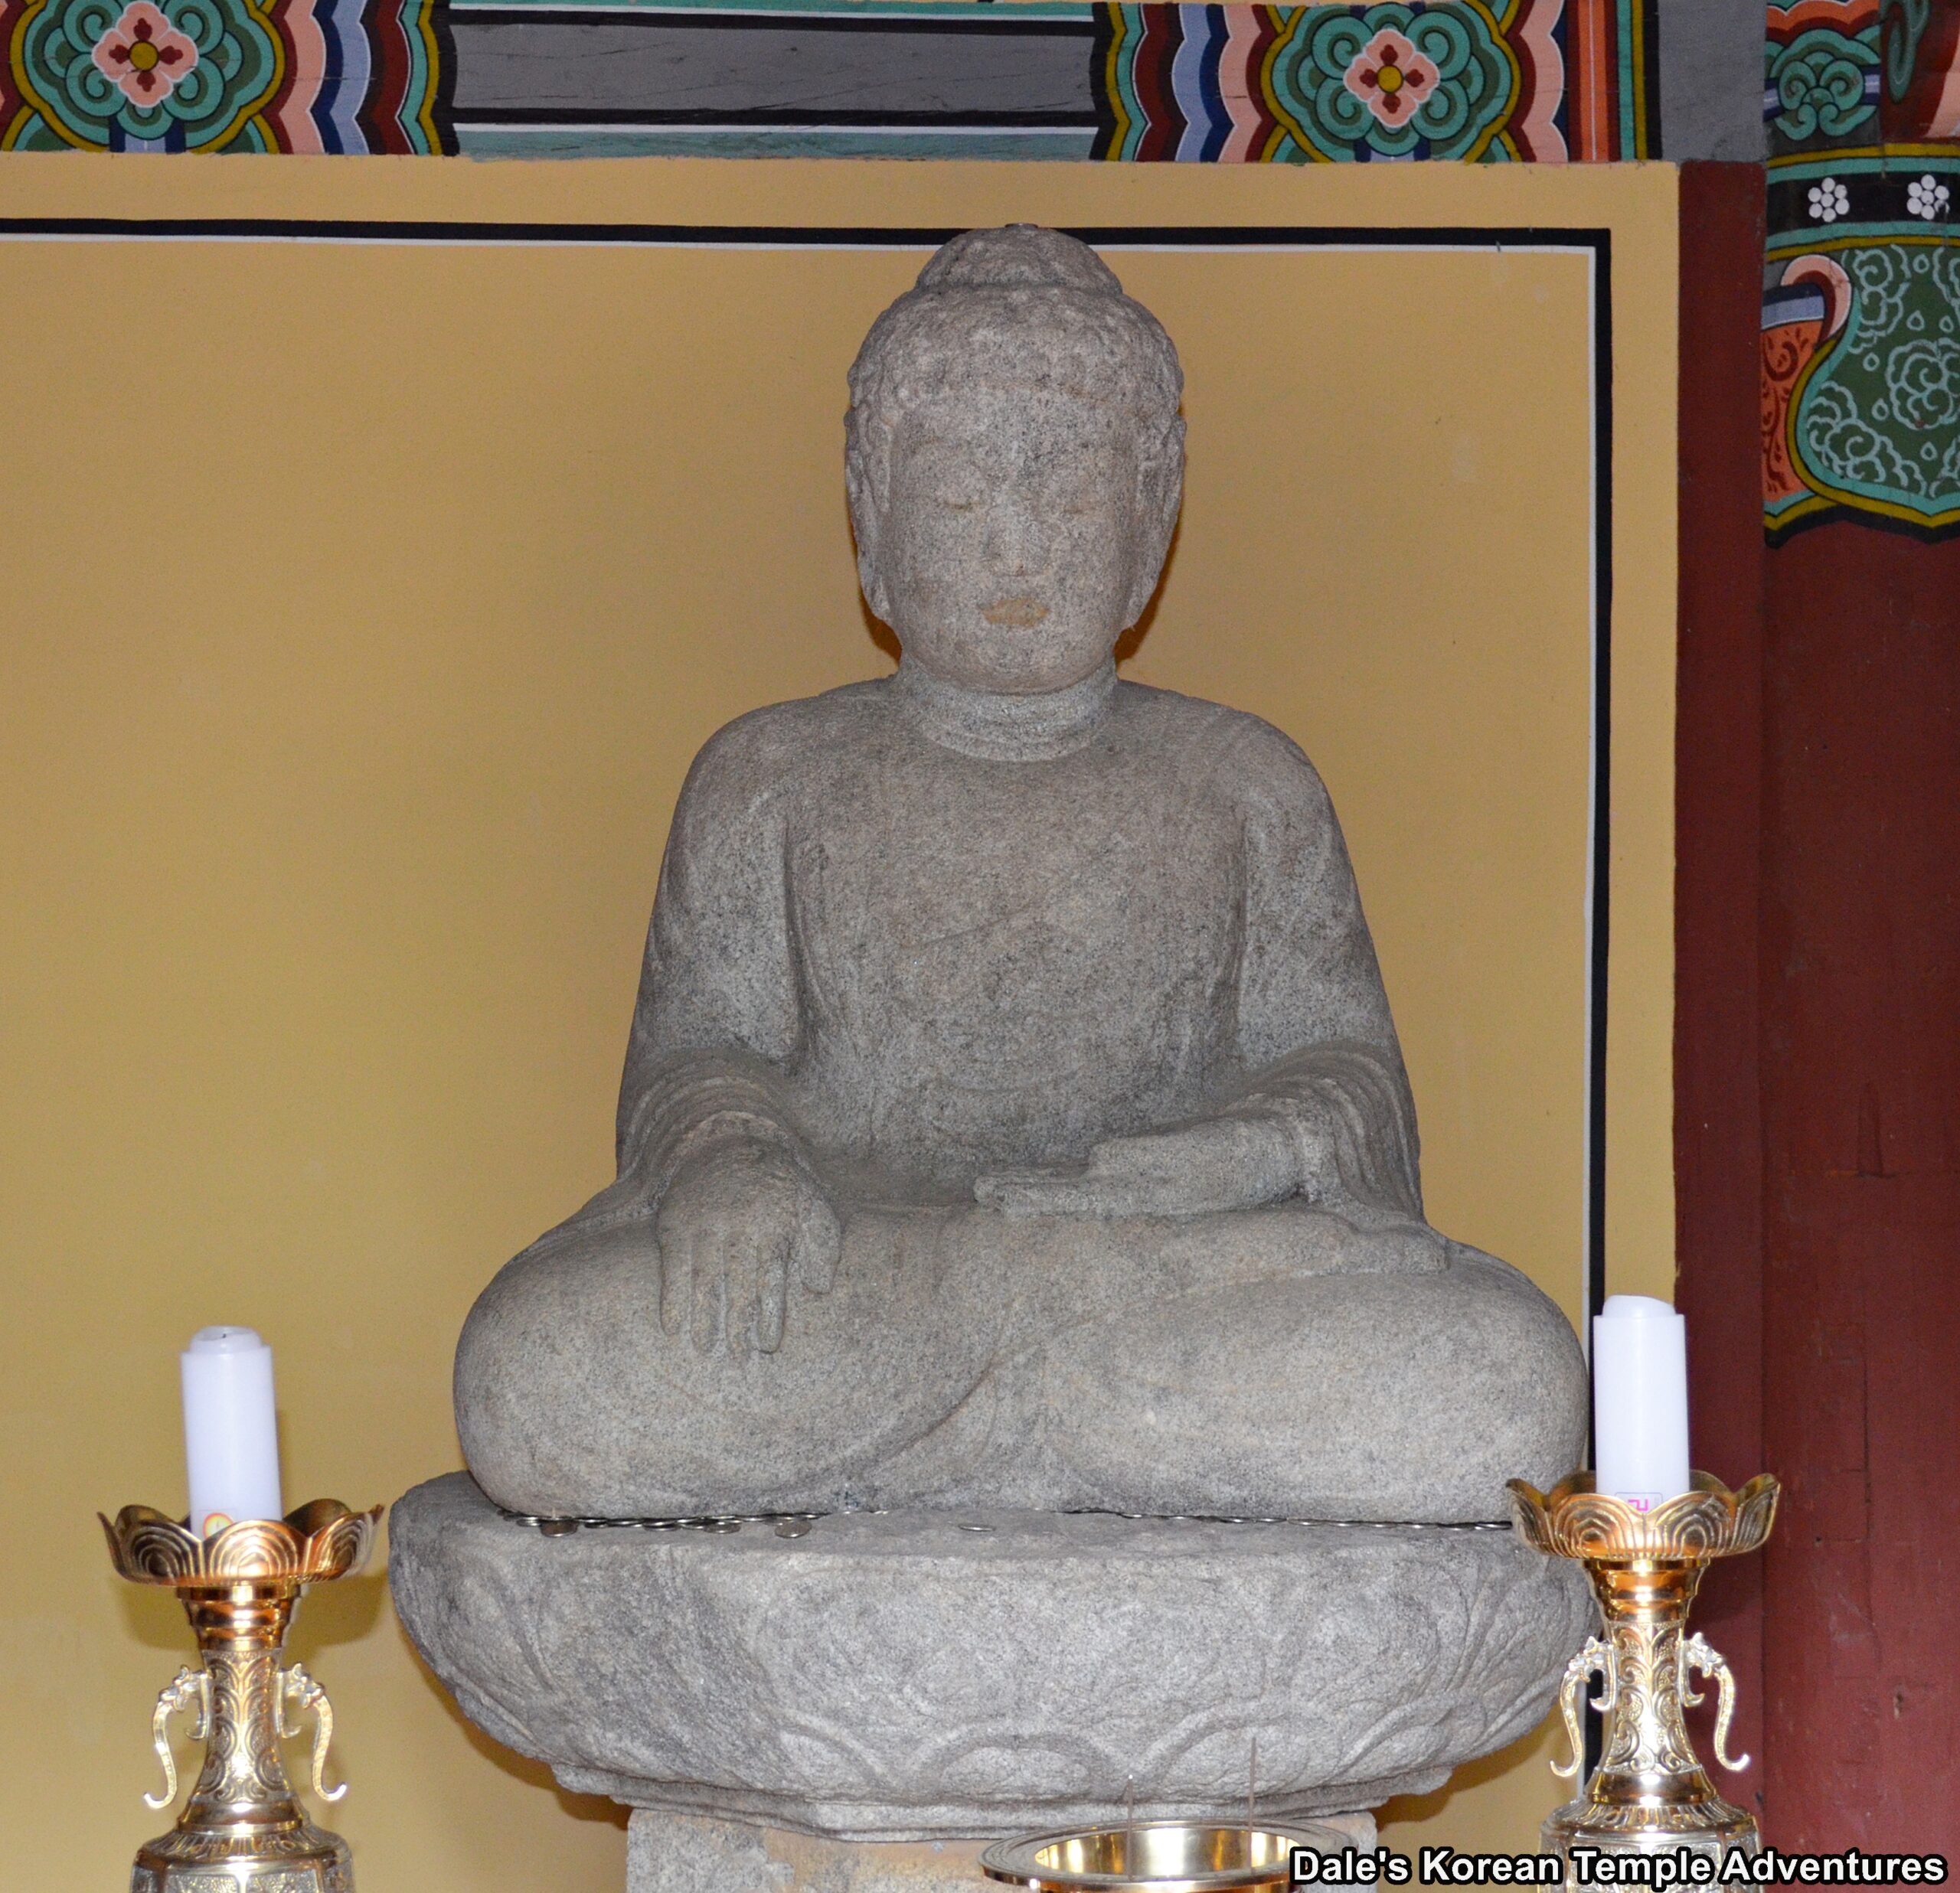
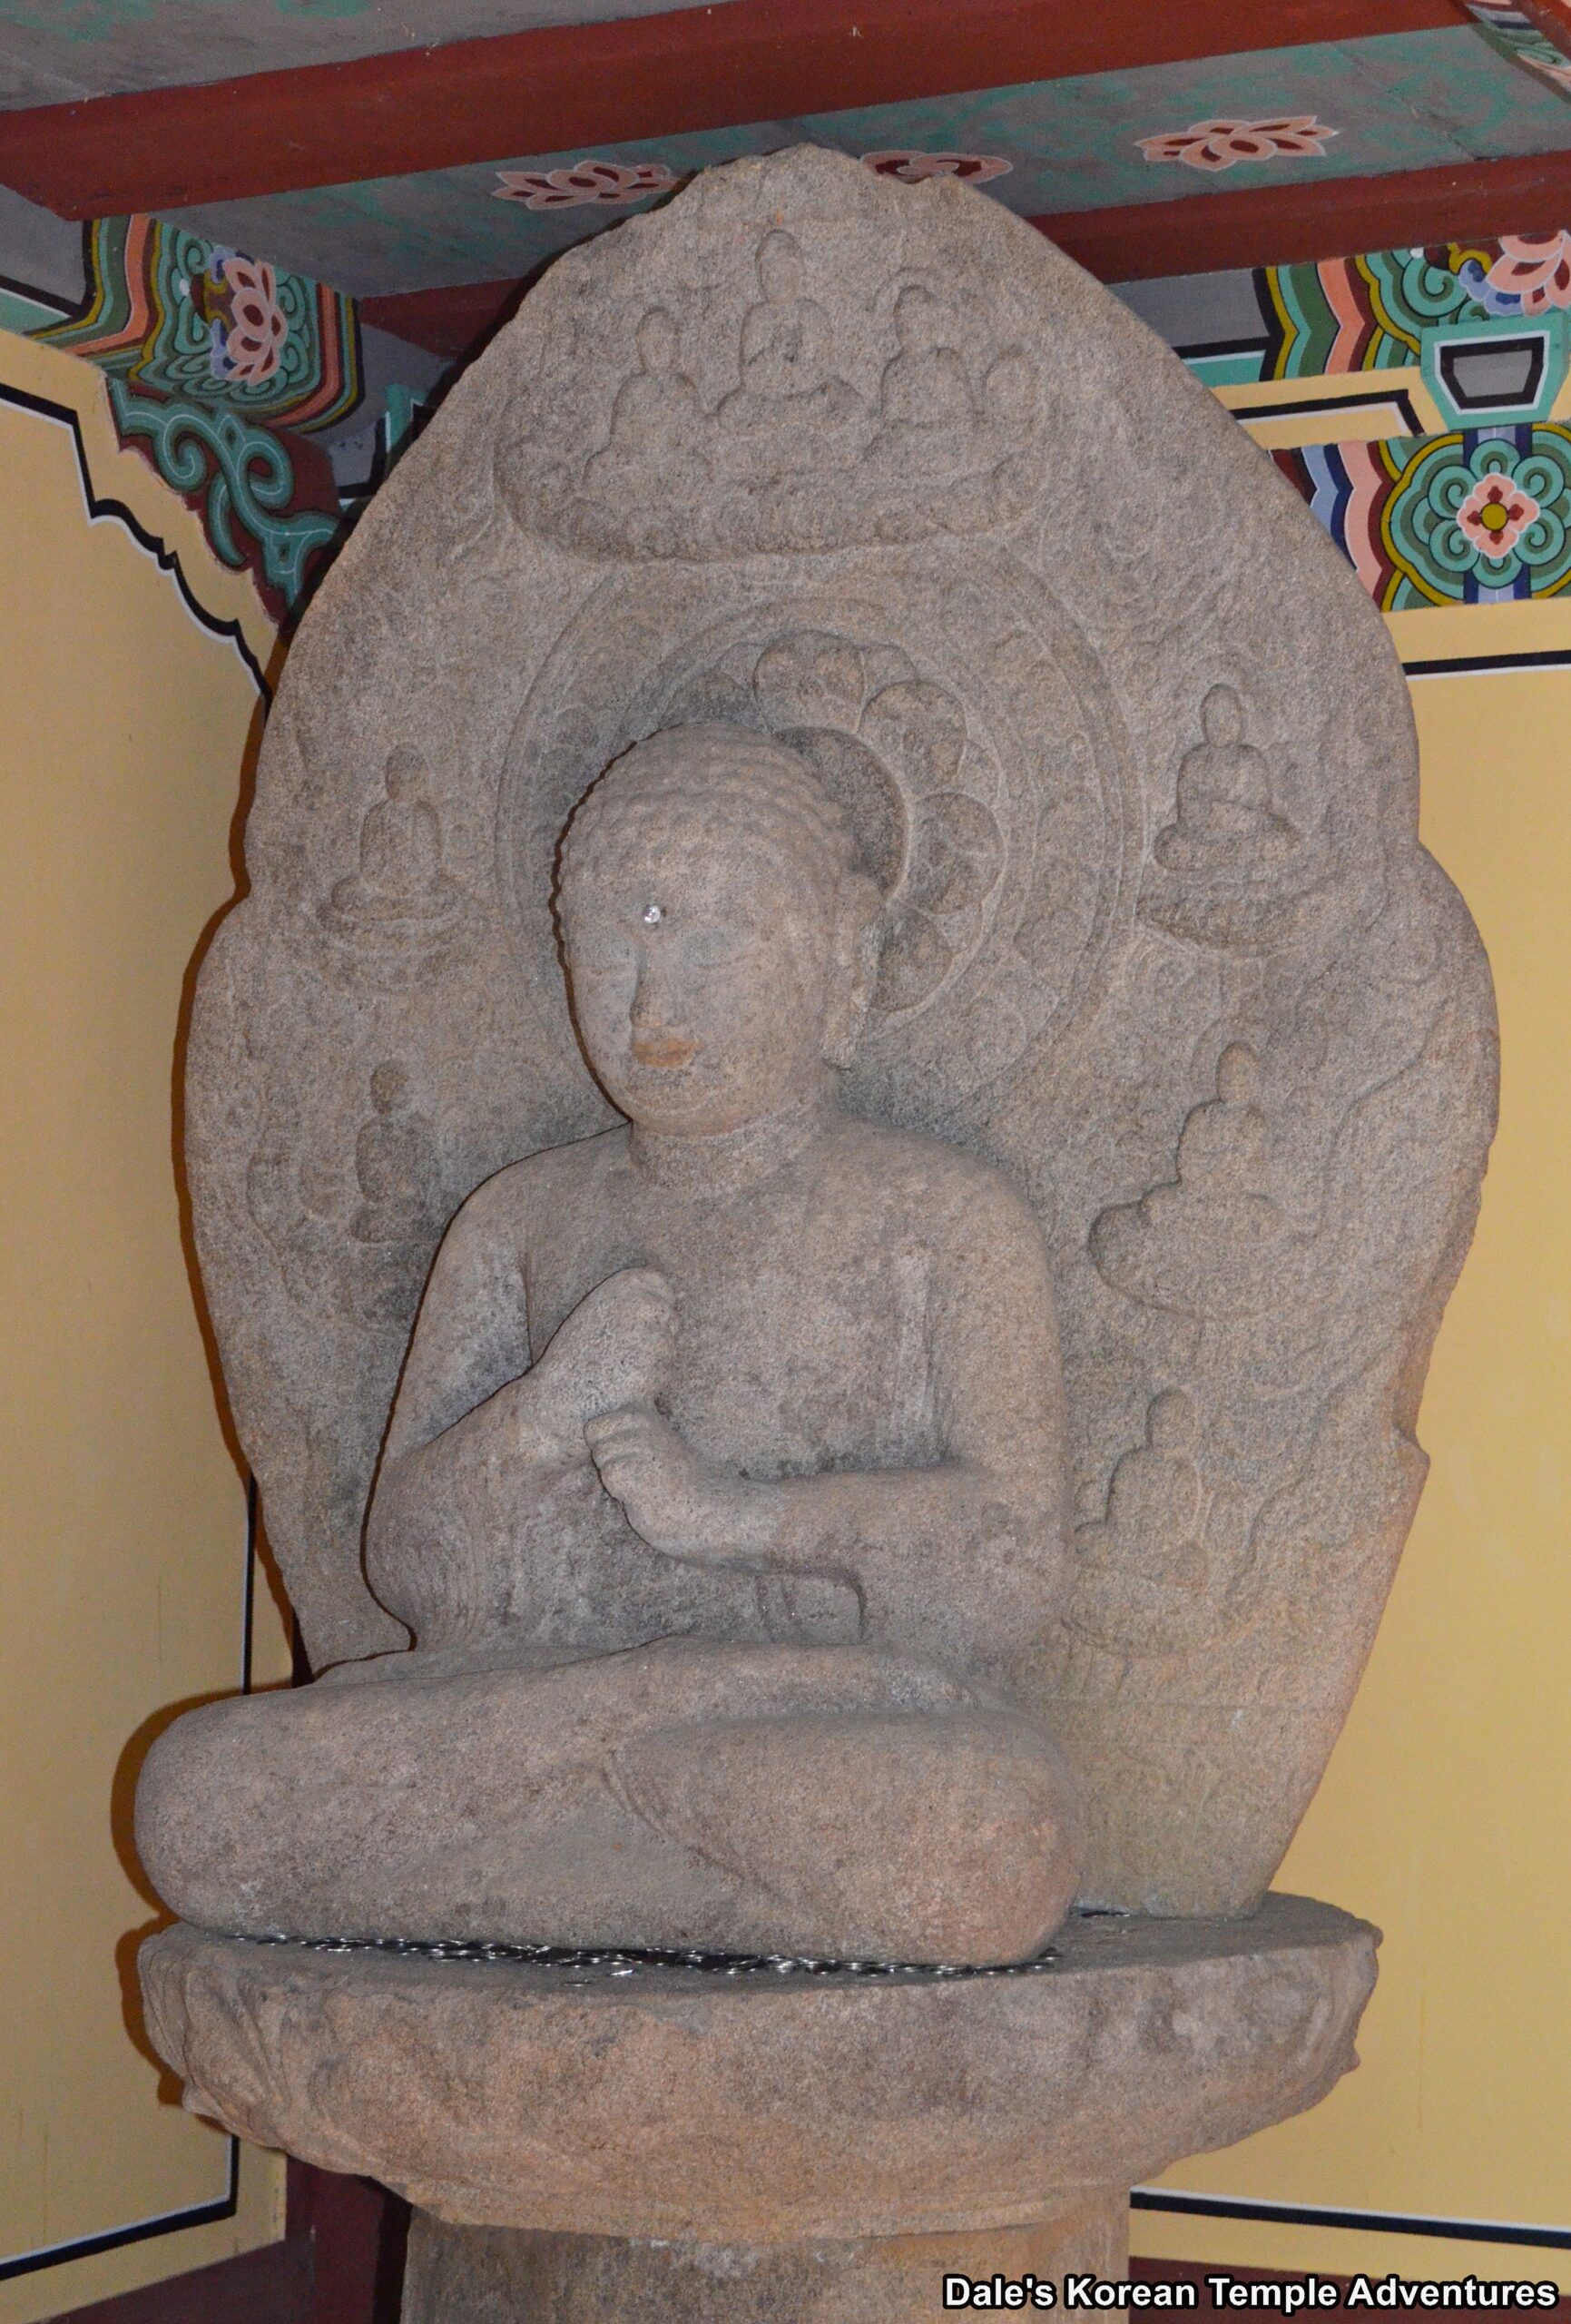
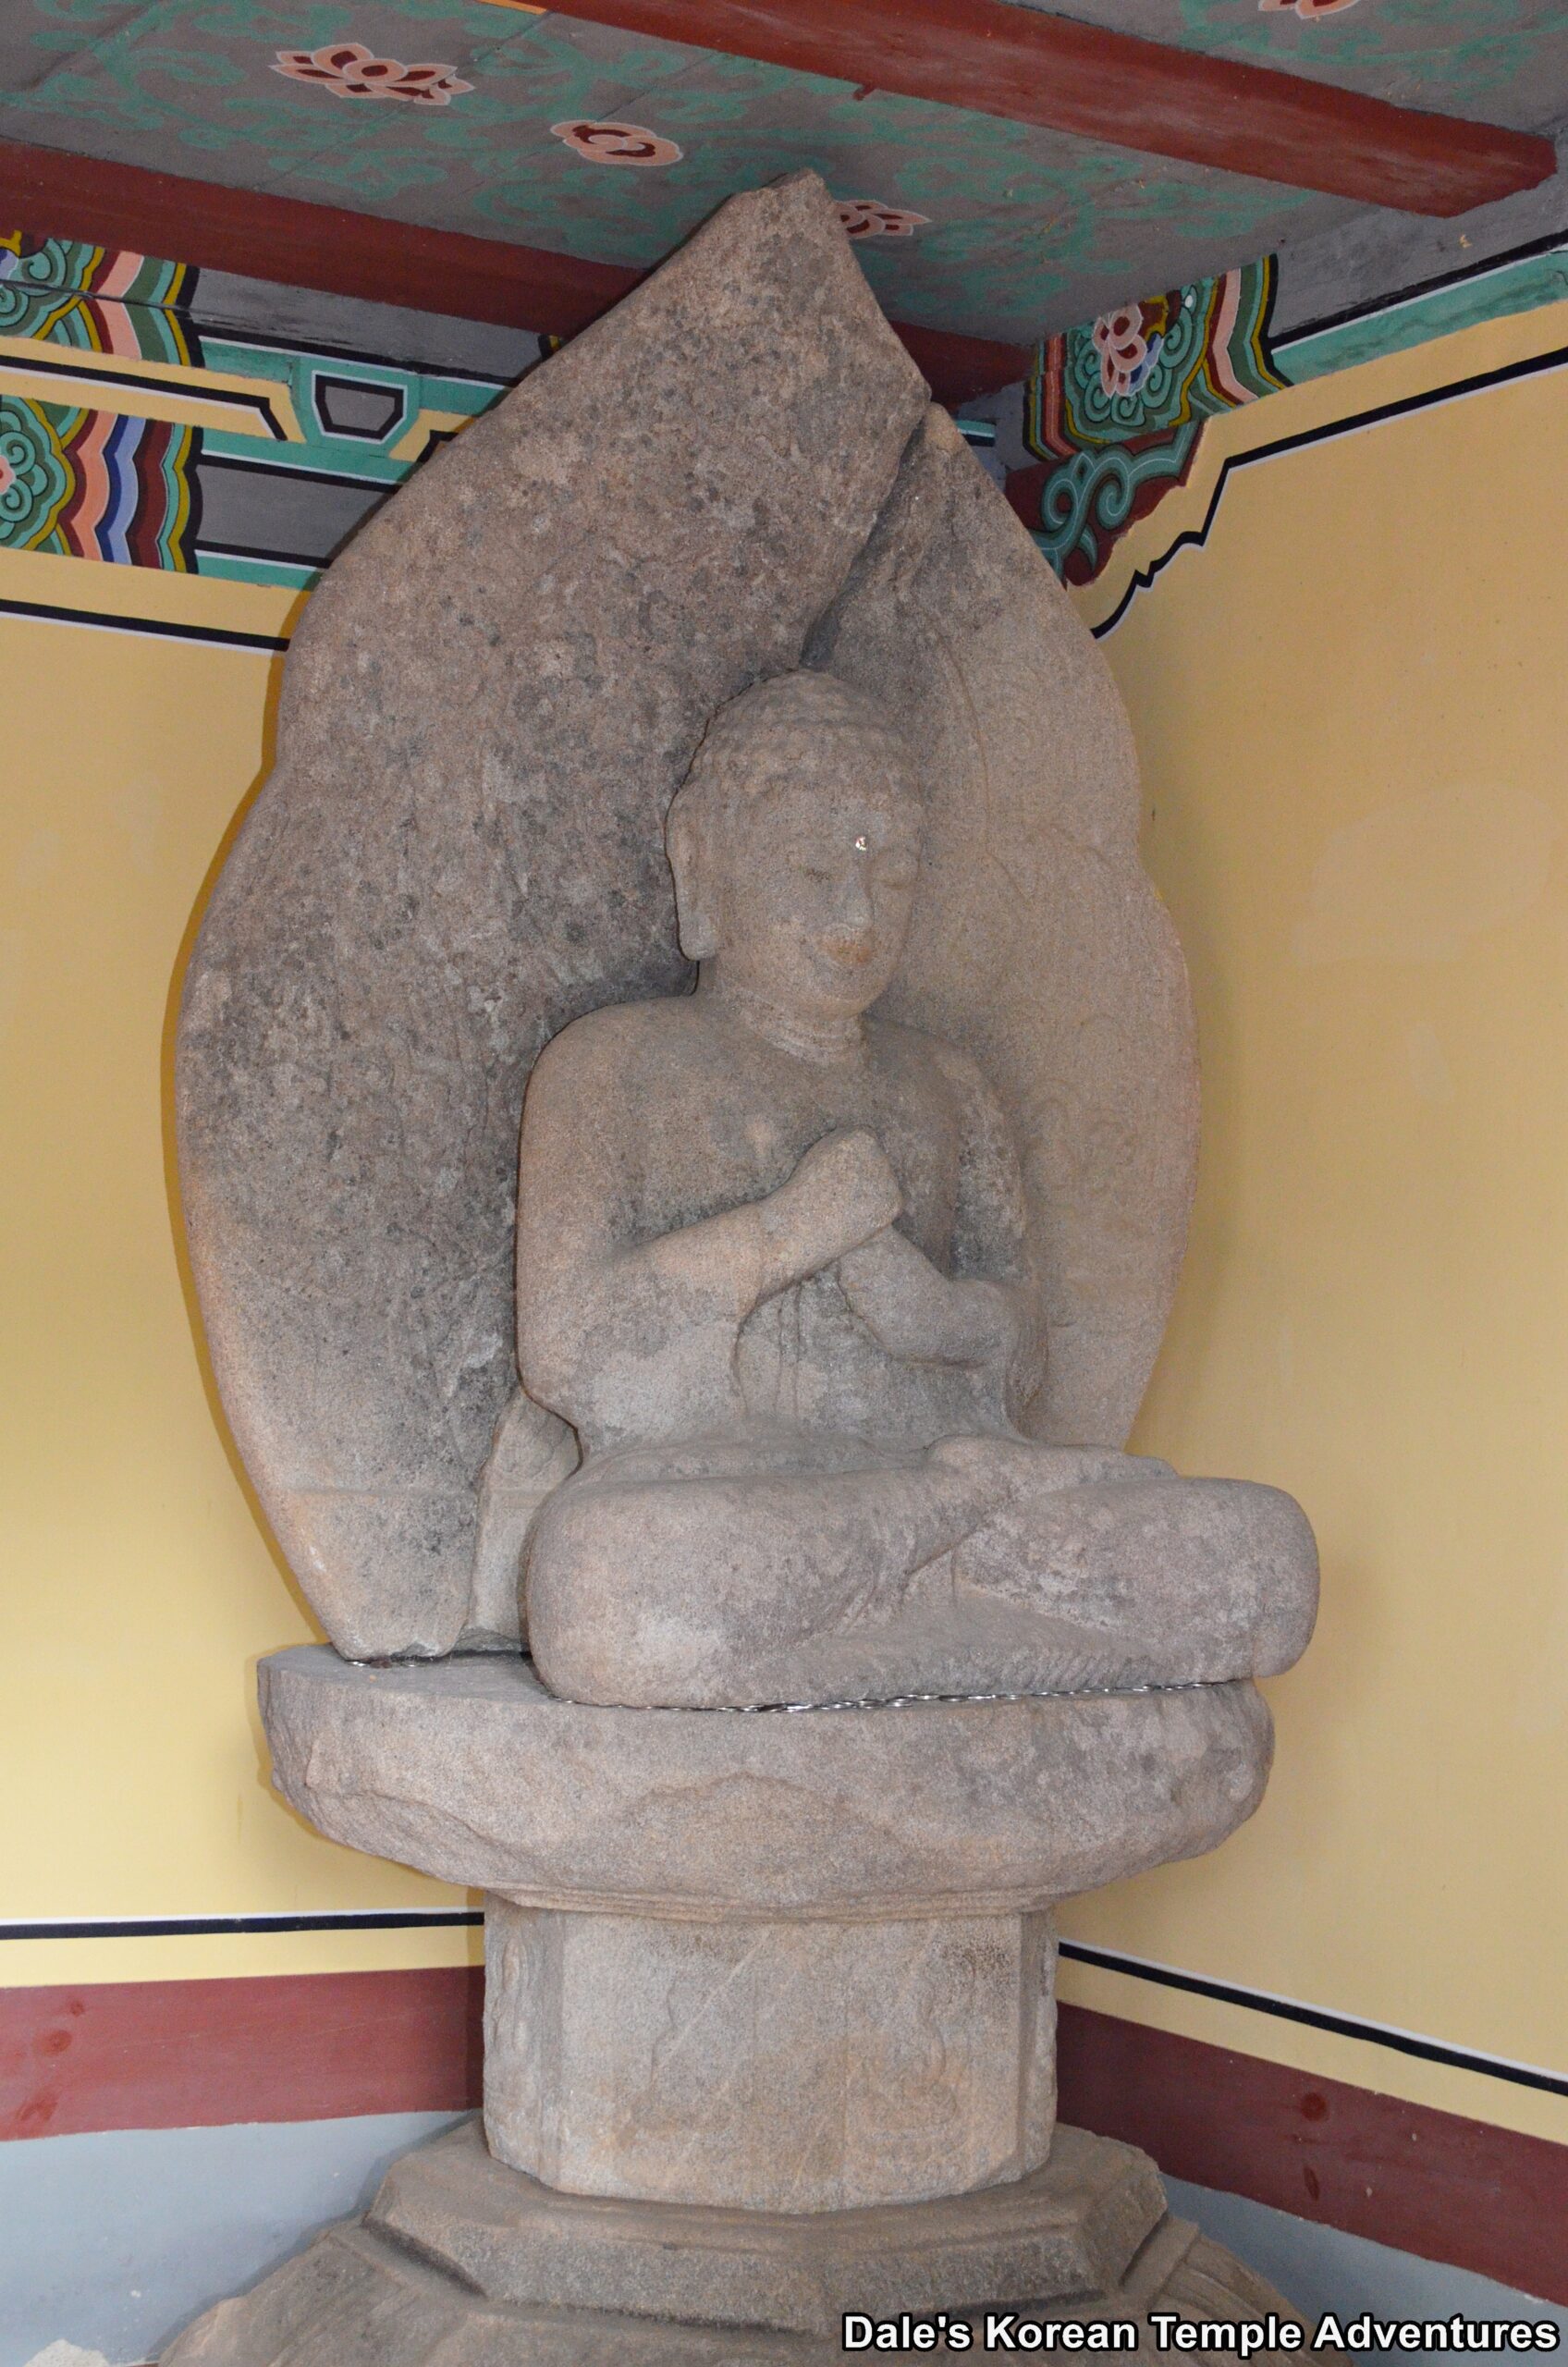
The trail that forks to the left leads up to an area that houses three temple shrine halls. The small one on the far right is the Nahan-jeon Hall. The hall is dedicated to the historical disciples of the Buddha. The building to the left is the Jain-dang Hall. Inside are housed three ancient stone statues. The central statue is of Seokgamoni-bul (The Historical Buddha). This statue dates back to the Later Silla Dynasty, and it’s Korean Treasure #1636. This statue is flanked by a pair Birojana-bul (The Buddha of Cosmic Energy) statues. These statues were previously located to the east of Buseoksa Temple. The twin statues of Birojana-bul also date back to the Later Silla Dynasty and are Korean Treasure #220-1 and #220-2, respectively.
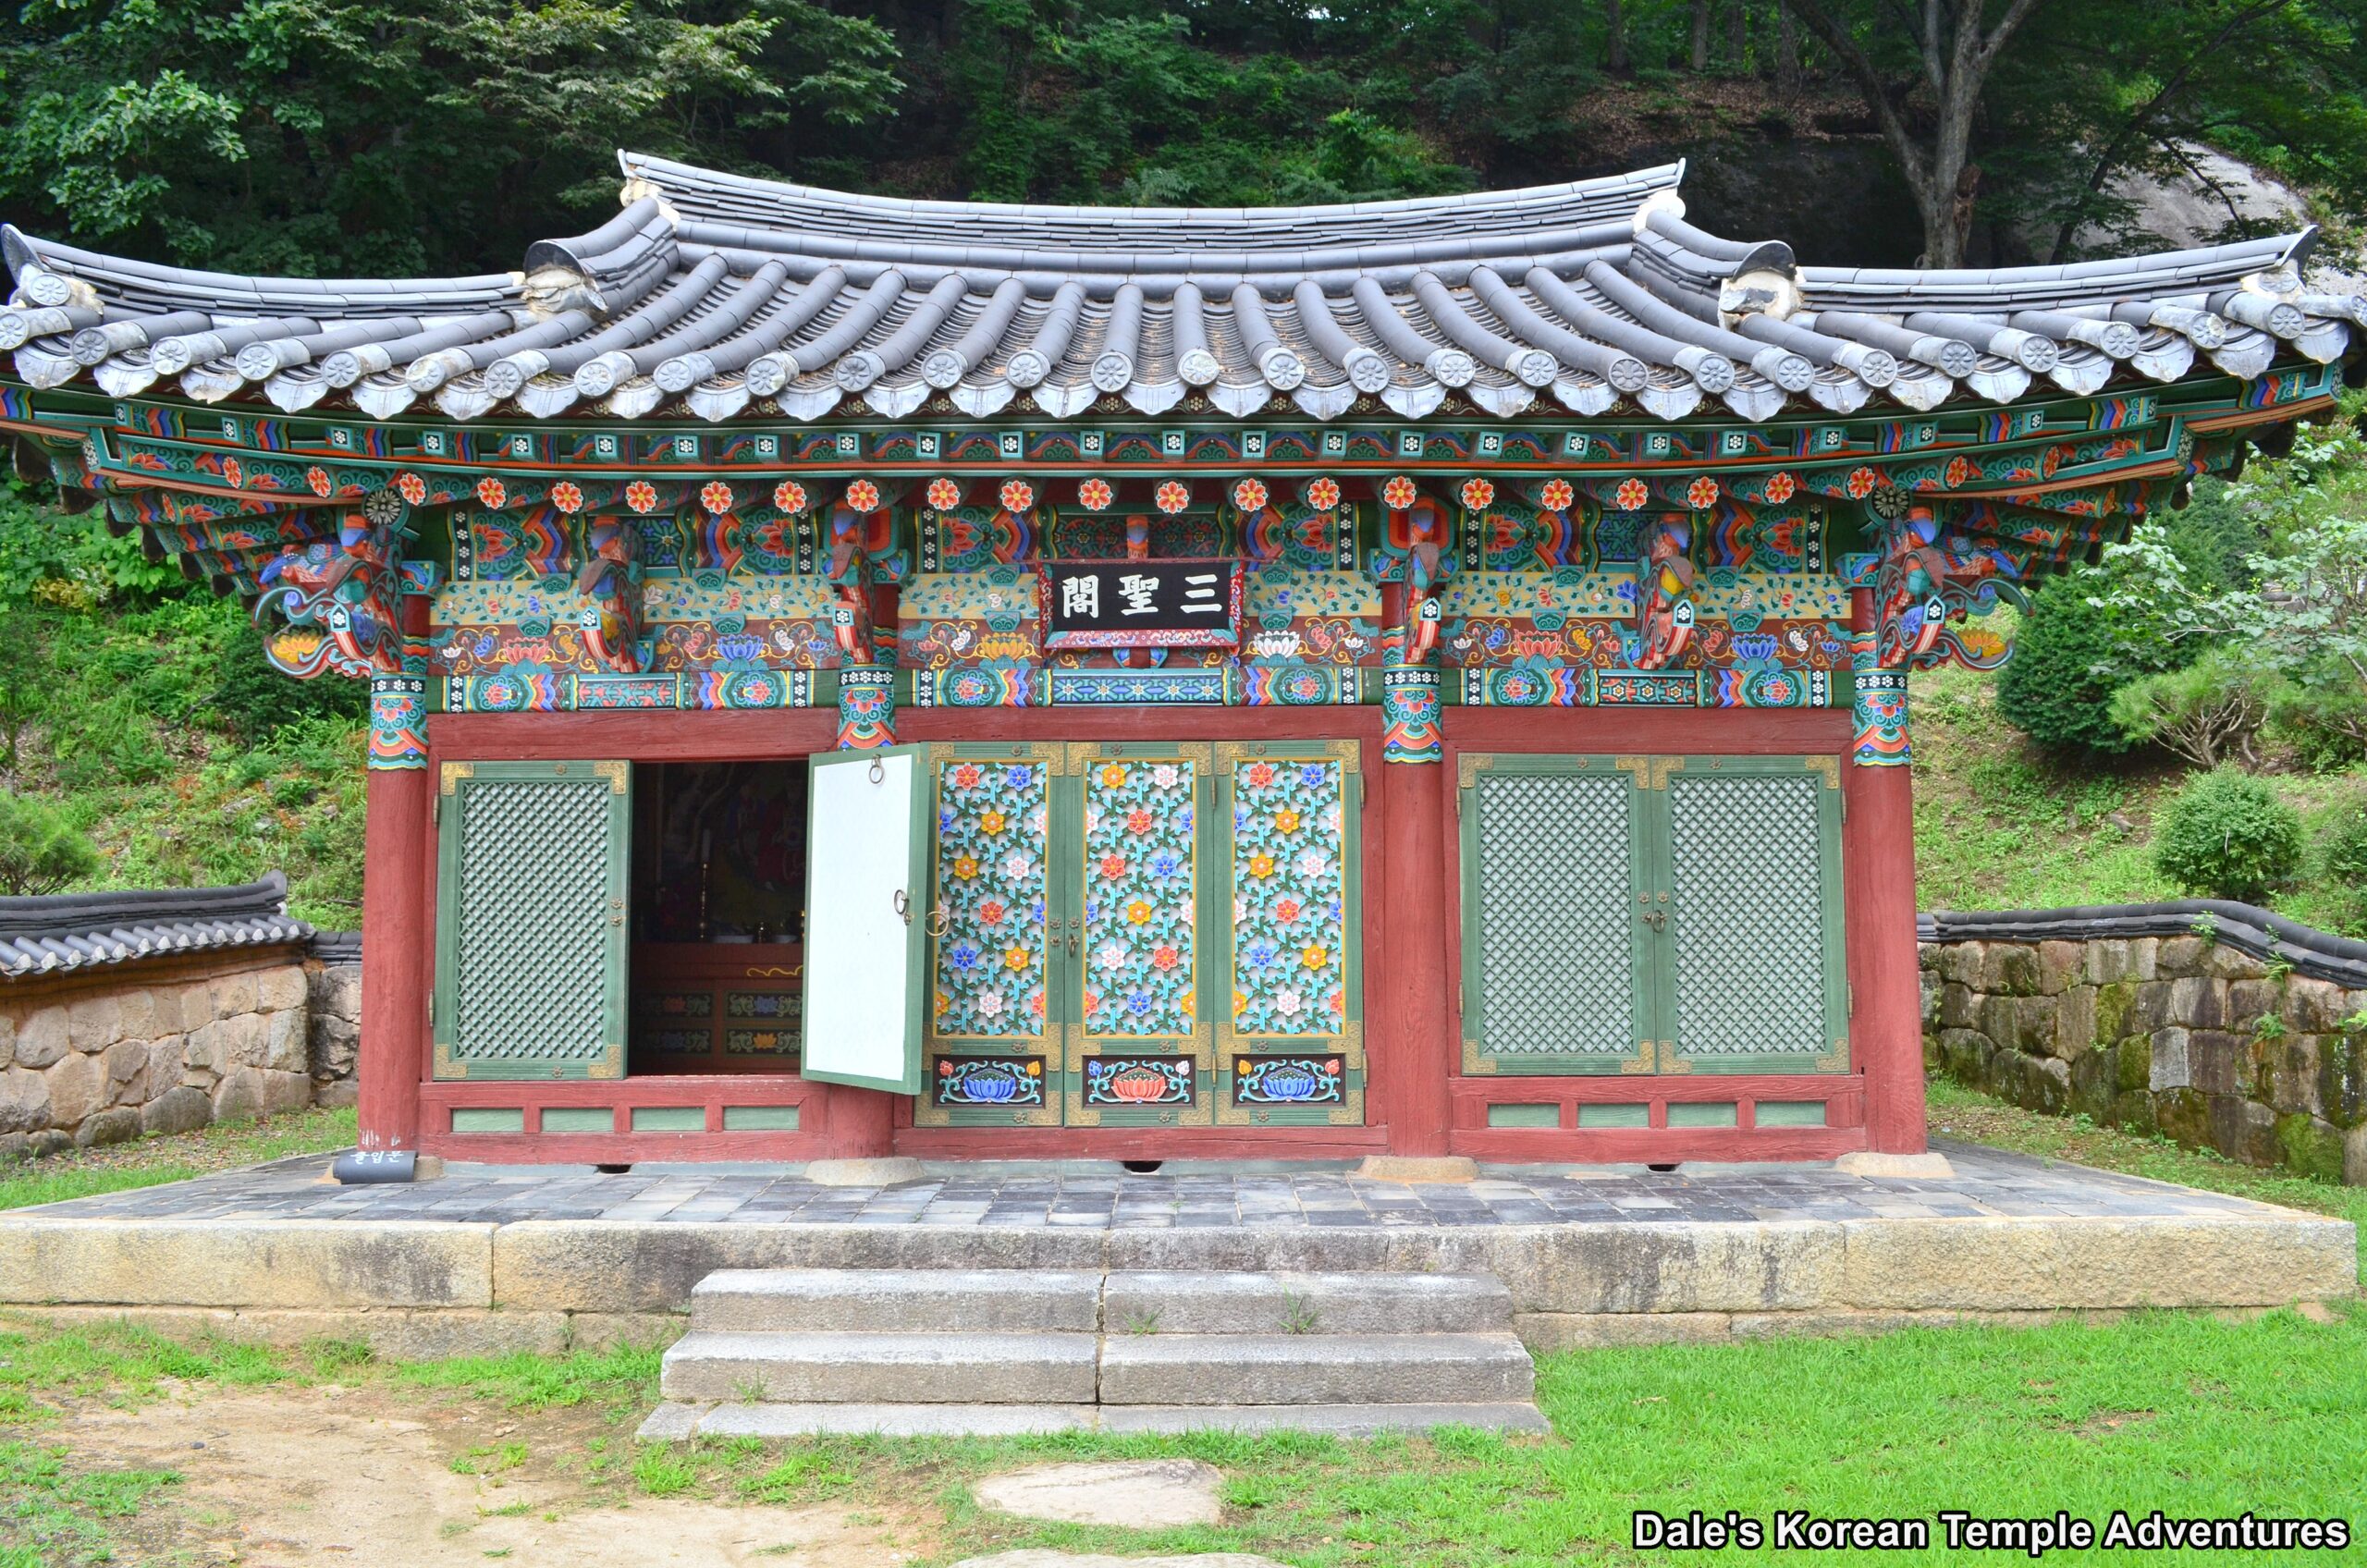
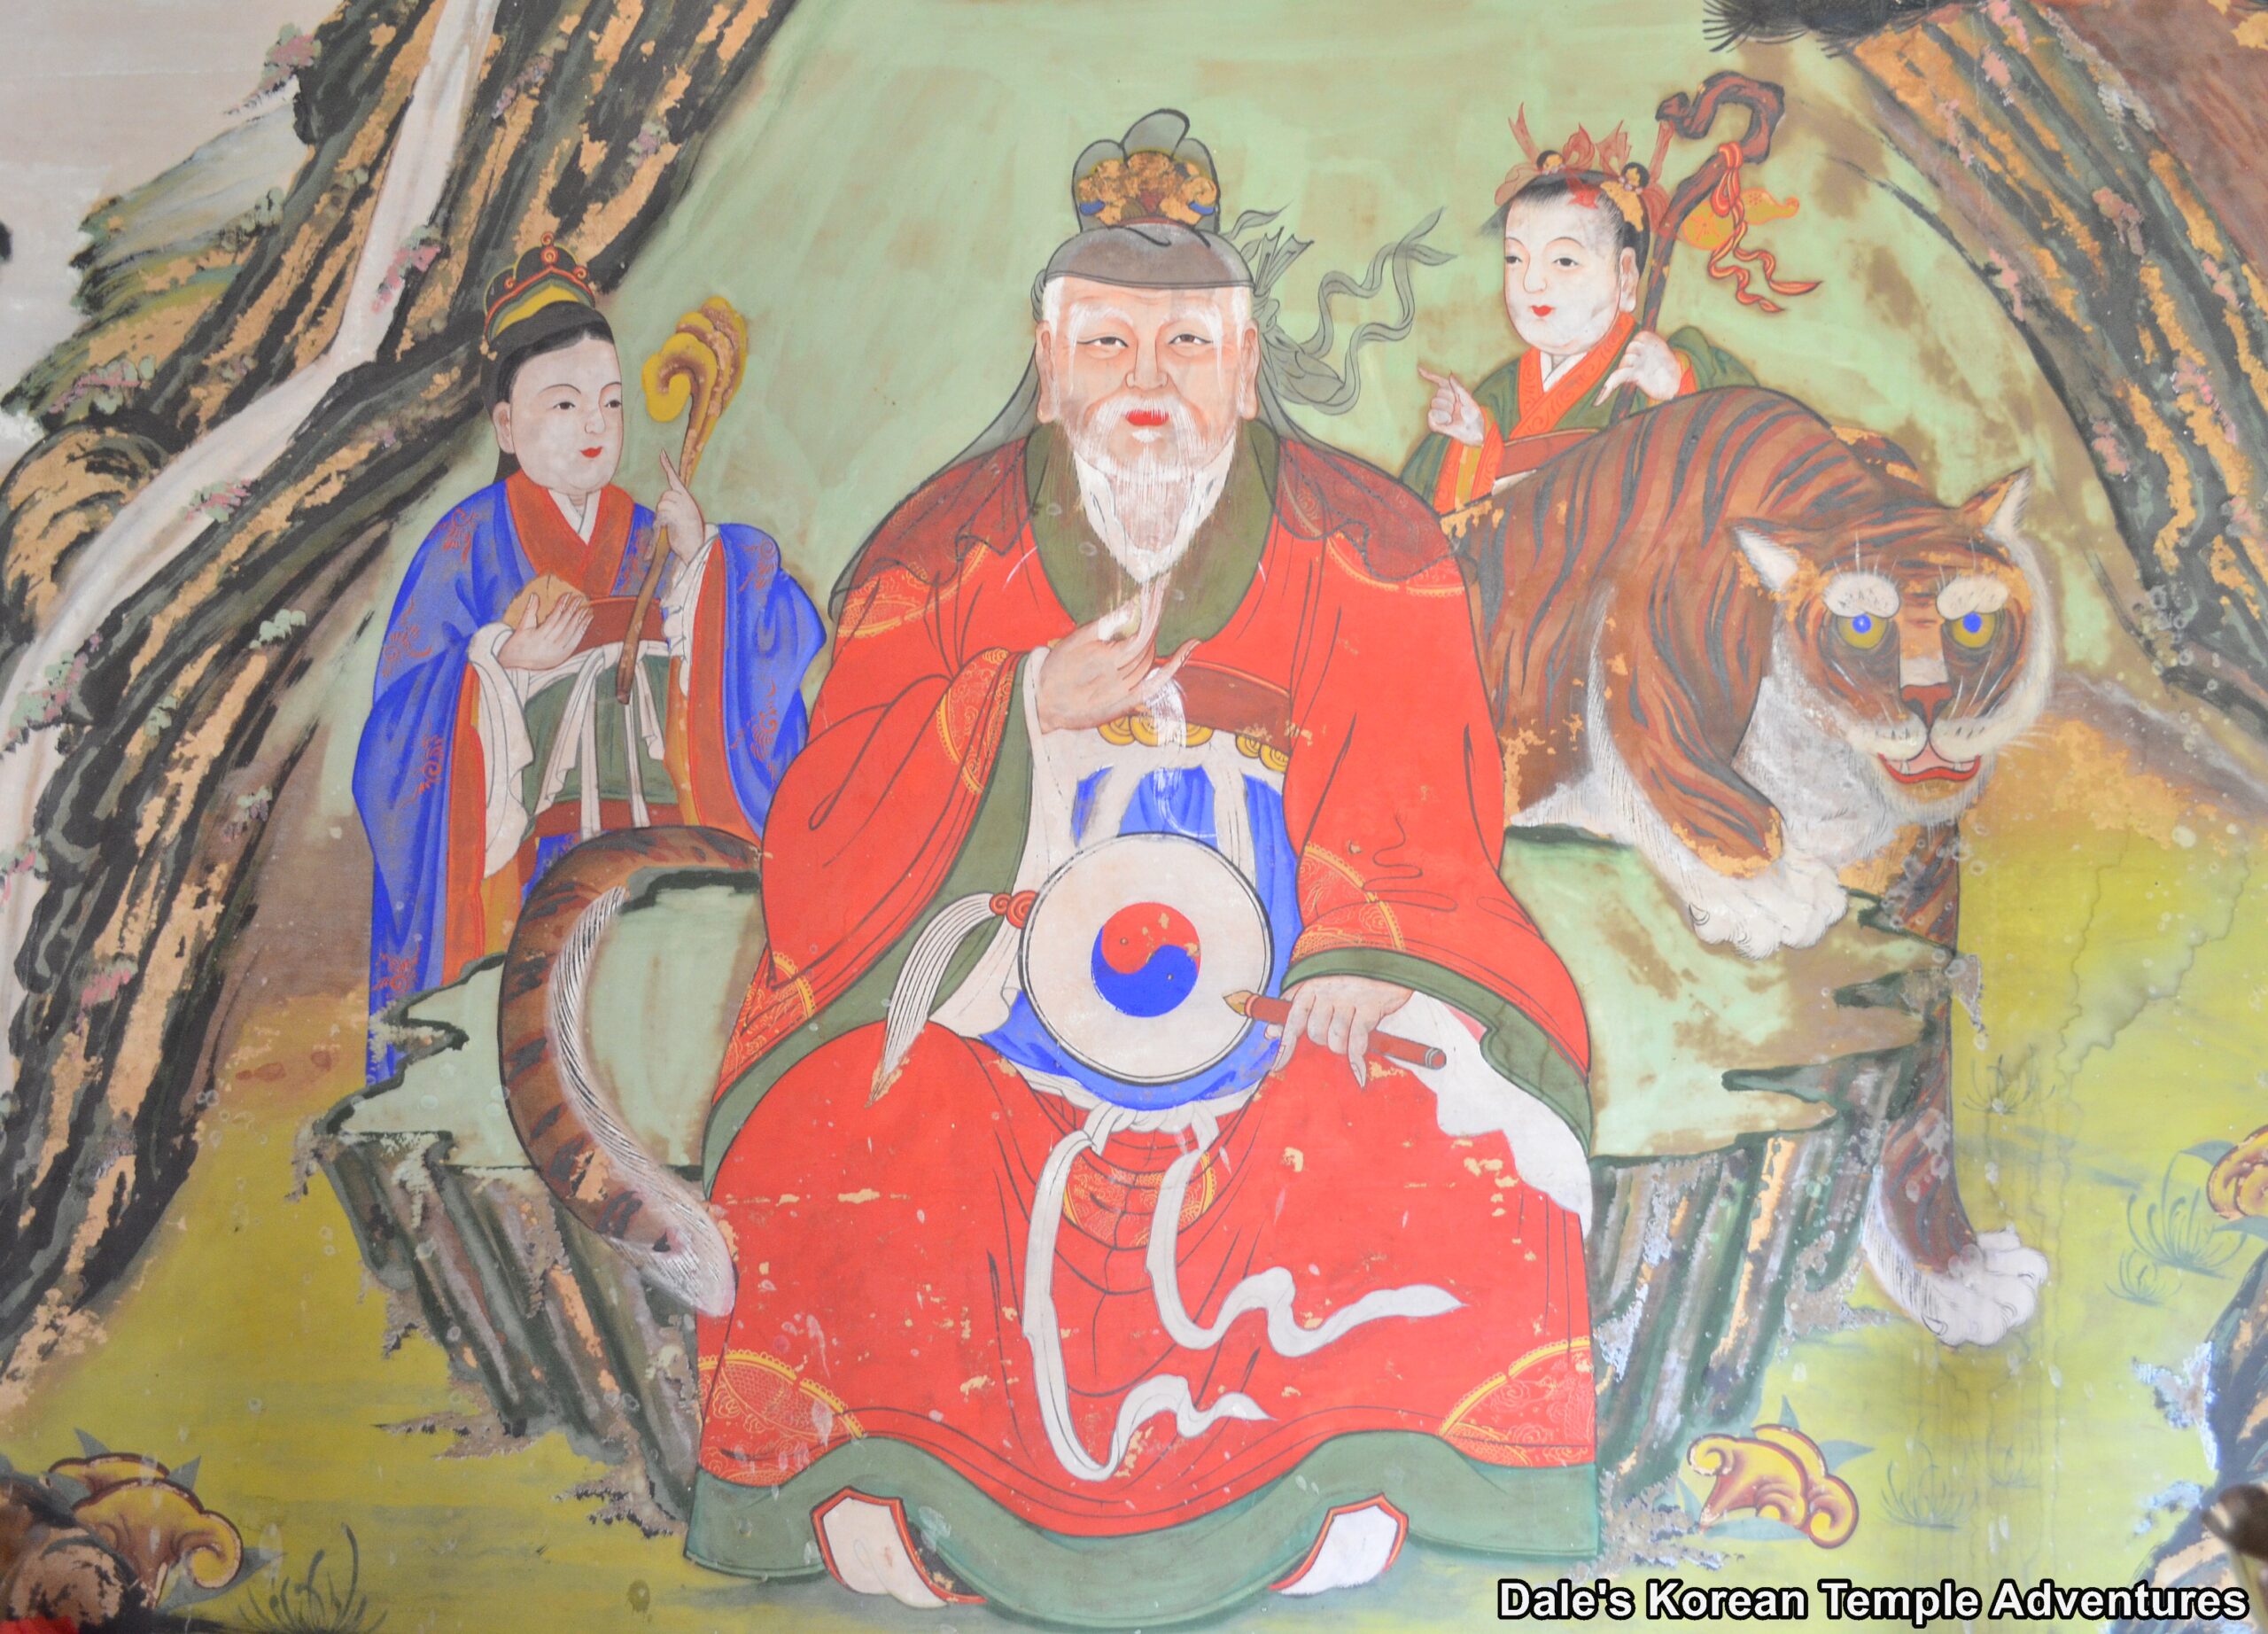
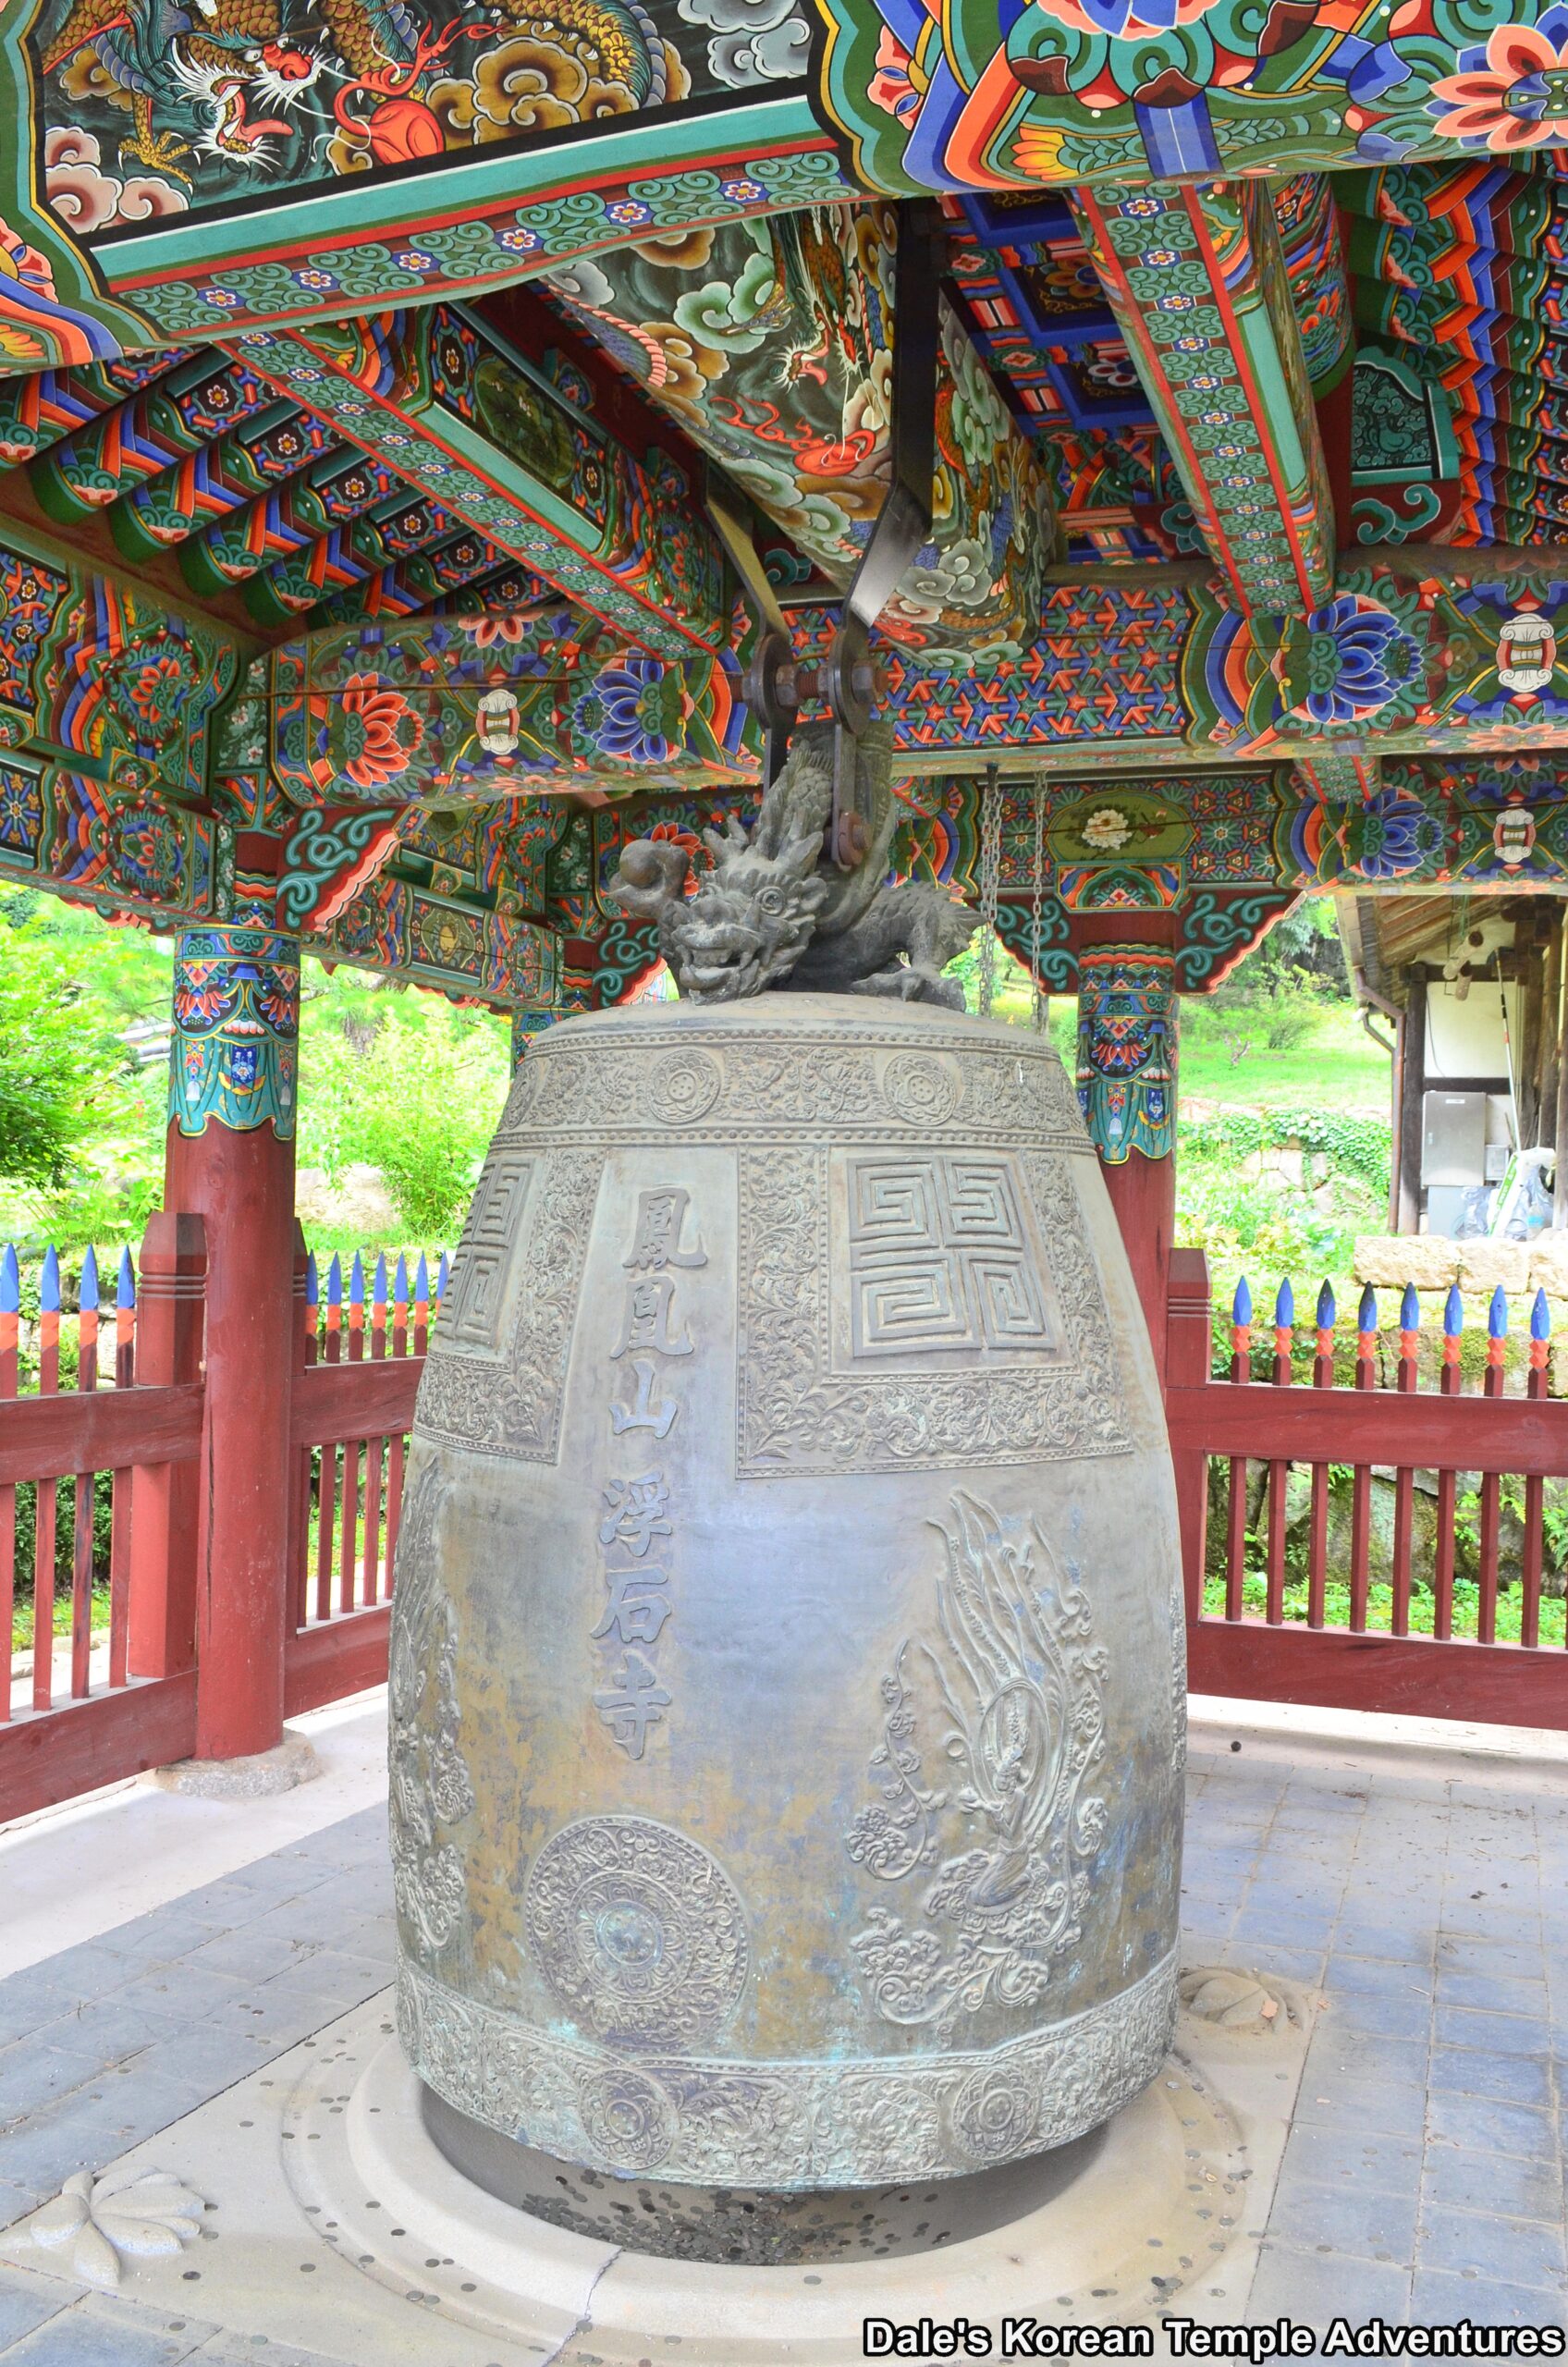
Finally descending down the hillside, and past the main hall, you’ll notice a gathering of rocks. These are the rocks that the temple gets its name. Down the cobble-stone pathway, you’ll see the Samseong-gak Hall. Housed inside are three murals dedicated to Sanshin (The Mountain Spirit), Chilseong (The Seven Stars), and Dokseong (The Lonely Saint). A little further down the hill, and you’ll come across a compact Jong-ru (Bell Pavilion) with a modest temple bell inside. Look at the top of the bell to see an amazing example of Poroe (The Bell Dragon).
Temple Architecture
According to “The Secret Spirit of Korean Architecture” by Bongryol Kim, there are two main theories about Buseoksa Temple’s original design, and what the huge stone platforms at Buseoksa Temple are meant to represent symbolically.
The first theory states that the whole temple compound is composed of nine platforms according to the doctrine of the “Nine Levels of Paradise in Jeongto (The Pure Land)” belief. The second theory states that the design of the temple follows that of the “Ten Land Theory of the Hwaeom Doctrine.”
The reason for the support for the Hwaeom theory comes from the fact that Buseoksa Temple was the head of the Hwaeom Sect. And the total number of stone platforms is ten. Additionally, Amita-bul, rather than Birojana-bul, is the Buddha of the highest level at Buseoksa Temple. But this theory neglects two key elements.
The first is that it confuses doctrine with a religious system. While Uisang-daesa was the leading figure behind the Hwaeom Sect, the centrality of the imagery found at Buseoksa Temple are seen in Amita-bul and the Jeongto belief. The Hwaeom ideology had just been introduced to Silla around the founding of Buseoksa Temple, so it would have been difficult for people to initially understand. The already established ideas of Jeongto would seem to make more sense than the newly established; and yet little understood, ideas behind Hwaeom Buddhism.
A second problem with the Hwaeom theory are the specific composition of the stone platforms at Buseoksa Temple. There are platforms at Buseoksa Temple from the present Cheonwangmun Gate to the Muryangsu-jeon Hall. These platforms can be counted as either nine or twelve depending on different opinions.
The present Cheonwangmun Gate was wrongly built on the former site of the Iljumun Gate. So no significance should be given to the present location of the Cheonwangmun Gate. Also, the narrow platform in front of the Hoejeonmun Gate is a stair for the next platform and not a platform in its own right. With this in mind, it’s most likely that Buseoksa Temple has nine stone platforms.
And with the establishment of nine stone platforms, the Jeongto theory becomes far more plausible. Of these nine stone platforms, they can be subdivided into three corresponding clusters of the Hoejeonmun Site, the Beomjong-gak, and the Anyang-ru Pavilion. So the 3-3-3 composition corresponds to the idea of Seobang-geukrak-jeongto – 서방극락정토. And the ninth, and highest level of paradise, is represented by the interior of the Muryangsu-jeon Hall, where Amita-bul is found at Buseoksa Temple.
With all that being said, the Jeongto theory doesn’t completely exclude the Hwaeom theory. For example, the hall below the Anyangmun Gate, Anyang-ru Pavilion have its origins in Hwaeom Buddhism.
What is more correct, it would seem, is that Uisang-daesa intended for there to be a hybrid between Jeongto and Hwaeom. These religious beliefs found in both find expression in the architecture of Buseoksa Temple.
A: Muryangsu-jeon Hall
The Muryangsu-jeon Hall is Korean National Treasure #18. An interesting characteristic about the Muryangsu-jeon Hall, and the statue of Amita-bul housed inside it, are the directions that they are facing. Typically, the main altar Buddha faces to the south and sits in the middle of the structure. However, at Buseoksa Temple, Amita-bul sits on the west side of the Muryangsu-jeon Hall and faces the east. Because this is a rarity in composition, there must be a reason for this type of set-up and design. The paradise that Amita-bul reigns over is in the Western Pure Land. Also, Amita-bul is typically joined by two accompanying Bodhisattvas that are absent at Buseoksa Temple. Furthermore, a stone pagoda is typically housed out in front of a main hall structure; but at Buseoksa Temple, it’s to the east and on a hillside away from the Muryangsu-jeon Hall. This would point to a relative independence of Amita-bul away from the earthly Seokgamoni-bul (The Historical Buddha) whose sari (crystallized remains) are traditionally housed inside a pagoda.
All this would mean that the lone Amita-bul inside the Muryangsu-jeon Hall has yet to enter Nirvana. That this Amita-bul is still in the present and not of the afterlife. So the Muryangsu-jeon Hall at Buseoksa Temple is meant to symbolize paradise. And it looks out over the world of suffering to the east, which is found in the symbolism of the eastern hillside pagoda.
B: The Daejeokgwang-jeon Hall
From the paintings and records of Buseoksa Temple, we can clearly interpret that there used to be a temple shrine hall below the Anyang-ru Pavilion. Its former location was the grassy area below the stone platform of the Anyang-ru Pavilion and in line with the Beomjong-gak Pavilion. Though no traces of this shrine hall still remain, traces of a stone lantern do. While it’s impossible to one hundred percent confirm that the hall was a Daejeokgwang-jeon Hall, it seems the most likely.
With all this in mind, we can envision the temple being divided into two sections: the upper and lower. This would also help explain why there are two axis at Buseoksa Temple. The lower axis would have had the Daejeokgwang-jeon Hall as its goal, while the upper axis would have had the Muryangsu-jeon Hall as its goal. This also makes clearer why there are nine stone platforms. 1. Hoejeongmun Site, 2. Beomjong-gak, 3. Anyang-ru/Muryangsu-jeon.
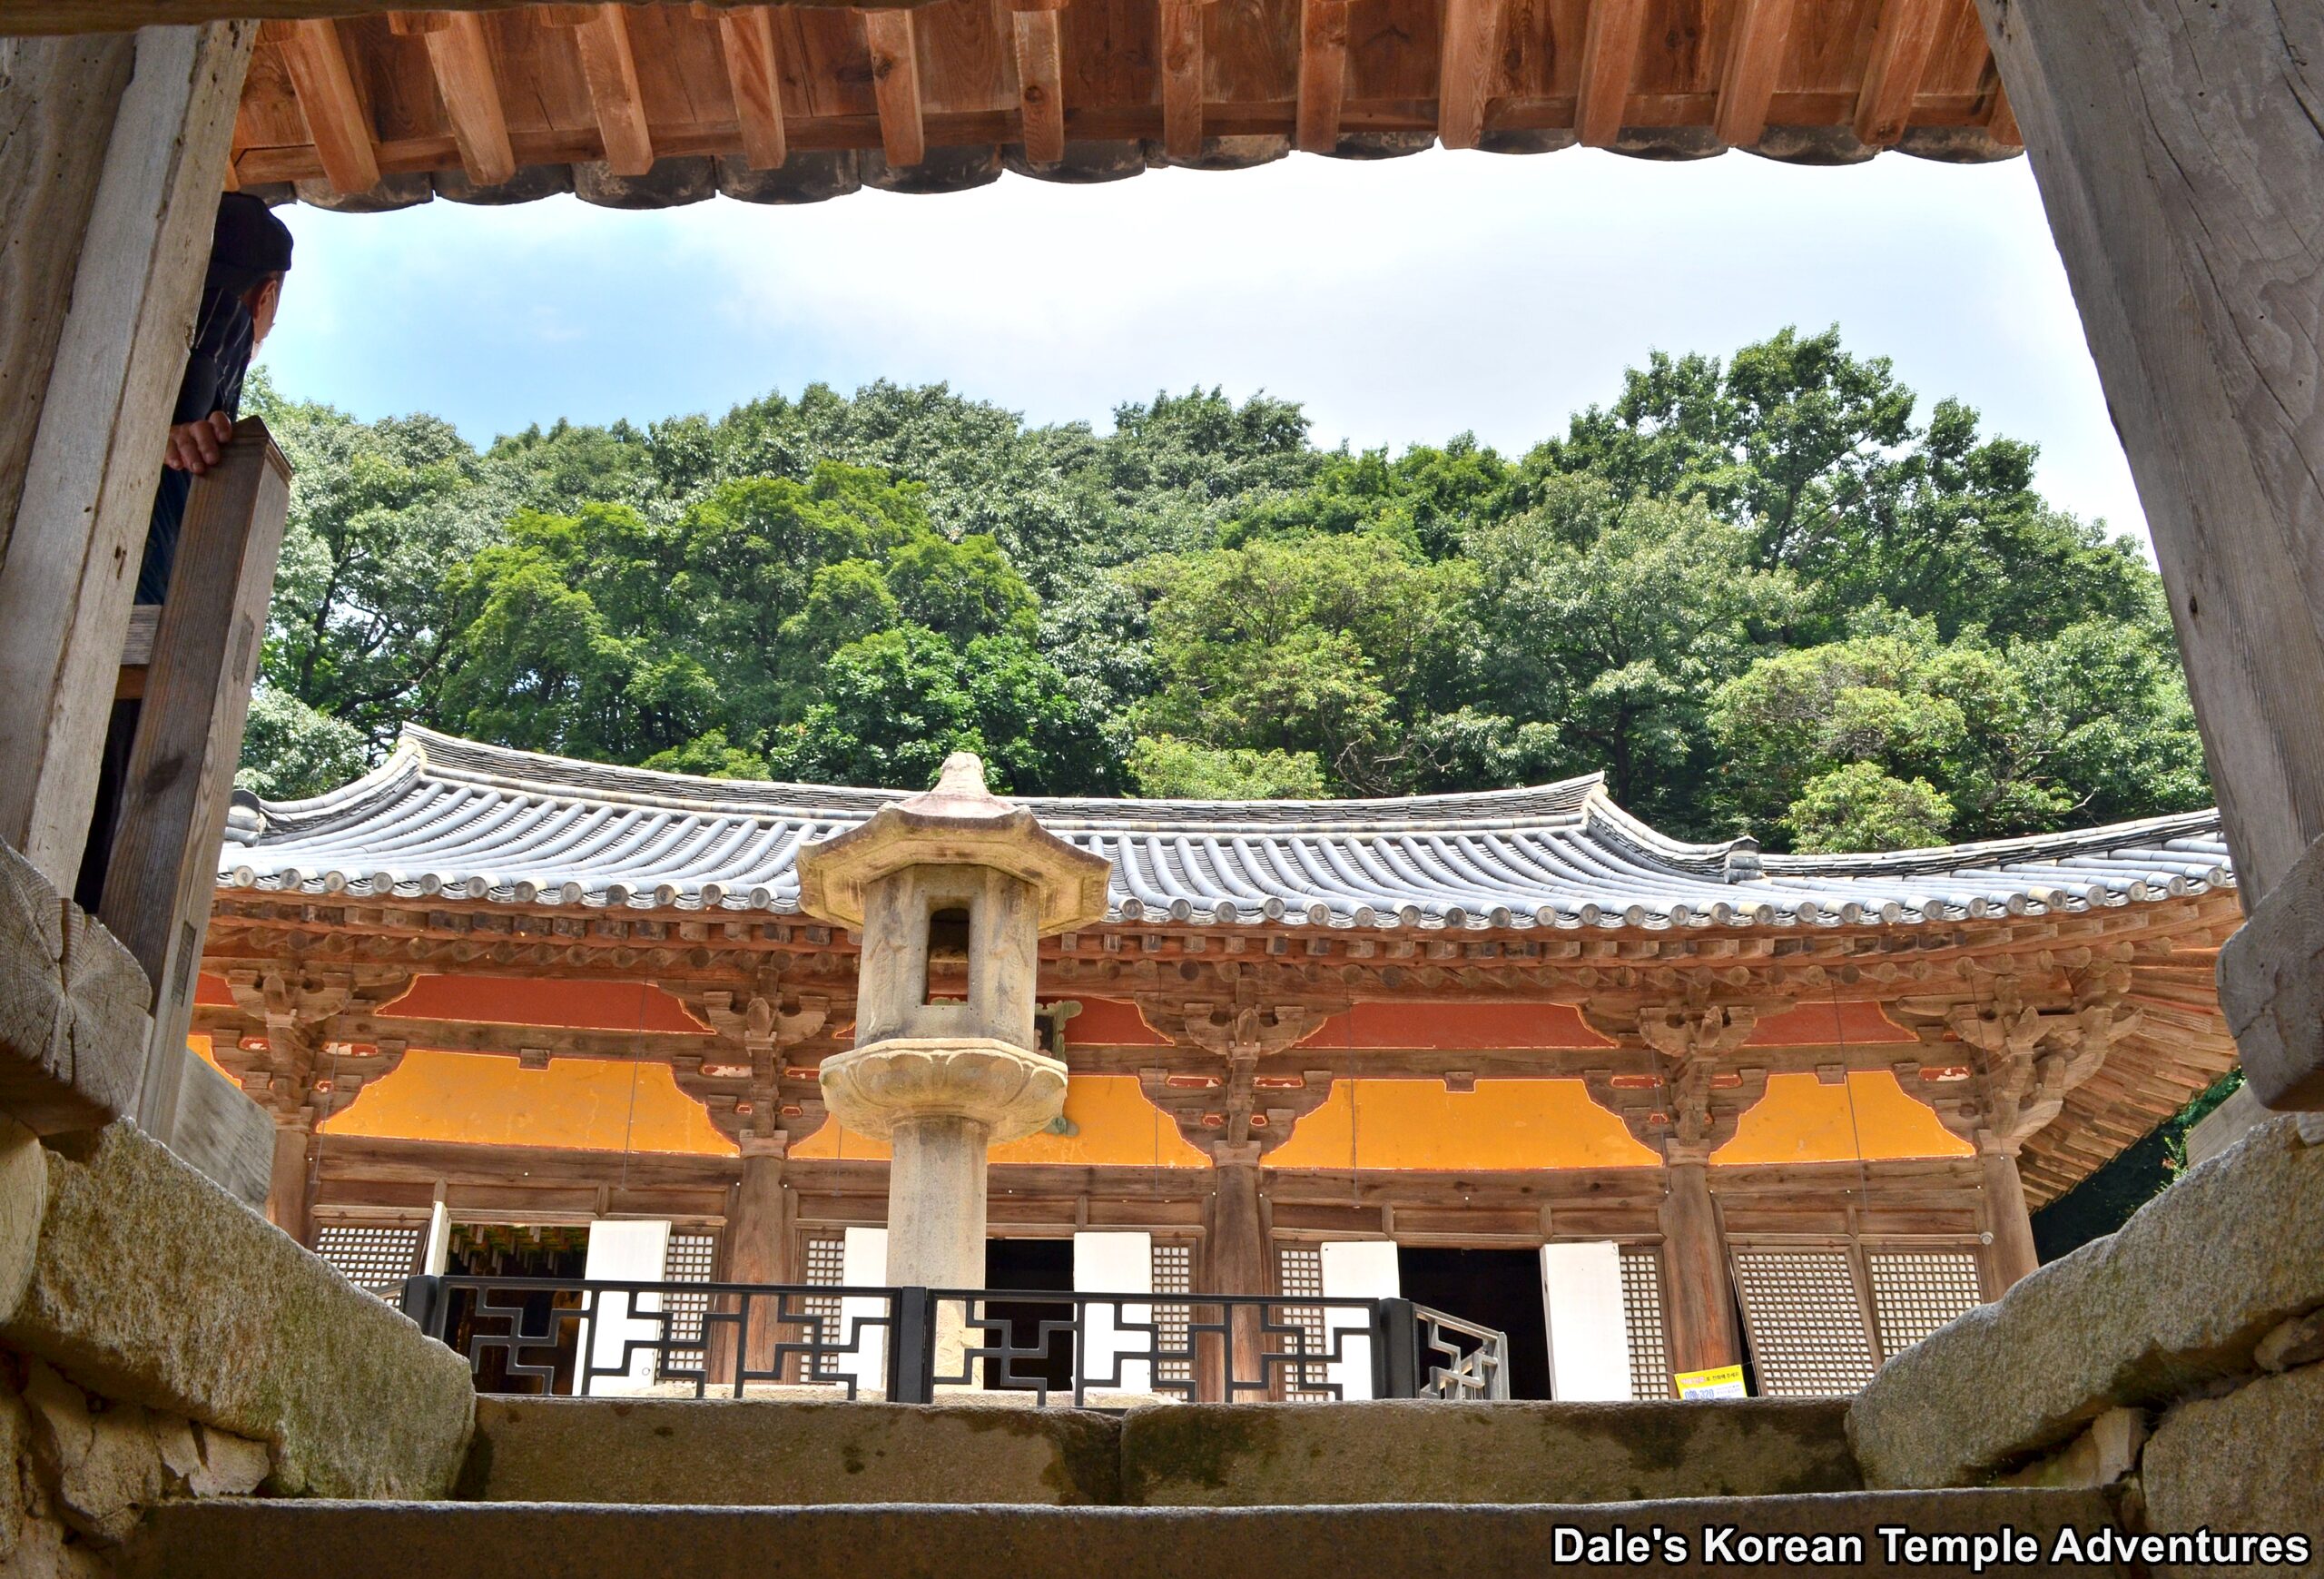
C: The Stone Lantern at Muryangsujeon Hall of Buseoksa Temple
When entering the upper courtyard in front of the Muryangsu-jeon Hall by way of the stairs under the Anyang-ru Pavilion, you’ll notice a stone lantern to the left with the main hall as a backdrop. This stone lantern is known as the Stone Lantern at Muryangsujeon Hall of Buseoksa Temple, and it’s National Treasure #17. The stone lantern’s location is an important feature. The stone lantern is placed fifty c.m. west of the temple’s centre axis. If the stone lantern was following this central axis, it would block the view of the Muryangsu-jeon Hall. This would have resulted in a cramped feeling. So by standing slightly to the left, it invites a sense of roomy serenity that’s inviting to visitors.
Also because Amita-bul is placed on the west side of the Muyrangsu-jeon Hall, the location of the stone lantern forces visitors to the right and the east. So visitors would have to enter the main hall through the east, which would coincide with the symbolism behind the Muryangsu-jeon Hall and the location of Amita-bul to the west looking out on the suffering world to the east.
D: The Three-Story Stone Pagoda of Buseoksa Temple
As was already mentioned, there’s a pagoda on the hillside to the east of the Muryangsu-jeon Hall. This is the Three-Story Stone Pagoda of Buseoksa Temple, which is also Korean Treasure #249. Rather strangely, because it doesn’t follow the angle of any of the other structures at Buseoksa Temple, is the eastern hillside pagoda’s eighty degree angle.
However, with a view beyond the Muryangsu-jeon Hall, and towards the Josa-dang Hall past the tree on the hillside, the pagoda coincides with the direction of the other important shrine hall at Buseoksa Temple. The angle of this pagoda points visitors towards something beyond the Muryangsu-jeon Hall and on towards the Josa-dang Hall beyond it. So the pagoda was a religious reminder of something more at Buseoksa Temple.
E: The Josa-dang Hall
If you follow the narrow pathway east of the stone pagoda, you’ll find the famous Josa-dang Hall appear to the right past the forest. The Josa-dang Hall is National Treasure #19. The portrait of Uisang-daesa is kept inside this temple shrine hall. There used to be a pavilion called the Chwiwon-ru Pavilion out in front of the Josa-dang Hall, but it’s no longer there. The Chwiwon-ru Pavilion was a famous place for both its beautiful location and meditative training. In fact, Samyeong-daesa (1544-1610) visited Chwiwon-ru Pavilion. The Josa-dang Hall area was considered as important as the main temple grounds around the Muryangsu-jeon Hall.
Buseoksa Temple Hermitages
Rather surprisingly, Buseoksa Temple doesn’t have a single hermitage directly associated with it. Perhaps at one point it did, but it no longer does. Buseoksa Temple is the only one of the top ten temples not to have a single hermitage directly associated with it.
How To Get There
Buseoksa Temple in Yeongju, Gyeongsangbuk-do is definitely one of the more difficult temples to get to because of its remote location. First, you’ll need to get to Yeongju from wherever it is that you reside in Korea. From Yeongju, you can get a bus bound for Buseoksa Temple opposite the Yeongju Intercity Bus Terminal. Catch Bus #55 bound for Buseoksa Temple. The bus ride lasts about 50 minutes.
Overall Rating: 10/10
Buseoksa Temple rates a perfect ten out of ten for the nearly limitless amount of National Treasures and Treasures. From the Muryangsu-jeon Hall that dates back to 1376, to the Josa-dang Hall that’s nearly as old in age, to the oldest Buddhist murals in Korea that were once housed inside the Josa-dang Hall, to the pavilions that guide your way up to all the historic sites at Buseoksa Temple, this temple has it all! While a bit out of the way, it’s definitely worth the time and energy it takes to get Buseoksa Temple.